Cranks’ Homity Pie
Posted on 24 August 2010 | 4 responses
Even though I am a pretty strict carnivore (that can be a thing, right?), growing up I loved visiting Cranks with my mum and my sister. While I can’t remember the location we went to (Mum, maybe you can help me?), I do remember walking down the stairs from street level and joining the long queue to be served your food, almost like a cafeteria lunch line. We would then bustle with everyone else, exiting the line and try to find a solitary empty table in the packed and noisy restaurant.
While it was not so remarkable that a) a restaurant in London was packed to the rafters and b) that we would wait in long lines to get served (the English are honestly the best at queuing, no bias and no exceptions!), the reason the whole thing amazes me now, when I think back on it, was the whole restaurant was completely vegetarian and wholegrain! And as a small child, I entirely loved it! As it seems did everyone else.
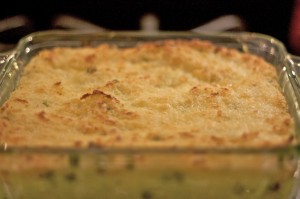
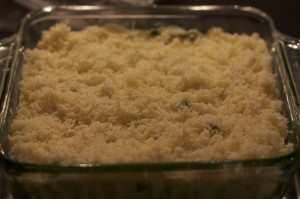
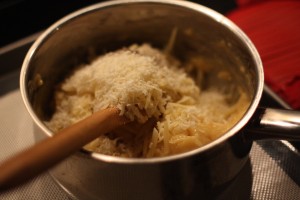
My favorite dish was the inspiration for this dish, Homity Pie. They served their’s with a wholewheat pastry crust but I have created this recipe without one as it greatly reduces the prep trip not having to make pastry and to be frank, the potatoes were always my favorite part! This oddly named dish is one of the most entirely comforting things you will ever eat. It is basically a bunch of deliciously amazing things all in one serving. Mashed potatoes made with sour cream and butter, check; baked Cheddar cheese, check; onions, check; garlic, check; I mean… how much better could it get?!
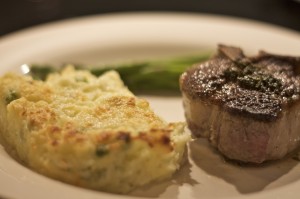
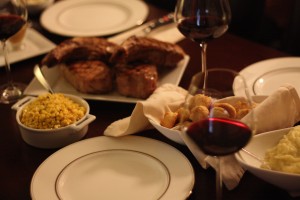
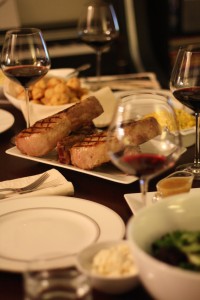
I served this with some grilled boneless lamb loin chops, asparagus and a Homemade Mint Sauce. All in all, it could not be more perfect for a weeknight meal. Also even though I use a potato ricer for my Extra Creamy, Buttery Mashed Potatoes, I use a potato masher to keep some of the texture for this dish. The potatoes still come out smooth but not quite a refined as with a ricer which I prefer here.
Notes: I had some Aged Cabot Cheddar left over from the Three Cheese and Bacon Macaroni and Cheese from last week so I used it in this dish. The sharp, salty taste was perfect but you can use any sort of Cheddar cheese.
Homity Pie, serves 4-6 as an entree or a large side
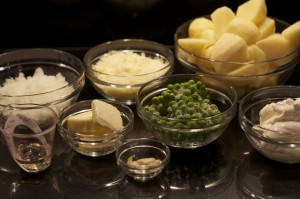
2 lb potatoes, preferably Yukon Gold or Maris Piper
3 tbsp butter
8 fl oz sour cream
4 1/2 tsp canola or sunflower oil
1 garlic clove, crushed and roughly chopped
1/2 cup petit pois (baby peas)
1/2 cup onion, diced (about half an onion)
1/3 cup grated Cheddar cheese (see Notes)
1. Heat oven to 375F. Butter a 9×9″ baking dish. Peel potatoes and place in a large pot of cold, salted water and bring to the boil. Cook for 30 minutes or until potatoes are fork tender.
2. While the potatoes are boiling, bring a small saucepan of salted water to the boil. Add the peas and blanch for 4 minutes. Drain and set aside.
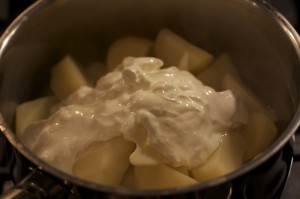
3. Drain and add butter, sour cream, oil, garlic and salt and pepper. Mash thoroughly with a potato masher.
4. Add the peas and onions to the potatoes and stir to combine. Pour mixture into baking dish. Top with grated cheese and bake in the oven for 30 minutes, or until golden brown. (If the cheese is not browning, place the dish under the broiler/grill for 3-4 minutes.)
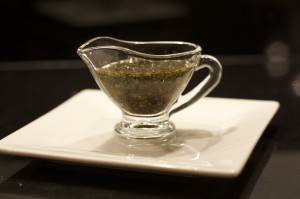
Traditional Mint Sauce
Posted on 23 August 2010 | 2 responses
Last week when the hubby and I were eating our lamb chops right before I began to grill them I decided something was missing from the meal. We were having Homity Pie, asparagus and these beautiful boneless lamb loin chops but I wanted some sort of sauce or gravy on the plate. Without wanting to open a bottle of wine for just a splash to make gravy I decided to make mint sauce.
Mint sauce is the traditional sauce eaten with lamb in England. Having grown up with it I am unused to seeing roast lamb without either a mint sauce or a redcurrant jelly (which is my favorite condiment!) on the table. While it is slightly tricky to make redcurrant jelly out here in the US, due to the lack of any available red currants, a simple mint sauce is more than easy to make at home.
Traditional Mint Sauce, makes 1/4 cup enough for 4 lamb chops
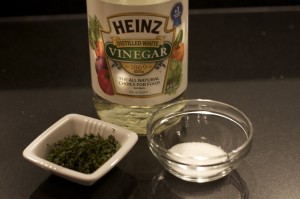
1/4 cup finely chopped fresh mint
3 tbsp sugar
4 tbsp boiling water
1 1/2 tbsp white vinegar or white wine vinegar
1. Add the sugar to the mint in a small bowl. Stir together until the mint is coated with sugar. Leave for 3-5 minutes.
Add boiling water and vinegar to the mint. Leave for 5-10 minutes, until the mint has infused the water.
2. Serve with roast or grilled lamb.
White Chocolate and Vanilla Bean Panna Cotta
Posted on 20 August 2010 | 2 responses
This dessert is every bit as sinfully delicious, decadent and moreish as the name suggests. I am totally in love with white chocolate as I you may have notice when I posted a recipe for White Chocolate Chip Cookies before posting one for regular choc chip cookies! An obsession with vanilla lends itself to a love of white chocolate as unlike regular chocolate, white chocolate is made up of sugar, milk solids and cocoa butter (rather than chocolate liquor from cocoa solids) and flavored with vanilla. This lack of cocoa solids has spurred some purists to claim that white chocolate is not really a “chocolate”. Personally I believe if it walks like a duck and talks like a duck… From my experience with working with chocolate (dark and milk), white chocolate behaves exactly the same. You have to be careful of the milk solids splitting from the cocoa butter (if this happens all you have to do is whisk in some more chocolate to re-emulsify) and you also cannot add water to chocolate (white or otherwise), it will “cease” and become grainy and impossible to stir (to remedy this you just have to reheat and whisk in some more chocolate… Are you seeing a pattern here? Adding more chocolate solves basically anything in cooking or elsewhere!
The reason for white chocolate’s melt-in-your-mouth quality is due to the high percentage of cocoa butter. It has a very low melting point which just so happens to coincide with human body temperature. Humans and white chocolate = a match made in heaven!
This recipe is so unbelievably easy I almost do not want to post this and keep it an ambiguous secret (just like I wanted to with the Molten Centered Chocolate Cakes!) I served it at both dinner parties last week trying to perfect the recipe. The second time I added more white chocolate, six ounces rather than four, which you are more than welcome to do but the hubbie preferred the texture of the original one which is here.
Notes: I use an excellent brand of white chocolate chips by Guittard called Choc-Au-Lait (they are unable to call it white chocolate due to the lack of cocoa solids as mentioned above). I have found this to be the most consistent of all white chocolate I have used and it saves me time not having to chop up the chocolate before use. The only downside is I usually sneak a couple as a chef’s treat while I am cooking which usually leads to an impromptu snack!
I used the extra liquid to make a seventh panna cotta which I kept as a snack for the next day. I found that it had any of the lumps and bumps that were not dissolved, you can also strain the liquid to alleviate some of this.
White Chocolate and Vanilla Bean Panna Cotta, makes 6 individual cupcake sized desserts
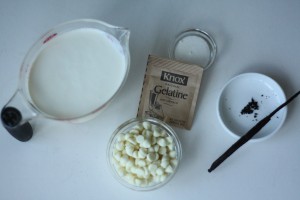
1 vanilla bean, split with the seeds scraped out, pod reserved
2 cups heavy cream
1 tbsp sugar
4 oz white chocolate, morsels or cut into small pieces (see Notes)
2 tsp gelatin (1 0.25 oz sachet)
2 tsp water
1. Add cream, vanilla seeds, vanilla pod and sugar to a small saucepan over medium heat. Heat for 10 minutes, until the cream begins to steam and the sugar has dissolved, make sure not to boil the cream.
2. Meanwhile, in a small bowl add the gelatin to the water and stir. Set aside. (It should turn to solid almost instantly).
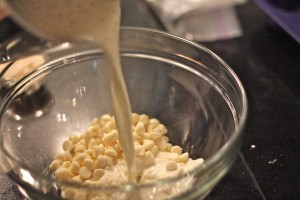
3. Once the cream is heated remove the vanilla pod and discard. Place chocolate chips into a medium sized bowl and pour the hot cream over them and add the gelatin and water mixture. Stir to dissolve the chips and gelatin making sure there are no lumps of chocolate or gelatin. At this point you can strain the mixture through a sieve if you believe you still have lumps.
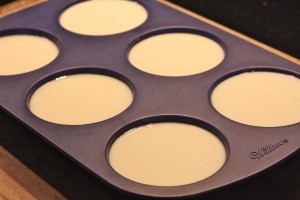
4. Pour the mixture into a measuring cup (I used this Oxo 4 cup fat separator). If unstrained, let sit for 2 minutes. Pour into a silicone cupcake tray. There will be enough for 6 full cupcake sized panna cotta and some extra (see Notes). Place in refrigerator until set, about 3 hours.
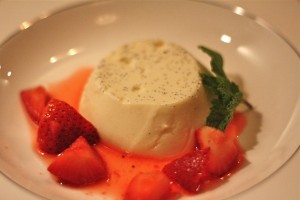
5. To unmold, run a knife around each panna cotta and carefully invert the cupcake cups to extract them out. Serve with your choice of berry, strawberries or raspberries both work well, as does a sprig of mint!
Creamy Macaroni and Cheese with Three Cheeses and Bacon
Posted on 19 August 2010 | 2 responses
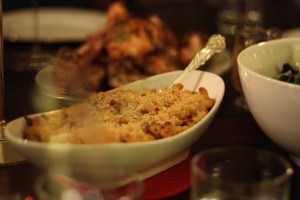
I made this dish as a side to go with the Herbed, Pan Roasted Chicken with a Red Wine Vinegar Sauce. The creaminess of the extra cheesy bechamel cut the acidity of the vinegar sauce, and the smoked bacon and the blue cheese added other elements of flavor which are not as common in macaroni and cheese. This is an Ina Garten recipe and she calls it her Grown Up Mac and Cheese. It is certainly not the boxed variety of mac and cheese (which definitely has its’ place – late night or very very lazy weeknight!) and it is is not your average homemade macaroni. The three cheeses work well together and create a thicker sauce that envelops the pasta, oozing inside the hollow. As you may have noticed this was the one dish that our lactose intolerant friend should not have eaten due to its high content of everything dairy but after smelling it and seeing she couldn’t resist a taste!
From the original recipe I just made a few changes. I fried the bacon as it is faster and it is easier to save the bacon fat. I have a container in my fridge for any bacon grease, it is perfect for making cornbread, eggs in the morning, and hash browns or any potato dish. In the original recipe Ina Garten adds two tablespoons of chopped basil to the breadcrumbs before sprinkling them over the pasta, I omitted this as I did not want the flavors to compete with the oregano and thyme in the Herbed Chicken entree I was making but when I have made it other time it has been a nice addition. You can also add which ever herb you think best suits the meal you are about to eat.
Notes: I use D’artagnan’s Uncured Applewood Smoked Bacon. Not only is the smoky flavor delicious, it is also made without nitrates and nitrites which means I have to use it up a bit faster than other brands of bacon but I have no problem with that! Also this bacon is more forgiving than other bacon as you cook it due to the thickness of the slices. I am able to render most of the fat out of the bacon on a medium high heat giving me perfectly browned and crispy bacon without it sticking to the pan like the less expensive brands do.
I used Extra Aged Cabot cheddar from Vermont but you can use any, just make sure that it is white so when it blends with the other cheeses it looks better.
I LOVE a cow’s milk blue cheese from King Island off the coast of Australia called the Roaring 40’s. It is perhaps the most divine cheese ever, with the except of some triple creams… or maybe robiola bosina with truffled honey or a well balanced Camembert or fresh Bucheron or Morbier or Cantelet… okay, so maybe it is my favorite blue cheese… I also think it is adorable how it is named after a nautical term!
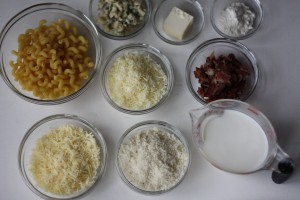
Creamy Macaroni and Cheese, serves 6 as a side or 2 as an entree
4 oz thick cut bacon (see Notes)
2 cups cavatappi or favorite pasta for macaroni
1 1/2 cups milk
2 tbsp butter
2 tbsp all-purpose flour
4 oz Gruyere cheese, grated
3 oz extra-sharp Cheddar grated (see Notes)
2 oz blue cheese, crumbled (see Notes)
1/4 tsp freshly ground black pepper
1/8 tsp freshly grated nutmeg
2 slices sandwich bread, crusts removed, grated with a hand grater or food processor to form crumbs
1. Heat oven to 400°F. Add bacon to a cool frying pan over medium high heat and cook until crispy and most of the fat has rendered out. Pour of bacon fat and set aside cooked bacon on a paper towel lined plate to cool. When cool enough to handle, crumble bacon and set aside.
2. Cook pasta of choice according to package directions in a large pot of salted boiling water. Drain well.
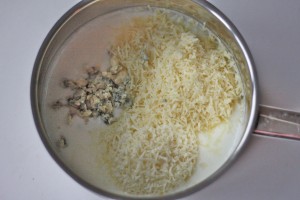
3. As the pasta is cooking, heat milk in a small saucepan until steaming but not boiling. Melt butter in a medium saucepan over low heat and whisk in flour. Cook for 2 minutes, whisking continuously. While whisking pour in hot milk in a continuous slow stream and cook for 2 minutes more, until sauce has thickened and is smooth. Remove pan from heat and add Gruyere, Cheddar, blue cheese, 1 tsp kosher salt, pepper and nutmeg.
4. Add cooked macaroni and bacon and stir well. Pour into a 2 quart baking dish. Sprinkle with breadcrumbs and place in the oven for 30-40 minutes until the sauce is bubbling and the top is a golden brown.
Herbed Roasted Chicken with a Red Wine Vinegar Sauce
Posted on 18 August 2010 | 4 responses
As I mentioned in my post last Friday we love to throw dinner parties so much so that we held two last week. My last post contained the menu for our first party but I was saving the second menu for today. For our second dinner party on Thursday evening I had a slight challenge. One of our friends is lactose intolerant and as you may have noticed I have a fondness for cream, butter and cheese. I thought planning a whole menu that omitted this holy trinity was going to be tough. Somehow it was easier than I thought, it may have been that it is summer so many of the dishes you gravitate towards are on the lighter side and are usually dairy-free.
We started with Gazpacho again (sneaky I know! I just added a little extra virgin olive oil and some freshly diced avocado right before serving.
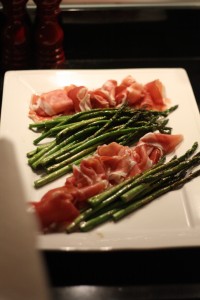
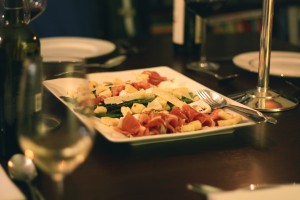
Then I served Grilled Asparagus with Prosciutto, Fried Bread, Poached Egg, and Aged Balsamic Vinegar. Rather than using the Torn Croutons which are slowly fried with butter I used these Easy Garlic Croutons and baked them with some thyme sprigs as well as the crushed garlic cloves.
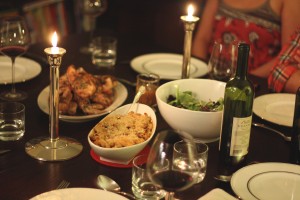
For an entree I made Herbed Roasted Chicken with a Red Wine Vinegar Sauce (recipe below) with a creamy Three Cheese Bacon Macaroni and Cheese and a green salad with a white balsamic vinaigrette.
As I dessert I am still tweaking the White Chocolate Vanilla Bean Panna Cotta I had made the day before. Being as addicted to white chocolate as I am I tried to up the chocolate-i-ness but found that the texture suffered in the balance.
This recipe is originally from Saveur magazine attempting to recreate the famous Stretch’s Chicken Savoy from the Belmont Tavern in New Jersey. It was created in the test kitchen while I was working there. I have probably made this dish thirty times but I am still amazed at how easy it is and how tender, moist and flavorful the chicken turns out. The quick sear at the beginning of the preparation helps to keep the moisture in.
Notes: for an 8 piece bird, in this case, you want two wings, two thighs, two drumsticks and 2 breasts. Try to get an all-natural bird as they have a better flavor and a naturally higher water content than commercially farmed birds.
You can use a hand grater to grate this cheese or use the grating attachment on your food processor.
Herbed Roasted Chicken with a Red Wine Vinegar Sauce, serves 3-4
1 3-4 lb chicken, cut into 8 pieces (see Notes)
4 cloves garlic, roughly chopped
1/3 cup grated Pecorino Romano (see Notes)
4 tbsp olive oil, separated
1 tbsp dried oregano
1 tsp dried thyme
1 cup red wine vinegar
1. Heat oven to 500°F. Season chicken with salt and pepper.
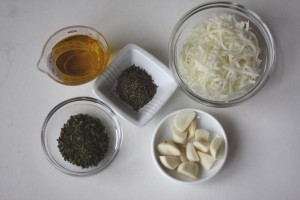
2. In a food processor, combine garlic, Pecorino, 3 tbsp olive oil, oregano and thyme until they form a paste. Set aside.
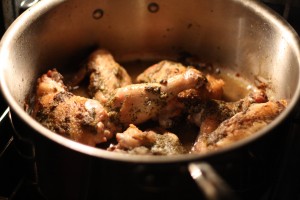
3. Heat remaining 1 tbsp olive oil in a large skillet over medium high heat. Add chicken skin side down and cook until golden brown, about 6 minutes. Using tongs, turn chicken over and using the back of a spoon smear the skin side with the herbed paste. Place skillet in the oven and cook until cooked through, about 20 minutes.
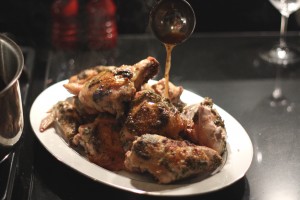
4. Remove from oven and carefully pour of the fat from the pan. Add the vinegar, spoon the vinegar over the bird as though you are basting. Transfer chicken to a serving platter and spoon over the vinegar sauce.
My Insane Love of Dinner Parties
Posted on 12 August 2010 | 4 responses
I was lucky enough to go to the University of St Andrews in Scotland (before you ask – I do not play golf…) There were so many reasons that I was insanely lucky to attend but here are the top two: it is one of the most beautiful places I have ever been and full of amazingly awesome people. One thing that is pretty unique about St Andrews is the explosion of dinner parties that happens the second you move out of your dorm rooms and into flats. I loved to throw dinner parties and it would not be uncommon to hold one a week at least!
How could I not have loved going to school here?
Even though it sounds fancy, we did it to save money (that and you can get up to far more mischief in your own home than a restaurant…!). It is far cheaper for everyone than to eat out. One person makes the food, the rest bring the wine and you can all spend a meal together without the sticker shock at the end of the meal. We would take it in turns to host, almost like a rotation and every host brought something to the table. Some were great cooks, some were great mixologists and some just had a lot of booze and knew far too many drinking games! All were a blur of slightly tipsy but yummy fun and they are one of my fondest memories from being in school.
When my husband and I moved in together one of our first furniture purchase was our dining room table (even before our bed or chairs!). I wanted to have a table large enough to fit eight people but would not take over our NYC sized apartment’s living room. We found a genius table from Crate and Barrel. It looks like a desk most of the time and it seats four but then with a swivel on its’ hinge and it doubles in size and somehow it’s a dining room table for eight. Truly magical! Sadly they do not sell them anymore, I really wanted to post the link as I believe that every space compromised person needs to own one immediately!
Some how this seats eight people when it folds out!
Staying true to my university style we still throw dinner parties at home, using our magic expanding table. This week we seem to have two. Not quite sure how we have them back to back but we do love to entertain. As one guest mentioned two nights ago, we had a guest from West Virginia, one native to New York, one from from Minnesota, two from North Carolina and one from London! How awesome is that? All sitting around eating a meal in Brooklyn – doesn’t get better than that!
As I mentioned in a post a long time ago (time is flying while I am writing this blog!), one of my favorite parts about dinner parties is planning the menu. Since that post I have had a couple of requests for more menus and ideas for dinner party dishes.
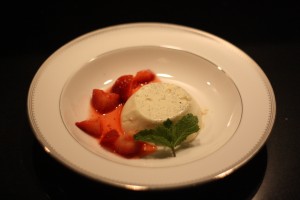
The best piece of advice I have read about menu planning is to pick one thing I am itching to cook and base the rest of the meal around it. Wednesday night’s was the White Chocolate and Vanilla Bean Panna Cotta (how could it not be, for proof see photo below!). I wanted everything else to fit in nicely with it. It all did for the most part but next time I’m changing out the Pork Tenderloin, Creamed Corn and Potatoes for something else… I’ll keep you posted on what it will be!
On the menu from Wednesday night…
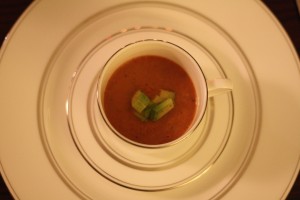
For an amuse bouche I served Chilled Gazpacho with diced avocado.
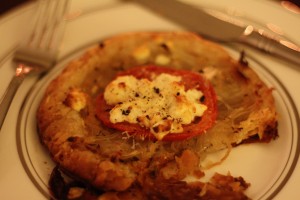
For an appetizer these Puff Pastry Tarts but I replaced the blue cheese for goat cheese.
For the entree I made Brined Pork Tenderloin, Buttery Mashed Potatoes and Creamed Summer Corn (if it seems as though I am obsessed with making that meal it is because I am!)
And then for dessert I tried out a new recipe, a White Chocolate and Vanilla Bean Panna Cotta with macerated strawberries and mint.
Enjoy!
Photographs of St Andrews from www.st-andrews.ac.uk (the University website)
Gougères
Posted on 11 August 2010 | 1 response
These delightful, fluffy “cheesy puffs” always go quickly at any party. They are so easy to make; after making a simple choux pastry with Gruyère and Parmesan added, all that is left is to pipe them out and bake them. These have gotten me out of many a pinch when I know that I am not making enough food for the number of guests we have over. Or when I know that I will not have dinner on the table in a timely fashion, these are the perfect way to distract everyone while they have their welcome drinks. They are also the perfect thing to get ready and then pop in the oven while you are doing last minute touch ups of yourself and the house! The whole house smells divine.
While I made them and then placed them in a cute little serving basket, wrapped in a linen napkin, I failed to get a close up. Please excuse the need for Where’s Waldo-like skills (they are in between the two wines glasses to the right of the picture).
These gougères are buttery, light and slightly chewy all whilst being immensely cheesy. The Gruyère has a slight nutty taste making them more adult than ones made with cheddar and both the Gruyère and Parmesan are drier cheeses so you end up with a non-greasy hors d’oeuvres.
I served this before and during a recent dinner party. We ate these Brined then Grilled Pork Chops, Buttery and Creamy Mashed Potatoes, Creamed Summer Corn and a large green salad. We drank it all down with a lovely, light Pinot Noir.
Gougères, makes 30
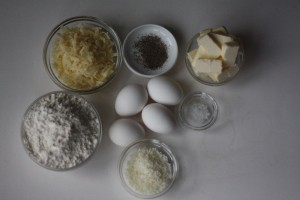
2 large eggs, room temperature
4 tbsp unsalted butter, cut into squares, chilled
1/4 tsp kosher salt
3/4 cup all-purpose flour
1/2 cup grated Gruyère cheese
2 tbsp Parmesan cheese
Pinch freshly ground black pepper
1. Heat oven to 400°F. Place Silpats on 2 baking sheets or lightly grease 2 baking sheets.
2. Whisk eggs gently until whites and yolks are combined but no further.
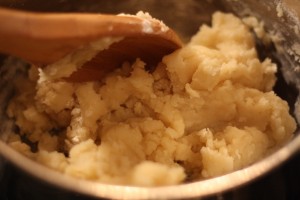
3. Put 1 cup water, the butter and salt into a medium sized saucepan over medium high heat and bring to a boil, stirring occasionally to make sure the butter melts. Once it reaches a boil, add the flour. Beat heartily with a spoon until the mixture pulls away from the pan’s sides (the mixture should all be one mass). Turn the heat down and continue cooking for 1 to 2 minutes, until the dough is partially dry.
4. Remove from heat. Add the beaten eggs slowly, stirring all the time. Stir in the cheeses and pepper until everything is well combined.
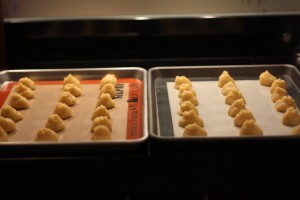
5. Put the dough in a ziploc plastic bag (or a large pastry bag with a large round pastry tip). Cut off the tip of the bag and pipe the dough into 1 to 1 1/2 inch rounds onto the baking sheets (3 rows of 5 on each sheet).
6. Bake for 20 to 25 minutes, checking on them regularly, until slightly crispy of the outside but still slightly doughy on the inside, and golden colored.
Pulled Chicken and Avocado Sandwich
Posted on 10 August 2010 | 9 responses
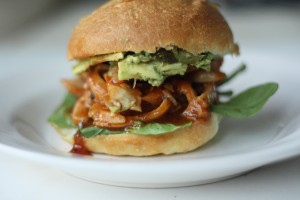
This recipe came out of a very simple philosophy… ‘waste not, want not’. As you may have gathered I hate to throw anything away and as I had two spare chicken thighs from my Baked Barbecue Chicken from last week I decided to shred them and heat them with some extra Kansas City-style Barbecue Sauce. I am equally addicted to and obsessed with avocados. I eat them with almost every meal and certainly add them to every salad I make. I think that the avocado adds a layer of amazing creaminess to the tart and sweet, vinegar-ketchup sauce. I chose to use arugula as it is fresh tasting and just a little spicy. Together with the sweet, soft brioche bun it makes the perfect sandwich and the ideal way to use up your leftovers!
Pulled Chicken Sandwiches, makes 1 overstuffed or 2 regular sandwiches
2 Baked Barbecue Chicken Thighs, shredded into thin strips (see Notes)
2 tbsp Kansas City-style Barbecue Sauce
1/4 avocado per sandwich, mashed
1/4 cup baby arugula or other greens per sandwich
1 brioche bun per sandwich
1. Add chicken thighs and sauce to a small saucepan over medium low heat and slowly heat until simmering gently. Allow to simmer until heated through, about 5 minutes.
2. Toast bun under broiler or on a grill until golden. Add greens to the base, then layer the heated chicken, then top with the avocado (alternatively you could mash the avocado directly onto the bun for speed). Serve and enjoy!
Easy Potato Salad
Posted on 9 August 2010 | 4 responses
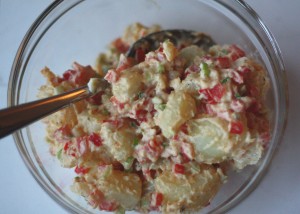
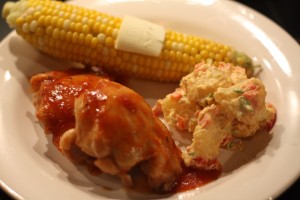
After last week’s Barbecue Chicken Thighs this recipe may be the second easiest recipe I have posted on this site. I almost feel guilty for posting them both together. The only reasons that I do not are firstly I know how little I want to be standing in front of a hot stove in the summer time so minimizing that time is in everyone interests and secondly this salad and the Barbecue Chicken Thighs go together so well. I made both of them at the same time and served them together with freshly boiled summer corn on the cob. All you have to do is stir everything together and you have a perfectly creamy, slightly spicy and tangy potato salad.
There are so many variations that you can add to this salad as well. You could change the red pepper for a green one, add a splash of vinegar to give it an acidic tang, or add a pinch of sugar like one of our friend’s family recipes states.
I usually serve this warm, right after the potatoes have cooked but it is equally good chilled or at room temperature making it the perfect side for a pot luck grill out or for an outdoor picnic.
Easy Potato Salad, about 4 servings as a side dish
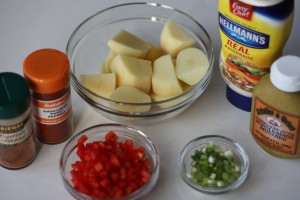
3 small Yukon Gold potatoes, peeled and chopped into chunks
1/2 large red pepper, chopped
2 scallions, sliced finely
5 tbsp mayonnaise
1 tsp Dijon mustard
1/4 tsp sweet paprika
1/4 tsp ground cayenne pepper
1. Add potatoes to a medium pan of cold, salted water. Bring to a boil. Cook until fork tender, about 15-20 minutes, checking tenderness regularly. Drain.
2. While the potatoes are cooking, combine mayonnaise, mustard, paprika and cayenne. Add peppers and scallions and drained potatoes. Stir until all ingredients are well coated in the mayonnaise mixture. Season with salt and pepper to taste.
Barbecue Chicken Thighs
Posted on 6 August 2010 | 5 responses
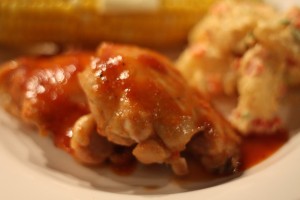
This is honestly the most simple recipe you will ever see… I almost feel guilty for putting it up! But it came in so super handy when I had some boneless skinless chicken thighs recently. I made the Kansas City-style Barbecue Sauce with no exact meal in mind for it, knowing that it was an all-purpose sauce for grilling, marinating and cooking with. The evening I made the sauce I decided to try out simply baking the chicken in the sauce and what a surprise – success! I told you this sauce was versatile!
This is the perfect way to take a low-cost, but in my opinion one of the tastiest, meat and make it into something fantastic so easily. This meal only took half an hour to pull together but tasted as though the chicken had been marinating for hours. The meat was still juicy and tender and the sauce complimented both the sides I made. I served this with fresh corn on the cob, boiled with a teaspoon of sugar and a splash of milk, which I put a little pat of butter on for some extra summer goodness and Potato Salad, made with red peppers and scallions and a mayonnaise-mustard dressing.
Notes: This recipe would work equally well if you grill the meat too. Just cook the chicken over a medium heat grill for about 6 minutes on each side, making sure it is cooked through. Pull it off the grill when it is just done.
Baked Barbecue Chicken Thighs, serves 3 as an entree
6 boneless, skinless chicken thighs
1 cup Kansas City-style Barbecue Sauce, cooled or room temperature
1. Heat oven to 375°F. Place chicken thighs in a 9 by 9 inch baking dish and add barbecue sauce. Turn to coat completely and allow to sit at room temperature while oven is heating. Turn occasionally.
2. Place baking dish in oven, and cook for 10 minutes. Remove dish from oven and using tongs, turn chicken pieces. Place back into oven and cook for a further 10 minutes, or until cooked through.
3. Turn broiler onto high and place baking dish underneath. Broil for 2 minutes until chicken gets a slight crust. Remove chicken pieces to serving plate. Return the sauce in the baking dish back under the broiler while you plate the rest of your meal. Pour some sauce over the chicken before serving.
