Not-Terribly-Traditional Bruschetta
Posted on 13 September 2010 | 2 responses
This dish combines many of my great loves and it is perfect for this time of year. The tables at the farmers’ markets are bowing under the weight of the overflowing piles of tomato varietals and the scent of basil lingers lazily in the air. The bunches of basil are huge at the moment and they are virtually giving tomatoes away before they turn mealy, so what better way to use perfectly in-season produce than bruschetta?
The name bruschetta comes from the latin bruscare which means ‘to toast’, so at its’ most basic, bruschetta is just grilled or toasted bread usually rubbed or drizzled with olive oil. Nowadays though bruschetta has come to be more of a production… rubbing the toasted bread with garlic cloves, adding chopped tomatoes and chiffonades of basil… While I do love the simpler style of bruschetta I decided to give it a revamp myself. As a strict carnivore and turophile (that means cheese lover for all you non-Greek speaking people!) I decided that I could squeeze more onto that little baguette toast.
One of my main joys of bruschetta is the textural difference between the crispy bread and the soft topping and one of my pet peeves with bruschetta is when, after sitting out for fifteen or so minutes, the bread gets soggy from the juices of the salted tomato. I decided to test out a couple of solutions to this mushy bread problem. The first is probably the most obvious – remove any hint of a seed or moisture from the tomato. I found this left the topping bland and sort of took away the refreshing juiciness of it all. So I tried out the ultimate decadent method – a barrier impervious to water. That’s right, a layer of molten, gooey cheese. Surprise, surprise, this worked out amazingly and tasted divine. Mushy bread problem, solved!
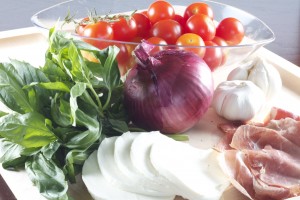
Even though cured meats and cheeses are also served as antipasti with bruschetta, as I had managed to combine mozzarella I decided to throw in some prosciutto as well. Just an ounce of this sweet, salty cured ham is enough to add its’ flavor into the mix. It melds so well with the finely chopped red onion and minced garlic and of course with the tomatoes, their juices and the basil. All in all, an amazing explosion of flavor!!
Tips: One tip that I am sure you all know, is to slightly freeze prosciutto before slicing. It helps the fat solidify which makes slicing or in this case mincing far easier. I put the prosciutto in the freezer for 5 minutes before chopping it.
Notes: The tomatoes used can be cherry, beefsteak, on the vine, heirloom and any color at all. When I have made this in the past, I have used a combination of large beefsteak tomatoes and small on the vine cherry ones, and also just small heirloom cherry tomatoes. Using lots of smaller tomatoes increases the amount of time it takes to chop them, so if speed is a big factor, you may want to think about using larger tomatoes and if you want to add some sweetness supplement a few smaller ones (not that you need to with most late summer tomatoes).
Using a large ball of mozzarella, I slice 1/8″ slices and then cut those slices into thirds and it is usually the right size. You basically want to cover as much bread as possible when the cheese melts.
Bruschetta, makes 48 hors d’oeuvres
1 lb tomatoes, chopped finely (see Notes)
1/3 red onion, chopped finely
12 basil leaves, chopped finely
2 cloves garlic, minced
1 oz prosciutto, minced (see Tips)
1 tbsp balsamic vinegar
1 baguette, sliced on a steep diagonal into 1/4″ slices
Olive oil for brushing or drizzling onto baguette slices
1/2 to 3/4 lb fresh salted mozzarella, cut into thin baguette slice size pieces (see Notes)
1. Combine tomatoes, onion, basil, garlic, prosciutto and balsamic together. Season with kosher salt and freshly ground black pepper to taste.
2. Heat the broiler (the grill in the oven – UK), and lay out all the baguette slices on a large baking sheet. Either brush or drizzle your slices with olive oil and place under the broiler for 2 minutes, rotating half way through. Top with mozzarella pieces and pace back under broiler until cheese melts, about 2 more minutes, checking to make sure it doesn’t burn.
3. Top with bruschetta topping, season again with kosher salt and pepper to taste.
4. Serve warm or at room temperature.
Banana Bread
Posted on 10 September 2010 | 12 responses
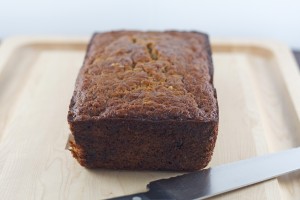
This recipe honestly could not be any simpler. Just heat up the rum and the raisins together, wait until the raisins have absorbed all the rum’s goodness then add to everything else and bake. Easy peasy! Whenever I buy bananas invariably we never eat them quickly enough. I buy them in large bunches because at my grocery store they seem cheaper that way. They would be cheaper, if we could eat them all. The oddest thing happens, when we do not have bananas I crave them and imagine all the fantastic smoothies I could create with them, think about how they are the perfect snack on the go, grab one and run out the door but the second we have them in the house we get instant banana fatigue. We never finish them so they turn brown, soft but sweet and perfect for baking.
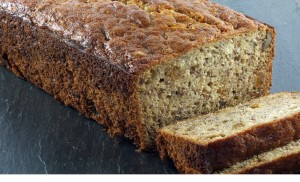
Whenever I have too many bananas that are just past the point of eating (I cannot eat an overly bruised banana, the texture is so off for me) I bake this banana bread. It’s not overly sweet so you feel okay about having a slice for breakfast but it is moreish enough that you can have it for your mid afternoon pick me up as well. This recipe is based on a similar recipe in Nigella Lawson’s cookbook, How to be a Domestic Goddess, a book with a title that is near to my heart and aspirations! I somehow do not own said book (head down in shame) but thankfully my mum does so I was able to scribble down the recipe on a slip of paper. This slip of paper with highly important information did exactly what slips of paper with cannot-lose-instructions-on-them want to do and decided to give me the proverbial slip… Thankfully by that point I have made this recipe so many times that I could approximate what when in and voila, we have this recipe. Not exactly the same but I assure you just as good!
Tip: If you are completely overrun with ever-ripening bananas and you cannot possible use them all in time, throw them into the freezer. Just thaw them out in the fridge for a couple of hours and you have instant ripe bananas for baking!
Unbelievably More-ish Banana Bread, makes a 9 by 5 inch loaf (about 10 slices)
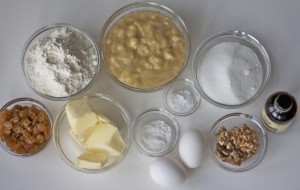
1/4 cup sultanas
5 tbsp dark rum
3/4 cup plain flour plus more for dusting the pan
2 tsp baking powder
1/2 tsp baking soda
1/4 tsp fine salt
1/2 cup unsalted butter, melted
Just under 1/2 cup sugar
2 large eggs
4 small very ripe bananas (about 300 g peeled weight)
1/4 cup walnuts, coarsely chopped
1 tsp vanilla extract
1. On the stove top – place raisins and rum in a small saucepan. Cook over high heat until rum is boiling. Cover with plastic wrap and set aside until cool.
Microwave option – place raisins and rum in a bowl, cook on high for 45 seconds until rum is hot. Cover with plastic wrap and set aside until cool.
2. Heat oven to 350ºF. Butter and flour a 9″ x 5″ loaf pan. Put flour, baking soda, baking powder and salt in a small bowl. Stir sugar and melted butter until combined. Add eggs one at a time, mixing well after each addition. Add bananas, walnuts, raisins (with the rum) and vanilla and stir until combined. Pour into loaf pan. Bake in oven for 1 hour, or when tested with a toothpick, the toothpick comes out clean.
Bangers and Mash with an Onion and Tarragon Gravy
Posted on 8 September 2010 | 2 responses
Even though we are still experiencing summer here in New York we did have a ropey patch of weather last week. When it begins to rain and get chilly all I crave is familiar comfort food. As I am sure everyone knows, bangers and mash are traditionally English (with a name like that where else would they be from!) but I think it is one dish that should make a cross over as there is nothing that can cheer your spirits quite as perfectly on a cold and miserable day.
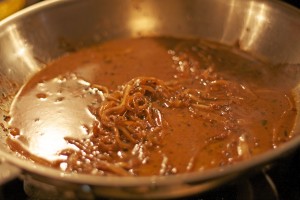
An onion gravy with bangers and mash is fairly common but I have switched it up a bit and made it slightly more refined by adding tarragon and white wine*. The gravy is so easy to make. Using all the browned bits of the sausages and the compound butter creates a sauce with a lovely depth of flavor. Almost everything in the compound butter is a pantry item so you can make this dish anytime the mood strikes you, which I can promise will be almost anytime the weather turns slightly colder!
*This does not mean that I am adverse to a bistro and onion gravy – sometimes that can also hit the spot!
Definition: a compound butter is simply butter with other ingredients. You can add literally anything to make a compound butter: fresh herbs, dried herbs, spices, seasonings, onions, shallots, wine, spirits. Think of them as an easy way to inject flavor into anything.
I served this with a succulently sweet piece of local corn on the cob for a little touch of summer with this fall/winter meal.
Bangers and Mash with an Onion and Tarragon Gravy, serves 4
Compound butter
2 tbsp unsalted butter, softened at room temperature
1 tbsp minced onion
3 tbsp dry white wine
1/2 cup chicken stock
3/4 tsp dried tarragon
8 chicken and apple sausages
1 recipe of Creamy and Buttery Mashed Potatoes
1 tbsp unsalted butter
1/4 onion, thinly sliced
1. Make the compound butter – combine all ingredients and return to fridge. Can be made a day in advance.
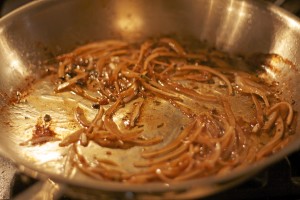
2. Line a baking sheet with foil. Heat a large frying pan over medium high heat. Add 1 tbsp canola oil. Add sausages, making sure that they are not touching and cook until they are browned, about 5 minutes. Turn over and brown the other side, about 5 minutes more. Remove from pan and place on foil lined baking sheet, cover with another piece of foil to keep warm.
3. Add 1 tbsp butter to the pan. Once the butter has melted, add onions. Cook until soft, stirring occasionally.
4. Add compound butter and allow to melt, stirring often. Allow to bubble for a minute or 2.
4. Plate 2 sausages and a generous heap of mashed potatoes on each plate. Apply gravy liberally over the sausages.
Happy Labor Day! Some Great Ideas For Your Cookout!
Posted on 3 September 2010 | 4 responses
Happy Labor Day! As a Brit I had no idea what Labor Day was until I just wikipedia-ed it (how isn’t that a word yet?)… and apparently it is a day to celebrate laborers. Interesting fact of the day – the first was held in New York and used as a bribe to appease workers who were about to strike!. Personally for me, and I am sure for most of you, Labor Day is more important as the last weekend of real summer. It is the last time to fire up those grills without wearing a hoodie and Uggs!
More importantly for me, it’s our wedding anniversary so I shall take my leave early today as we are trying to beat the traffic out of the city. Here are a few ideas for your holiday weekend cookout!
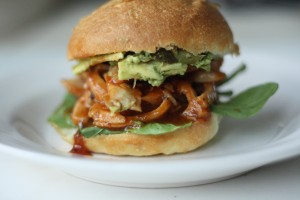
These Barbecue Chicken Thighs can turn into a mean Pulled Chicken and Avocado Sandwich.
This Hot Dog Chili is the perfect accessory for all your cookout dogs… they feel naked without it!
These Carne Asada Fajitas are made with flank steak, which after its’ marinating tastes as tender as a filet!
Make some extra Guacamole as a dip to go along side this Edamame Hummus.
Remember sides and salads as well! We have a recipe for the perfect Easy Potato Salad and a great, fresh Chicken Salad.
Go for light desserts which are easy to eat without getting messy like these Raspberry Cream Cookies or these Chewy White Chocolate Chip Cookies; do what we did and fill them with your favorite ice cream to make ice cream sandwiches!
There are also On the Grill and Perfect Picnic categories and don’t forget about Summer Summer Summer Time before it’s too late!
Enjoy the last official weekend of summer and we’ll see you after the break!
Pssstt.. This weekend is also the time to stock up on all your kitchen and tablewares… Williams Sonoma and Crate and Barrel are having big Labor Day Sales!
Curried Rice Pilaf
Posted on 2 September 2010 | Comments Off on Curried Rice Pilaf
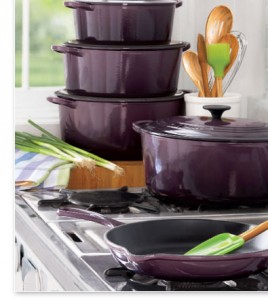
To me a rice pilaf is a “set and forget” risotto. Rather than constantly stirring the rice and chicken stock, everything is put in the same “Dutch oven” and allowed to cook. Personally, I had never heard of a Dutch oven until I saw the term used in a recipe. A Dutch oven is simply a casserole dish, preferably enameled cast iron and even more preferably the exact ones in the photo below… (if someone wants to get them for me, it would be much appreciated!)
You can also use an ovenproof pan with a lid, make sure no part (handles or the lid’s knob) will melt and you should be fine. I used a stainless steel All-Clad saucepan and I have never had a problem.
This dish compliments the Curried Chicken perfectly. It is a very savory tasting side. It has a hint of curry, it’s creamy but not as much as the sauce and it provides a texture contrast from the rice grains and the onion. You can also make this on the stove top as well, just make follow the directions for my Simple Risotto only exchanging the Parmesan in the final stage for the Curry Powder.
Curried Rice Pilaf, serves 6 as a side dish
3 1/2 cups chicken stock
2 tbsp butter
1 small onion, small diced
2 cups Arborio rice (or other short grain Italian rice)
1 tsp Curry Powder
1. Heat oven to 350ºF. In a saucepan, bring chicken stock to a boil.
2. In an ovenproof saucepan (or Dutch oven), heat butter over medium high heat. Add onion and cook until slightly softened, about 5 minutes. Add rice and stir to coat with butter and onion, cook for 3 minutes, making sure not to brown the rice. Pour the boiling stock over the rice, season with a sprinkle of salt. Cover the pan tightly with a layer of tin foil and place the lid over the top. Put the pan into the oven.
3. Remove pan from the oven and carefully remove the lid. Pull up a corner of the foil and taste a grain of rice. At this point if the rice is cooked enough, remove the foil and fluff the rice, stir in the curry powder and place the lid ajar onto the pot for 5 minutes as you get the rest of the meal ready. If it is not cooked enough, leave the foil and the lid on for 10 minutes longer before fluffing, stirring in the curry powder and leaving the lid to one side for 5 more minutes.
4. Serve with Harry’s Bar Curried Chicken or any dish you think it would compliment.
Photo of Le Creuset pans from the Sur La Table site.
Harry’s Bar Curried Chicken
Posted on 1 September 2010 | 1 response
The first time I made this dish, I was in college and in a woefully ill-equipped and under utilized kitchen (maybe the under utilization was due to the lack of equipment!). It seemed like such a challenge to get two frying pans, two saucepans – one for the sauce and one for the accompanying risotto – and a sieve clean and in the same place at the same time. But I was determined to make this fancy (at least for a student) entree for dinner. This chicken curry is a complete departure from what you would ordinarily think of as the typical curry house chicken curry. It is refined, creamy, smooth with a mild curry taste. While the addition of fruit is quite common in Indian curries, I love the combination of apples with the leeks, onions and celery. It is slightly unexpected, and works perfectly with the flambeed brandy and cream.
This dish, “Chicken al Curry”, is at every Cipriani restaurant I have been to. They serve it in in Venice, London, all five of the New York restaurants even Grand Central! It is a complete classic and while it make look a little tricky, with some time management it is a doddle. The sauce can be made up to three days ahead and kept in a airtight, sealed container in the fridge, leaving you to just saute the chicken when you want to serve this.
Thankfully since leaving university, my kitchen collection has grown so I do not have quite the same pot and pan problems anymore. Even though I probably could rustle up two 12-inch saute pans, I still choose to wash out the frying pan that I used to make the sauce to saute the chicken. Maybe it just makes me feel as youthful as an undergrad!
Harry’s Bar Curried Chicken, serves 6 as an entree
Curry Sauce
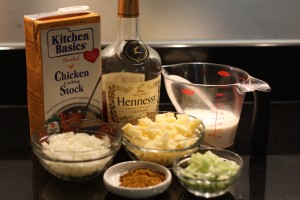
1/4 cup olive oil
1 small onion, chopped
2 leeks, white part only, thoroughly washed and thinly sliced
1 celery rib, chopped
1 Golden Delicious apple, peeled, cored and thinly sliced
3 tbsp brandy
2-3 tbsp Curry Powder (store bought or homemade), to taste
1/4 cup flour
3 cups boiling chicken stock
1/2 cup heavy cream
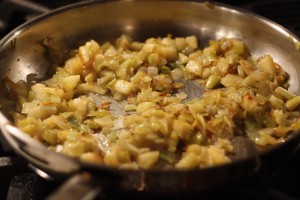
1. Heat a large frying pan over medium high heat. Add olive oil. Add onion, leeks and celery and cook until they are wilted, about 6 minutes. Reduce heat to medium, add apple and cook the mixture for about 30 minutes or until everything is soft, stirring occasionally.
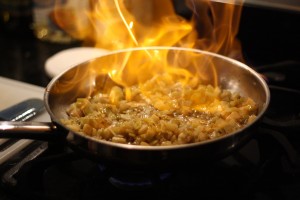
2. Pour on the brandy, allow it to heat slightly and carefully ignite it using a long kitchen match. Swirl the pan gently until the flames die out.
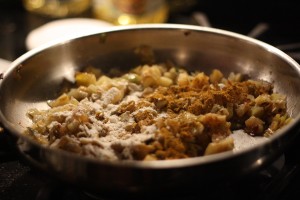
3. Add the curry powder and season with salt and pepper, stirring to combine. Add the flour and stir well, cook for 2-3 minutes.
4. Add the chicken stock slowly, whisking constantly. Cook until the sauce begins to thicken. When the sauce starts to thicken, lower the heat and allow it to simmer uncovered for 20 minutes, stirring frequently.
5. Strain the sauce through a sieve into a medium saucepan. It should be the consistency of thin cream. Taste the sauce and adjust the seasoning and add more curry powder if you prefer a more intense flavor and if it is too thick add a splash more stock.
6. Bring the cream to a boil and add it to the sauce. Allow the sauce to simmer for 10 minutes.
Curried Chicken
6 chicken breasts or boneless thighs
Plain flour for dredging
1/2 cup olive oil
1 recipe curry sauce, recipe above
1. As the sauce is cooking, cut the chicken breasts or thighs into 1-inch pieces. Pat the pieces dry and season with salt and pepper. Dredge in flour, shaking off any excess.
2. Heat a large frying pan over medium-high heat and add the olive oil. Brown the chicken pieces on both sides, until they are golden brown and crisp, about 15 minutes. (You may need to cook the pieces in batches, making sure they do not touch otherwise they will not brown.)
3. Pour off any fat remaining from the pan and add the curry sauce. Reduce heat to medium and stir the pieces so that they are covered well in the sauce. Cook, partially covered, for 30 minutes, or until chicken is cooked through.
4. Pour the chicken and the sauce onto a heated platter and serve with a Curried Rice Pilaf.
Guacamole
Posted on 31 August 2010 | Comments Off on Guacamole
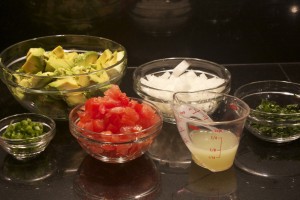
In the summer (and through most of the winter/fall/spring, when I am missing summer) I make guacamole a couple of times a week. I adore being able to eat huge scoopfuls of a dip without having to feel a tiny bit guilty. While most of the avocado’s calories come from fats, they are healthy monounsaturated fats. The rest of the ingredients are low in fat but high in flavor. In this recipe, the avocado is smooth and rich but the white onion is crunchy and juicy. I cut the tomatoes, jalapeno and cilantro finely so that they almost blend in with the avocado and lime juice and I leave the onion larger for a textural contrast.
I have tried every kind of onion (vidalia, yellow, red, Spanish onion, shallots and white onions) to find that white onions work the best. Their onion flavor is less direct and sharp than any other onion but I love them in this guacamole recipe as they are juicier and milder than other onions. If you cannot find a white onion, you can substitute it for the same amount of vidalia onion or about a quarter cup of yellow or Spanish onion.
Guacamole, makes 2 cups
2 ripe Haas avocados
1 1/2 vine ripened tomatoes, small dice
1 jalapeno, minced
1/3 cup white onion, medium diced (about 1/4 white onion)
2 tbsp minced cilantro
2 tbsp lime juice
Kosher salt
1. Mash avocados thoroughly with a fork. Add the rest of the ingredients and stir to combine. Season with kosher salt.
Roast Duck Hash
Posted on 27 August 2010 | Comments Off on Roast Duck Hash
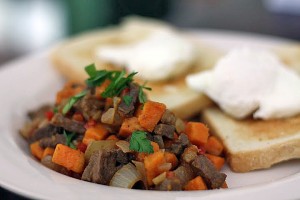
If this dish sounds original, it is because it is probably is. One cold and rainy Saturday morning the hubbie and I woke up slightly worse for wear and absolutely famished. Due to the miserable weather and thumping headaches we were completely unwilling to brave the outdoors to find a brunch spot or even to run out for supplies so we made this meal from whatever we had around the house. Thankfully I am a sucker for condiments and we usually have a pretty well stocked fridge. In situations like these a hash with poached eggs and toast is always the best option. To make one you just need a potato, in this case – sweet, some vegetables, and preferably (for me at least) some meat, which in this recipe is duck.
Somehow this dish is perfect for brunch. The flavor all meld together harmoniously and while the ingredient list may look extraordinary together, oddly it makes sense. I added the hoisin sauce as I love how it works with duck whenever I eat peking duck (which is not as often as I would like to). The sweet potato and duck are also a fairly classic pairing. Sweet potatoes are at their peak during duck season (mid fall), and the sweetness of the potato plays off the gaminess of the duck.
To balance the dish I added onions, red peppers and garlic to make sure it was a fully savory meal and added some Tabasco for a kick.
Make sure to poach your eggs so the whites are fully cooked but the yolks are still runny. When they burst it will taste divine with the hash! (If you are cooking this for someone with a restricted immune system (pregnant women, elderly people, young children, immune supressed people) make sure to cook the eggs fully including the yolk.
Notes: to cook the duck from raw, carefully score the fat of the duck in a criss cross pattern making sure not to cut the flesh. Salt the duck and begin to heat up an oven proof saute pan over medium heat and heat oven to 350F. Add a tiny splash of oil, as the duck already has so much fat beneath its’ skin. Place duck, fat side down, in pan and cook slowly until fat begins to render out. Once the fat is mostly rendered and the skin is beginning to crisp, pour off fat and flip the duck over for 30 seconds to sear the other side. Place the whole pan in the oven until the duck is medium rare, about 15 minutes.
Roast Duck Hash, serves 2
1 medium sweet potato, peeled and diced into 1/2 cubes
1 tbsp olive oil
1 duck breast, cooked until medium rare and fat rendered out then cooled, small dice (fat reserved) (see Notes)
½ red pepper, small dice
⅓ large onion, medium dice
2 cloves garlic, minced
2 tbsp chicken stock
1 tsp hoisin sauce
3 slugs Tabasco hot sauce
1. Place sweet potato in pan of cold water to cover, bring to boil and reduce to simmer for 8 minute under knife tender.
2. Heat saute pan over medium-high heat, add 1 tbsp duck fat and olive oil to the pan. Add the onions, cook for 5 minutes until tender and fragrant, stirring occasionally to prevent burning. Add garlic and cook for 2 minutes, continuing to occasionally stir, then add red pepper and cook for 3 minutes until soft. Add sweet potato and duck, cook for 4 minutes until warmed through. Add hoisin sauce, stir then add chicken stock and tabasco, stir again. Cook until the meat and vegetables are coated with a sauce.
3. Serve with 2 poached eggs and hot, buttered toast.
Roast Tomato, Chili and Cumin Soup
Posted on 26 August 2010 | 2 responses
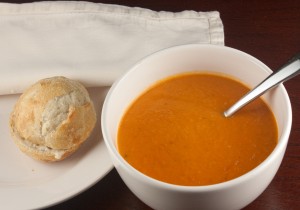
This soup is pretty much the most ideal use of sweet, juicy, late summer tomatoes. It is rich, filling, sweet and spicy but it is also completely dairy and gluten free. The texture comes from the tomatoes and the onions without any need for a thickener. The ground cumin, whole cumin seed, chili flakes and garlic all pack a punch and add some spicy savoriness to what would otherwise be a sweet soup. I served mine with freshly baked, buttered sourdough bread rolls.
It is from the Leon cookbook, which is full of all the recipes that makes the Leon cafes so popular. We received it as a wedding present last September and I have found it be the most perfect book to call on when I am looking for healthy, dairy free food.
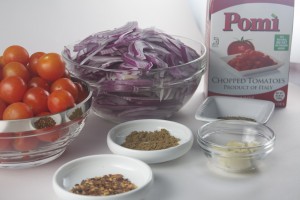
Notes: The original recipe calls for 5-6 vine ripened tomatoes rather than cherry tomatoes. I went with cherry tomatoes as they lend more of a sweetness to the soup and I love them roasted. If you are concerned about the soup being too sweet, halve the amount of sugar added to the olive oil and add more to taste at the end of the recipe. If you do use vine-ripened tomatoes, follow step 1 but allow the tomatoes to cool until you are able to handle them and then remove their skins before adding them to the soup.
I was recently told by friends that tinned tomatoes are awful for you. The acidity in the tomatoes cause chemicals to leach out from the can and into the tomatoes and their liquid, which you then ingest. I now buy Pomi crushed tomatoes (they are sold in grocery stores, stores online and amazon), not only are they high quality tomatoes fresh from Italy, they are also 100% BPA free so I know that I am not adding needless chemicals to our meals. Trader Joe’s also offer tomatoes which are in BPA free containers. While some tomatoes come in glass jars make sure that the glass is still BPA free and not epoxy lined as this will also leach chemicals.
Roast Tomato, Chili and Cumin Soup, serves 4
2 pints cherry tomatoes (see Notes)
1/2 cup extra virgin olive oil
1 heaped tbsp sugar
3 cloves garlic, crushed and roughly chopped
2 large red onions, thinly sliced, root to tip
3/4 tsp dried chili flakes
1/2 tsp ground cumin
1/2 tsp whole cumin seeds
14 oz tin chopped tomatoes (see Notes)
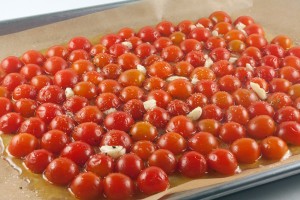
1. Heat oven to 375°F. Pour half the olive oil onto a baking sheet and add sugar, garlic and some salt and pepper. Halve the tomatoes and pack them closely together, cut side down in the olive oil mixture, making sure to coat them slightly. Place in oven for 20 minutes, or until the skins have shrivelled and the tomatoes are soft. Remove from the oven and set aside.
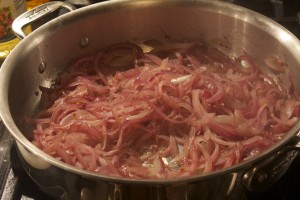
2. Meanwhile, heat a large saucepan over medium heat. Add the rest of the olive oil and fry the onions, cumins and chili flakes with a lid on, stirring occasionally, for 10-15 minutes or until the onions are soft.
3. Add the tinned tomatoes and cook over same heat for 10 minutes on, with the lid on. Add 3 1/2 cups water to the pan and bring the soup back to a simmer.
4. Add roasted tomatoes and their roasting oil to the pan and simmer everything together for 20 minutes. Puree the soup in a blender or with a hand held blender until you have the texture you would like (see Notes). If you think the consistency is too thick add a splash more water. Check seasoning and serve hot.
New York Style Cheesecake
Posted on 25 August 2010 | 7 responses
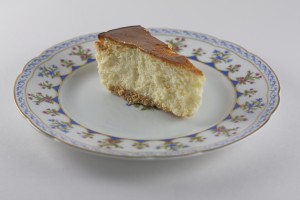
A couple of weeks ago the hubbie and I went to the famous Peter Luger steakhouse for a friend’s bon voyage party. My recommendations are to get the steak for 2, medium-rare, their thinly cut onion rings, special fried German potatoes and for goodness sakes, you should get the thick cut bacon to start and slather it in their house sauce, you can thank me later! While everyone raves about the steak, which of course I appreciate, I love the cheesecake with a heaping side of schlag (sounds rude, tastes delicious). We all got a piece to share and it was the perfect end to a traditional New York meal. It is creamy, rich but not heavy, old school New York style cheesecake, basically it is the cheesecake that all other deli cheesecakes want to be like. (Junior’s in Brooklyn also does a mean original cheesecake and I hate to say it but… Stage Deli’s really isn’t so bad.)
Since that meal I have been craving a big piece of cheesecake of my own and I knew that I had several pounds of cream cheese in the fridge so I set out to find the ultimate New York cheesecake recipe. It was an exhaustive search, I scanned the indexes of my cookbooks and searched online. When I found this recipe in Maida Heatter’s Book of Great Desserts I thought I had hit the jackpot. Not only was it in a classic dessert text (if you don’t believe me read the amazing amazon reviews), the recipe was original printed in the New York Times by none other than Craig Claiborne. Craig Claiborne was quite possibly the most influential man in media for the food world. He was a food writer, a critic and the editor of the New York Times food section. So I thought this recipe was going to be out of this world. Sadly I was disappointed; I do not know what happened, maybe it is because I used a springform pan and should have sought out one of these hard to find cheesecake pans but all I know is the recipe was not as heavenly as the Peter Luger’s cake. I found it too lemony with not enough vanilla or enough of a crust on the bottom (see Notes for my modifications). The texture however was good so I shall be tweaking this recipe until I get it exactly how I desire. I still wanted to put this recipe up here as I love how classic this recipe could be and if anyone does own a cheesecake pan let me know how it turns out!
Notes: as this is a classic recipe I wanted write it out in its’ entirety. As mentioned above I would tweak this recipe. I did not love how lemon flavored the cake turned out but instead would prefer more of a vanilla flavor. Next time I make a New York style cheesecake I am going to halve the amount of lemon zest and up the vanilla. I also did not think the crust was thick enough and would perhaps bake a graham cracker crust, similar to the one on my Key Lime Pie, for more of textural difference.
The recipe does not state to strain the lemon juice of pulp and seeds but if I made this cake again I would certainly do it. I found the pieces of pulp distracting and unpleasant in my cake slices.
Maida Heatter also recommends using a “cheesecake pan”, which apparently does not have a removable bottom and are deeper than the average pan and she states not to use a springform. After I briefly searched for one of these pans I only found “cheesecake pans” with removable bottoms, I decided that I would use a springform pan and risk it. I could not see how the pan would make a difference to the final cake. If you possess a round 8-inch wide, and at least 3 inches deep, cheesecake with a non-removable bottom, you are in luck as that is exactly what you need!
This cheesecake also freezes well. If you wish to freeze the cake, after inverting the cake for the second time place the cake in the freezer rather than refrigerator. Make sure to wrap well to prevent freezer-burn.
Craig Claiborne’s New York Style Cheesecake, serves 10
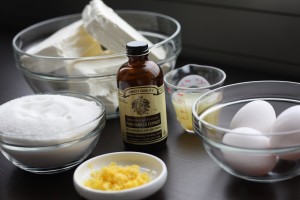
Finely grated juice of 1 lemon (see Notes)
3 tbsp lemon juice, (see Notes)
2 lbs cream cheese, room temperature
1 tsp vanilla extract
1 3/4 cups sugar
4 eggs
1/3 cup graham cracker crumbs (see Notes)
1. Adjust rack to lowest level in oven. Heat oven to 350F. Lightly butter an 8/9-inch round cake pan, at least 3 inches deep.
2. Mix the lemon zest with the strained lemon juice and set aside. In the bowl of an electric mixer beat the cream cheese on medium-high heat scraping down the sides occasionally, until absolutely smooth. Beat in the vanilla and sugar, mix until smooth. Add eggs one at a time, waiting until the last one is completely combined before adding the next. Do not beat more than you have to combine them. With a rubber spatula stir in the lemon rind and juice.
3. Spray the butter pan generously with Pam or some other non-stick spray (this is what the recipe calls for! It does make the cake come out remarkably easily and allow it to rise without sticking to the sides.)
4. Pour the batter into prepared pan. Smooth out the top by briskly rotating the pan a bit, first in one direction, then the other. Place the pan inside another pan which is large enough that the edge of the cheesecake pan does not touch but shallower. Pour hot water into the larger pan up to 1 1/2 inches deep. Bake for 1 1/2 hours, until the top of the cake is a rich golden brown and feels dry to the touch but the cake underneath still wobbles slightly.
5. Carefully lift cheesecake pan out of water and place it on a rack at room temperature for 3 hours, or until it is completely cool. Do not cool cheesecake in the refrigerator.
6. Cover the pan with plastic wrap (rather than cling wrap) and place a flat plate firmly over the top and invert (basically flip the cake onto the plate). Remove the cake pan. Sprinkle the bottom of the cake evenly with the graham crackers. Very carefully and quickly invert the cake again so it is right side up.
7. Refrigerate for at least 5 to 6 hours or overnight. Serve very cold. To cut the cake, dip the knife in hot water before slicing as it helps to prevent the cheesecake from sticking.
