and baby makes three….
Posted on 8 November 2011 | 34 responses
Sorry for the long, delayed absence! You’ll have to excuse me. As you may have guessed, this little munchkin is keeping me quite busy…
I have a few new recipes to post sometime soon. I’ve been trying to cook during baby’s nap times but who knew how noisy cooking was? With the banging of the pots and pans, the sizzling when searing and caramelizing, even the running water and scrubbing of said pots and pans, I usually have to wait until hubby gets home to hold the babe by which point we have something that takes about 10 minutes to put together. But dear reader, for you and for the sake of my palate – it’s getting a tired of the prepared food section of fresh direct (which has been my life saver these past few months!) – I have been trying to cook as quietly as possible. I’ve come up with and found some recipes which are either one pot wonders, quick and delicious or make ahead. Look out for these new categories soon! Until my next post, happy eating!
My two handsome boys!
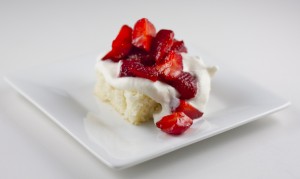
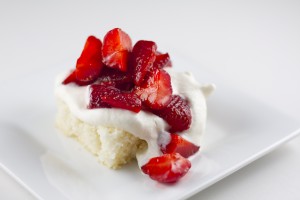
Strawberry Shortcake
Posted on 22 July 2011 | 13 responses
As most New Yorkers know there are a plethora of markets all over this city. Williamsburg has more than most; we have the Brooklyn Flea on Sundays, Artists and Fleas open all weekend, the new Northside Market and since, the amazing Smorgasbord on Saturdays (which has the same website as the Brooklyn Flea). Smorgasbord is a cross between farmers market and foodie market. While I intend to do a post on the different food vendors who visit Smorgasbord and the Flea, today I want to discuss the farmers stalls.
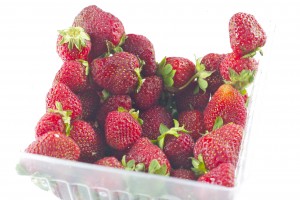
The first week the flea opened we rushed downstairs and ran around the stalls like crazy people trying to make sure we saw everything and sampled as much food as we could. I was struck by the amazing vibrant, deep red of punnets of strawberries on one stall and decided that they were coming home with me.
I had just made a birthday cake for one of my besties that week using a recipe by the cake guru himself, Ron Ben Israel. The original recipe was a vanilla cake with a white chocolate blackberry buttercream (pictures and post coming soon) that was posted on Rebecca Taylor’s Blog NYC Cake Girl. Rebecca is Ron’s right hand gal and I spoke with her more than a few times in the run up to our wedding, where we had the most exquisite cake made by Ron (for pictures and info on wrapping and defrosting that top tier, see this post). After making and eating that cake, I decided the vanilla cake itself had the perfect qualities for strawberry shortcake, which just happens to be my hubby’s favorite. So after he came home from a long day in the office I decided to surprise him with it.
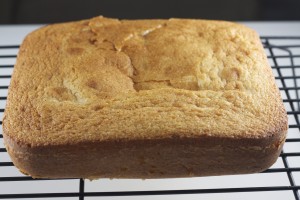
The vanilla cake is rich yet very light, from the cake flour and whisked egg whites, but still moist due to the milk and butter. When the cake is baked the sugar helps to form a slight crust which is sweet and slightly crisp but melts when you put it on your tongue. Just f.y.i., the hubs said this was the best strawberry shortcake he had ever had and is he says it is, it is… fact!
Random greenmarket tips: We try to get as much of our weekly groceries at the market directly from the vendors. The produce varies weekly but we always get things from two Greenmarket staples. We head to Ronnybrook Dairy for our whole milk, which comes in old fashioned reusable glass bottles that we return every week for a discount. They also make an amazing vanilla ice cream, my favorite flavor. I know, I know, I heard it a million times, I’m so boring… but in my defense, I believe you can tell a lot about an ice cream company by their vanilla ice cream. It’s always the way I judge and rank them. We also get our juices from the ubiquitous Red Jacket Orchards, who drive down from the Fingerlakes to what seems like every farmers market in the city. They have an out of this world fiji apple juice and we love their grape juice and cherry stomp! Last summer, my favorite weeknight cocktail was gin with their Joe’s Summer Blend, which is apple and lemon juice, and a splash of tonic. It is the perfect warm weather drink!
Strawberry Shortcake, makes enough for 12 portions
Macerated Strawberries
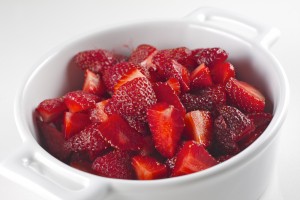
½ punnet of summer strawberries, cut into quarters
1 tbsp sugar
1. Add strawberries to a bowl, sprinkle with sugar and cover with cling wrap. Let sit for at least 30 minutes at room temperature.
Ron Ben Israel’s Vanilla Cake, modified from NYC Cake Girl
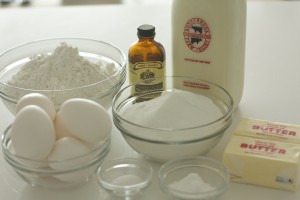
1 ¾ cups sifted cake flour
1 cup sugar
¾ tsp fine salt
2 ½ tsp baking powder
8 tbsp unsalted butter, at room temperature
½ cup whole milk (separated)
3 egg whites
1 tsp vanilla extract
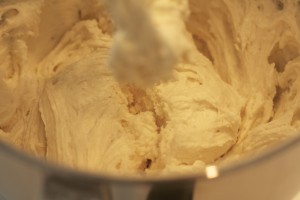
1. Heat oven to 350ºF. Butter and flour a 9″ by 9″ baking pan. Slowly and carefully (I have had mini flour explosions in my kitchen before), mix cake flour, sugar, salt and baking powder in a mixer bowl. Add butter and 6 tablespoons of milk to the dry ingredients and mix on medium speed for 2 minutes.
2. In a separate bowl whisk the eggs whites, remaining milk (2 tablespoons) and vanilla extract until combined. Add the mixture to the mixer bowl ingredients in 3 separate additions. Beating for 20 seconds and scraping the bowl down after each one. Pour into prepared cake pan and bake for 25 minutes, or until a toothpick inserted near the center comes out clean.
To assemble the strawberry shortcakes
Vanilla cake, removed from pan and cooled to room temperature
Macerated strawberries and their juices (see above)
½ cup heavy cream
1 tsp sugar
½ tsp vanilla extract
1. Whisk cream until it begins to hold soft peaks. Sprinkle sugar on top and add vanilla, continue to whisk until cream hold stiff peaks. Cover and refrigerate until cake is cooled and ready.
2. Cut the vanilla cake into 12-16 2″ to 2 ½” squares. Carefully cut the squares in half horizontally. Place lower half on a plate, add a dollop of cream and a big spoonful of strawberries and drizzle some of the juices over. Add the second half to the plate and serve.
Slow Roasted Tomatillo Salsa
Posted on 19 July 2011 | 2 responses
While I adore living here, one of the slight inconveniences of living in New York City is not having a car. It makes it more than a little challenging to go do a large shop from a supermarket resulting in my doing most of my shopping online at FreshDirect. One great category that they have is their Speciality Vegetables section. (At the moment they have zucchini flowers which are perfect for this pasta dish we had in Rome, Tagliolini with a Zucchini Flower Cream Sauce.) Always intriguing and full of seasonal produce that I would usually have to hunt through a farmers market to find or get shipped over from the West Coast. While perusing through a little while ago I spied some tomatillos and began dreaming of the grilled dips I could make and before I knew it, they were ordered and on their way to me.
Enter disadvantage of living in New York City numbero dos… Grills are hard to come by. Unless you are lucky enough to have a garden or a large terrace, grills are not terribly legal in NY so we have an indoor stove top cast iron grill/griddle (which I am obsessed with btw) but now here comes disadvantage number three – we don’t have a hood above our stove anymore so when we do grill there is a slight chance that the smoke alarm will go off, sending both my hubs and I into a state of door and window flapping panic and create mayhem around our apartment for at least ten minutes… i.e. so not worth it except for notable exceptions, red meat being one of them.
So… anything I can do in the oven I try to. In this case, the tomatillos may be missing a little char on them but for the sake of the peace and serenity of my household, it is worth it. Honestly, you have to hear our fire alarm…There is no sound quite like it. My goodness!
Tip: If you are lucky enough to have a grill (or outdoor space or a patch of lawn… ahhh, I digress) then feel free to experiment. A similar time on a grill over medium heat should be enough to get the vegetables soft enough for blending. Right now, I am coveting this mesh chef’s pan from Williams Sonoma which I think is perfect for the job. The one thing you will miss out on, though, is the cooking oil used as it contains lots of the juices from the veggies so you may want to add an extra drizzle of oil to your blender.
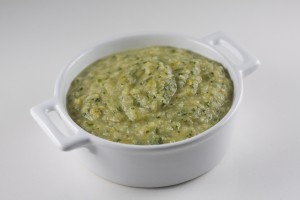
This salsa is perfect for accompanying meats, grilled or otherwise, as a dip for tortilla chips or even as a chutney type substitute alongside croquettes (I made this with some chicken croquettes similar to these easy, peasy Pork and Potato Croquettes).
Notes: tomatillos are little, round, bright green peppers which are wrapped in a papery husk. To prepare them you want to remove the husk and then allow them to soak for 5 minutes or so to get rid of the sticky coating (which is completely normal and non-toxic). If it isn’t all gone, just give them a little rub under some running water until it does. You can eat them raw, added to salads, roasted, like in this dish, or sliced and grilled.
Tomatillo Salsa, makes 2 cups
3/4 pound tomatillos (about 7), peeled, soaked, then halved or quartered depending on size, until they are about 1 inch chunks
1 medium yellow onion, peeled and cut into thick slices
1/2 jalapeno pepper, seeds removed and cut in half
1 tbsp canola oil
1/4 cup cilantro (more to taste if wanted)
Juice of 1/2 lime
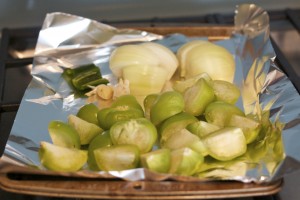
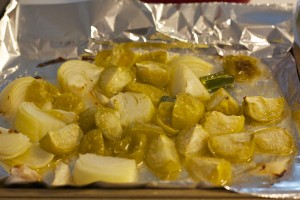
1. Heat oven to 350ºF. Line a baking sheet with foil. Toss chopped tomatillos, onion slices and jalapeno in canola oil with a few pinches of kosher salt. Add to prepared pan and place in oven. Roast for 15 minutes.
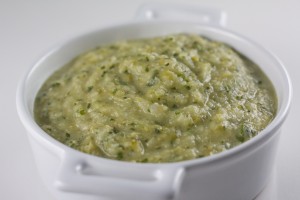
2. Remove from oven and place in food processor. Blend until chunky, about 5 pulses. Add cilantro and lime juice and blend for 30 seconds (longer if a smoother consistency is desired). Season with salt and pepper to taste and serve immediately or at room temperature.
Creamed Corn Cornbread
Posted on 29 June 2011 | 12 responses
It seems that I just can’t keep on a timely schedule at the moment. What with holiday weekends, traveling and attempting to ready ourselves and our apartment for our new arrival in just over a months time. I have felt so guilty for not posting but if I told you what we had been eating recently you would be so uninspired! Ok, for those of you that just have to know… DeCecco pasta and Mario Batali pasta sauce completely save me come dinner time!
I have also been making a lot of my classic dishes on rotation and this creamed corn cornbread is the perfect accompaniment to one of my favorites, Chipotle Chili! Since the weather has been gorgeous I decided it was time to pull out this perfect summer dish, although it is just as good in cold winter or fall (it’s really great for football parties) and make it with this delicious and moreish cornbread.
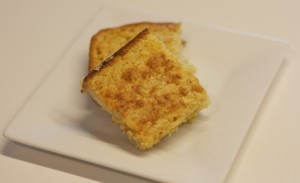
This cornbread recipe is so easy you will never again need to pick some ready made at the store or even use the dreaded packaged mix! As with most baking this is a case of add the wet ingredients to the dry, stir together and bake. It really couldn’t be easier. The resulting cornbread is moist, a little sweet, a little salty with a touch of something most people can’t put their finger on (although my super-taster hubs somehow figured out it was a sprinkle of cinnamon with no prompting!) When you have guests over, just revel in the praise and don’t tell everyone how easy it is to make!
Notes: this recipe can easily be doubled and made in a 9″ by 9″ baking dish (which is how I make it for a crowd).
Creamed Corn Cornbread, makes a standard sized loaf, about 8 small pieces or 4 side servings
1 tbsp butter (or 2 tbsp if not using bacon drippings)
1 tbsp bacon drippings (optional)
¾ cup medium grind yellow cornmeal
¼ cup all-purpose flour
¾ tsp baking powder
½ tsp fine salt
¼ cup sugar
2 shakes of ground cinnamon
1 egg
½ cup whole milk
½ cup creamed corn
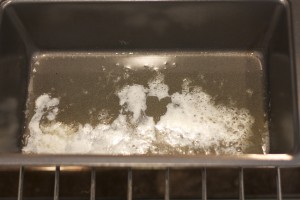
1. Heat oven to 375ºF. Add butter and drippings to a loaf pan and place in oven and wait until melted and frothy.
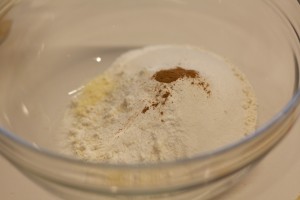
2. Combine dry ingredients in a medium bowl. Mix egg, milk and creamed corn together. Pour wet ingredients over the dry. Stir to just combine.
3. Pour mixture into the pan on top of the fat and return pan to oven. Bake for 25-30 minutes or until a toothpick comes out clean. Leave to cool for 5 minutes before cutting into squares. Can be served warm or at room temperature.
Roasted Turkey Sandwich with Mashed Avocado, Bacon and Balsamic Onion Marmalade
Posted on 7 June 2011 | 4 responses
A little while ago the hubs and I were lucky enough to go to taping of an episode of Saturday Night Live and the taping of the Jimmy Fallon show in one week – I know, I know, when it rains it pours! These tapings along with errand running meant that I would spend more than a couple of days up at 30 Rock.
Rockefeller Plaza has a cavernous underbelly, full of little flower stalls, boutiques, bakeries, chocolate stores and a full on food court as well as a Magnolia Bakery right upstairs (for evidence of Magnolia’s deliciousness, see their Banana Pudding recipe!) So as well as stocking up on cupcakes that week, I also checked out the options in the food court. My favorite is ‘wichcraft, Tom Colicchio’s casual sandwich and soup place. There are thirteen of them dotted around NYC, one in Bryant Park, another in Lincoln Square, one across the road from Macy’s and the one that I frequent almost daily for a week at 1 Rockefeller Plaza. My favorite sandwich was the roasted turkey, bacon, mashed avocado, garlic aioli with balsamic onions (they call it onion relish). I could quite happily eat one a day, which I basically did for a week.
At the end of my week in midtown I was going through withdrawl and decided to try to figure out how to make the sandwich at home. It turns out that I didn’t need to look very far… ‘wichcraft has a book and the sample recipe was my scrumptious sandwich! So here is the original recipe courtesy of ‘wichcraft: Craft a Sandwich into a Meal.
As far as critiquing the book, the only complaint I have seen is that the components of each sandwich take a wee while to make. So the recipes seem a little complicated for making lunch everyday but would be perfect for a fancy picnic or an afternoon tea party.
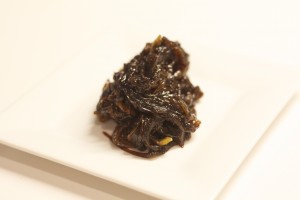
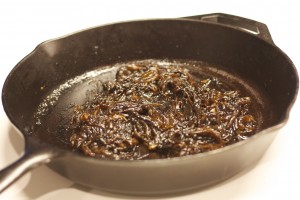
Notes: Even though this sandwich recipe only calls for ½ cup of the balsamic onion marmalade make the whole recipe as you can add it to other sandwiches, serve it with eggs, add it risottos or pasta. It’s so delicious, with such a deep, sweet flavor, it can be added to anything. For me the onions are the star of this sandwich!
Roasted Turkey with Mashed Avocado, Bacon, Balsamic Onions and Mayonnaise, makes enough for 4 filling sandwiches
6 fresh sage leaves
1 (3- to 4-pound) boneless turkey breast
2 tablespoons unsalted butter, softened
Kosher salt and freshly ground black pepper
12 slices bacon
4 ciabatta rolls
½ cup Balsamic Onion Marmalade (see recipe below)
1 ripe avocado, halved, pitted, peeled, and sliced
4 tablespoons Mayonnaise
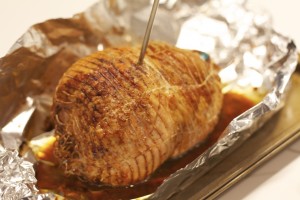
1. Heat the oven to 350°F. Slide the sage leaves under the skin of the turkey breast and place the turkey on a sheet pan. Rub the skin with the butter and season generously with salt and pepper. Roast the turkey for 1 to 1½ hours, until it reaches an internal temperature of 165°F. Baste the meat with its juices throughout. (Keep in mind that the meat will continue to cook even after it’s removed from the oven, so be careful not to cook it too long.) Allow the meat to rest before slicing, or cool completely.
2. In a heavy skillet over medium-high heat, cook the bacon until golden brown and crisp on both sides. Transfer to paper towels to drain.
3. Slice the ciabatta rolls in half. Place the turkey slices on the bottom halves and top with the marmalade. Place the bottom and top halves of the rolls in the 350°F oven and remove once the marmalade is heated through and the bread is toasted. Top the marmalade with the bacon, followed by the avocado. Evenly spread the mayonnaise on the top halves of the rolls. Close the sandwiches, cut into halves, and serve.
Balsamic Onion Marmalade, makes 2 cups (see Notes)
1 tablespoon vegetable oil
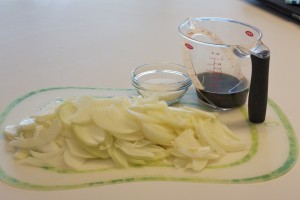
4 large onions, thinly sliced (about 8 cups)
Kosher salt and freshly ground black pepper
1/3 cup sugar
2/3 cup balsamic vinegar
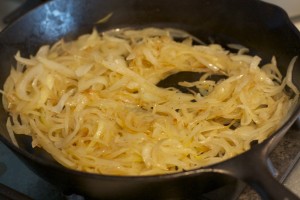
1. Heat the oil in a large skillet over medium heat until it slides easily across pan. Add onions, salt, and pepper and cook, stirring occasionally, for about 20 minutes, until onions are soft.
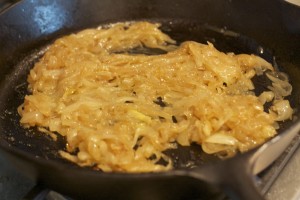
2. Add sugar and reduce the heat to medium-low. Cook, stirring frequently, for about 10 minutes, until onions appear dry.
3. Add vinegar and reduce heat to low. Continue cooking, stirring occasionally, for about 1 hour, until onions are soft and dry. Serve warm or at room temperature. Store marmalade in refrigerator. It will keep for several weeks.
Two Potato, Creamy Fish Pie
Posted on 10 May 2011 | 5 responses
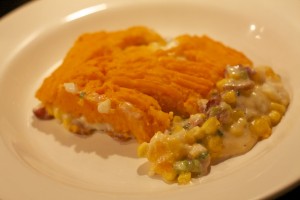
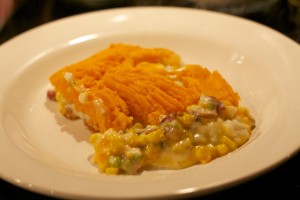
When I first became pregnant the largest change, other than the earlier night and the no drinking, was my diet. You become aware in a way that most people do not have to worry about that everything you put in your body has to be healthful and nurturing. Essentially, your baby is what you eat! It puts a huge responsibility on you as a person and as a future mother. Like everything in my life, I went slightly overboard on the research and found that the first 3 months are the most important for nutrition (which is not to say you can slack off after the first trimester!). My challenge was finding ways to incorporate everything I wanted to eat for our growing baby but also something that the hubs would eat without complaining or pulling that “mmm, I really like it” face (which of course means he does not like it!). This recipe hits the spot. It’s satisfying enough for my hubby, who likes food to taste like it has meat in it and it’s creamy and rich but still light and healthful.
This recipe is almost flawless and ticks a lot of boxes for the buzz vitamins you need for your growing baby. Cod is the perfect fish and protein for pregnancy, low in mercury, high in omega 3 oils. Check to make sure you are buying Pacific cod (and that it is fished in somewhere non-contiminated) as the stocks are far higher than Atlantic cod or scrod. The sweet potato contains beta-carotene, which is one of the other forms of Vitamin A you can safely ingest in moderation during pregnancy. Carrots, spinach and pumpkin are just a few others that contain it. The milk and butter are great for calcium, which you need a lot of at the moment. The bacon is there for deliciousness and some added protein and the sweetcorn and scallions just amp up the flavor and the vitamins, win win! The only thing you could change is switching the butter for olive oil and the whole milk for skimmed… but where’s the fun in that? You can also eat this even if you aren’t pregnant. Super handy right?
Two Potato, Creamy Fish Pie, serves 4-6 as a main course
1 lb Yukon Gold potatoes, peeled and cut into 1 1/2″ chunks
1 lb sweet potatoes, peeled and cut into 1 1/2″ chunks
5 tbsp unsalted butter
6 strips smoked bacon, cut into 1″ pieces
6 scallions, white and light green parts only, thinly sliced
1/2 11oz can sweetcorn or 3/4 cup frozen sweetcorn
2 cups whole milk
1 1/2 lb cod fillet, cut into 2″ chunks
3 tbsp plain flour
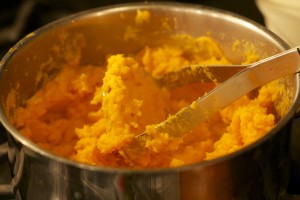
1. Heat the oven to 375°F. Place the potatoes in a large pan of salted cold water, bring to the boil over high. Once boiling, add the sweet potatoes. Simmer for 15-20 minutes until both are tender. Drain thoroughly then mash with 2 tbsp of the butter, season with salt and pepper and set aside.
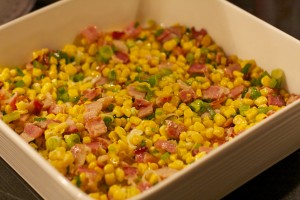
2. Place the bacon pieces in a medium pot at room temperature and cook over medium low heat until they start to render their fat. Increase the heat and fry for 5 minutes until crisp. Stir in the salad onion and sweetcorn then transfer to a pie dish about 9″ by 9″ baking dish.
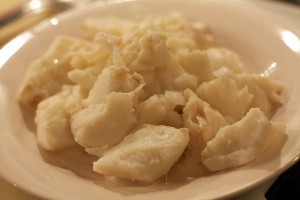
3. Pour the milk into the used pan and add the cod. Bring to a fast simmer over medium heat and poach for 5-6 minutes, until the fish starts to turn opaque. Set aside the cod and strain the milk back into the measuring cup.
4. In a clean pan, melt the remaining butter and stir in the flour using a wooden spoon. Cook for 2 minutes to make sure the flour is cooked, stirring constantly, then begin to added the warmed, used milk. Stir until the mixture is smooth before adding the rest of the milk in a slow stream. Continue to stir the sauce constantly until it comes to the boil. Simmer and cook for a further 2 minutes. Flake the fish into the sauce, discarding any liquid on the plate. Season and stir through, then pour into the pie dish, stirring to combine it with the bacon, sweetcorn and scallions.
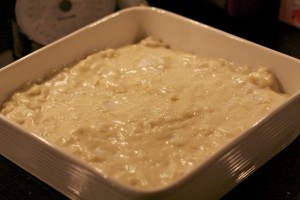
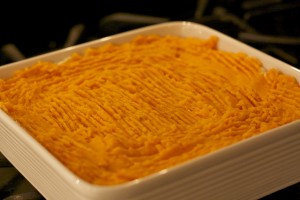
5. Pile the mash over the filling, making pretty patterns with a fork or simply spreading it with the back of a spoon. Place in the oven and cook for 30 minutes, or until piping hot and the top is just starting to brown.
For maximum healthiness, serve with a green veggie!
Happy Cinco de Mayo!
Posted on 5 May 2011 | 5 responses
As many of you, my dear readers, know I cannot join in the traditional festivities of Cinco de Mayo. On this gloriously gorgeous and sunny day, I will be avoiding the flavored frozen margaritas, pitchers of sangria and highballs of michelada while I am just waiting for my little one to get here. But I will not let that stop me from joining in with the food. Here are a few of my top recipes for today!
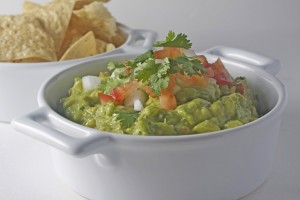
Start things off with this Guacamole. It’s creamy, flavorful, a little spicy and somehow still oh-so healthy!
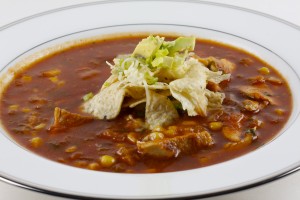
If your weather isn’t quite as lovely as the weather we are having here in New York, think about making this Chicken Tortilla Soup. It’s perfect for both warm and cold weather and you can mix it up with different toppings depending on the seasons. Personally, I like all toppings, all seasons but that’s just me!
These Carne Asada Fajitas are the perfect entree for today! With a fairly quick marinade and a very quick grill, these flank steak fajitas are sure to wow your crowd!
You can stick to this Pulled Pork Quesadilla recipe or switch out the pulled pork for chicken, more veggies or some sliced steak. Any which way, you can’t go wrong with this summer staple.
Relax and sit back back with a Prickly Pear Margarita made with homemade infused tequila!
Also if you live in neighborhood (Northside of Williamsburg, Bk), we have a new restaurant, Molé, which just opened on the waterfront. It has a cute outdoor space and I am hearing good things about the table side made guacamole. The hubs and I tried the Tacquitos con Guacamole appetizer during their opening week and loved it! My guess is it will be bumpin’ this evening!
Mini Mascarpone Cheesecakes
Posted on 2 May 2011 | 8 responses
Today I was this close to scrapping these delightful mini cheesecakes and writing about something decidedly English in honor of the royal wedding on Friday. Something along the lines of fresh crumpets with a homemade Meyer lemon curd (very Rule Britannia) but as I made a promise that I would post this recipe shortly, I shall. The crumpets and curd will just have to wait!
Now I am sure you are all thinking, this is more like it! A sweet treat for a grey Monday morning (or afternoon depending on where you are in the world). These cheesecakes are super easy to make. The hardest part is the planning ahead and pulling out the ingredients that need to get to room temperature before preparing the cheesecake batter, I kid you not! It takes about eight minutes from start to the time when you pop them into the oven to bake in a water bath.
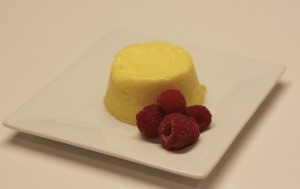
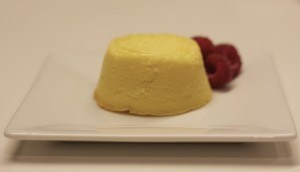
The cheesecakes are creamy and rich but not heavy. When we baked these cheesecakes in culinary school they were easily hands down favorites on the pastry section of our course, but then again I am sucker for a great cheesecake! I like to serve these with fresh berries so they are perfect for this time of year when berries are almost at their prime.
Notes: I like to use a 6-cup silicone cupcake pan as it makes the removal of the cheesecakes a snap. You can also use individual aluminum cups but you have to butter the cups extremely well to get the cheesecakes out in one beautiful piece.
Tips: When I use a water bath, I always make sure to put the containers in the oven first and then pour the water in separately to minimize spilling and scalding. Be careful when you are removing the water baths from the oven.
Mini Mascarpone Cheesecakes, makes 6 individual cheesecakes
Recipe reproduced from ICE’s Culinary Arts degree program
Softened unsalted butter for the cups
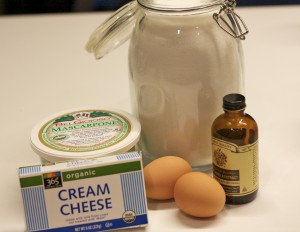
1 box cream cheese, room temperature (8 oz)
2/3 cups granulated sugar (4.5 oz)
½ cup mascarpone, room temperature (¼ 500g container)
2 large eggs, room temperature
¼ tsp vanilla extract
1. Heat oven to 300ºF. Butter the cups that you will be baking the cheesecakes in (see Notes). If using aluminum cups, line the tops with buttered parchment.
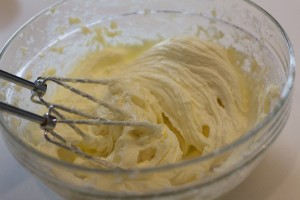
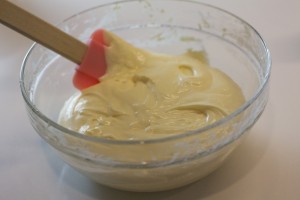
2. Beat the cream cheese and sugar on medium speed until well combined, about 2 minutes. Scrape down the mixture.
3. Add mascarpone and beat again on medium speed for 1 minute. Add eggs 1 at a time, scraping down after each addition. Add the vanilla extract and beat until the mixture is light and fluffy.
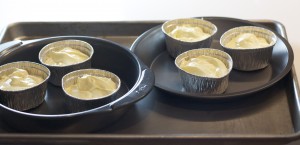
4. Pour into the prepared cups. Shake the cups gently to try level the batter so the cakes cook evenly (the ones shown below are pre-leveling).
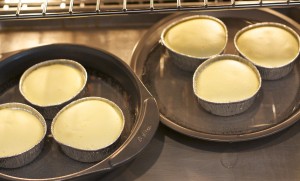
5. Bake in a water bath (see Tips) for 30 minutes, until the edges are set and the top of the cake when pressed gently feels set. Chill to fully set cheesecakes.
6. Serve chilled with berries.
Fig, Walnut and Baby Mozzarella Salad with a Sherry Vinaigrette
Posted on 26 April 2011 | 2 responses
As Valentine’s Day fell on a Monday this year we didn’t quite have the time for a long drawn out meal. We were in the midst of moving and I was still feeling the effects of the dreaded first trimester 🙂 ! We split the meal over two days and had these delicious Smoked Gouda Gougéres to start and then some freshly made lobster pasta with a slow cooked vodka sauce which I covered in finely grated Parmigiano Reggiano and torn basil. Sadly, I did not slave over the pasta dough and the sauce as I probably should have done but in a pinch I bought it from Fairway Market in Red Hook, possibly one of my favorite places on Earth!
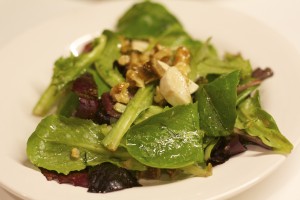
The second night I got a little more involved and made this salad with some Mini Mascarpone Cheesecakes for dessert (recipe coming soon). I had been craving figs but I was unable to find any fresh ones as figs come into season in late July before reaching their peak in September. I made do with some dried Turkish figs I found at a gourmet deli near our apartment. These sweet dried figs, which have a little ‘chew’ to them, combined with soft, milky mozzarella, crunchy walnuts and a tangy, silky sherry dressing over mixed baby lettuce, made the perfect meal.
A quick sneak peak at the heart shaped lobster ravioli with slow simmered vodka sauce covered in lashings of Parmesan and torn basil.
I’m not normally so mushy as to get heart shaped pasta… Let’s blame the preggo hormones, shall we?
Tip: If I were not currently with child I would have added some chopped prosciutto to this in a heart beat. I advise you, if you are able, to do the same!
Notes: this dressing can be tangier or sweeter depending on your taste. Just adjust the mustard and honey until you have it exactly the way that you like it.
Fig, Walnut and Baby Mozzarella Salad with a Sherry Vinaigrette, serves 2 (makes 1/4 cup dressing)
1 1/2 tbsp sherry vinegar
3/4 tsp honey
1/2 tsp Dijon mustard
3 tbsp olive oil (not extra virgin olive oil)
Salt and freshly ground black pepper
4 dried figs, Turkish or Californian if you can, quartered
8 baby mozzarella balls, quartered
1/3 cup walnut halves, chopped coarsely
3 cups mixed baby lettuces, washed and dried
1. In a medium sized bowl, combine vinegar, honey, mustard and a sprinkle of salt and pepper with a whisk. Continue to whisk while slowly adding the olive oil in a thin stream. Whisk until the mixture thickens. Taste and season with more salt and pepper if wanted. (See Notes)
2. Pour vinaigrette into a small milk jug/gravy boat/measuring cup, and add the cut figs, mozzarella, walnuts and lettuces to the bowl. Using tongs or a fork and a spoon, toss together. Pour over the dressing in a thin stream while tossing until you have enough to coat the leaves. Reserve any leftover dressing for another salad, another day.
Cider-Braised Normandy Pork
Posted on 20 April 2011 | 7 responses
Even though this dish is named Normandy Pork after a northern region of France, it just screams England to me. Maybe it’s the fact that in England we love to use apples in our savory dishes as well or it could also be that this dish was made at a lot of dinner parties when I was at university in St Andrews. It was so commonly made as it is unbelievably easy. I know I say that a lot but this dish really is a quick throw-it-in a pot dish and you can let it bubble away gently, filling your whole kitchen with a wonderful aroma. The sides, which I suggest below, are also impossibly easy. Leaving some time to get yourself and your kitchen looking perfect! It is also the sort of meal which is fancy enough for a dinner party (to make larger quantities just double, triple etc the recipe) or easy enough for a quick, weeknight meal.
Normandy cuisine is known for its’ use of locally grown apples and the resulting cider. The famous cider is more dry with a kick (as most serious cider is) rather sweet and round. If you can get your hands on a bottle to cook with and to enjoy a chilled glass of alongside the meal, you won’t be disappointed.
This really is a dish for all seasons which is very handy especially at the moment when the weather here in New York can’t decide if it wants to be winter with Arctic winds or high summer with welcome, unexpected sunny days. For those chilly or rainy days, I like to serve this with Roast Potatoes and asparagus or broccoli and on those lovely warm days, I make it easy on myself by slicing a French baguette and serving it with salted creamery butter and a green salad with an easy, light vinaigrette. Bon appetit!
Notes: Currently I am making this with apple juice as I am not entirely convinced that alcohol does evaporate from stews and braises (I know, I know, I am paranoid and over-thinking it) but please do switch this for some cider (hard rather than spiced).
If you have some on hand, you can use fresh thyme leaves rather than dried. Using the 3 fresh to 1 dried substitution, add 3/4 of a teaspoon of fresh thyme leaves to your pot.
Normandy Pork Stew, serves 4 as a main course
2 tbsp all purpose flour
Salt and pepper
1 lb pork loin, chopped into 1″ pieces
1 tbsp canola oil
2 tbsp unsalted butter, divided
½ large onion, diced
1 Granny Smith apple, peeled and diced
1 cup cream
¼ cup hard cider/apple juice (see Notes)
1 cup chicken stock
1 bay leaf
¼ tsp dried thyme (see Notes)
1. Place flour into a flat bowl or a plate. Season with salt and pepper. Toss pieces of pork loin in flour. Set aside.
2. Heat canola oil and butter in a large saute pan over medium high heat. Once hot, add floured pork and cook for 5-8 minutes until browned on all sides. Remove pork from the pan and set aside on a clean plate.
3. Add 1 tbsp butter to the pan and allow to melt. Add onions and saute for 3 minutes, stirring frequently to scrape up any browned bits from the pork. Add apple and cook for 3 minutes until both the onions and the apple are softened. Add cream, chicken stock, hard cider/apple juice, bay leaf, dried thyme and browned pork and allow to simmer gently for 30-45 minutes, until the sauce has reduced and thickened. Season with salt and pepper to taste.


