Tomato Soup Cupcakes with Mascarpone Frosting
Posted on 2 November 2010 | 15 responses
When it comes to shortcuts in cooking you often sacrifice on taste and overall quality of the finished product, so I rarely use them. There are certain tasks that are just plain time consuming and beyond frustrating to complete. Juicing key limes for Key Lime Pie is one, and another is grating carrots for Carrot Cupcakes (I even grumble about both of them in their posts!).
Even though I describe squeezing key limes as a task I wouldn’t wish on my worst enemy, aside from the occasional squirt in the eye, I have never inflicted pain upon myself. The same cannot be said for grating carrots (or grating anything actually). I have a severe lack of attention and find myself unable to focus on mundane tasks so I will often attempt to multitask. At any given moment while grating I can be attempting to set the oven, make a new playlist, replying to an email… you get the picture. This has lead to some unfortunate accidents where the food I am making has become a little too personal if you get my drift! This result in my having to begin the task over again.
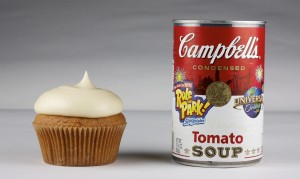
Adding tomato soup to these cupcakes is an unexpected shortcut for carrot cake cupcakes! When I fed them to the hubbie, he guessed that they were carrot cake. The seasonal spices in both are very similar and the texture of these cupcakes are fluffy and light just like my Carrot Cakes. It also saves time and keeps your knuckles intact – both bonuses!
It may sound odd but do give they a try. You will not be dissapointed!
Notes: If you want a more savory cake, replace the cinnamon, nutmeg, and allspice with 1/2 tsp. freshly ground pepper and increase the salt to 1/4 tsp.
Tomato Soup Cupcakes, makes 12 cupcakes, recipe from Baked Explorations: Classic American Desserts Reinvented
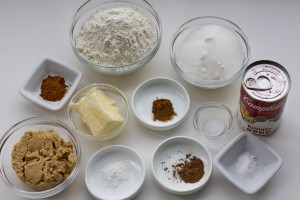
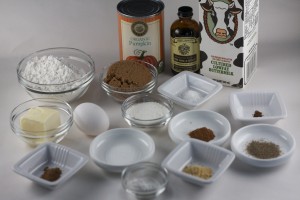
1 (10¾ oz.) cans condensed tomato soup, preferably low sodium
1/2 tsp. baking soda
1 3/4 cup all-purpose flour
3/4 tsp. cinnamon (see Notes)
1/4 tsp. freshly grated nutmeg (see Notes)
1/4 tsp. ground allspice (see Notes)
1/8 tsp. salt
1/2 tsp. baking powder
6 tbsp unsalted butter, at room temperature
1/2 cup granulated sugar
1/2 cup firmly packed light brown sugar
2 large eggs
1. Preheat oven to 325°F. Line a twelve-cup cupcake pans with paper liners.
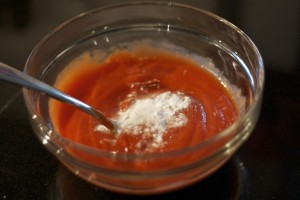
2. In a large bowl, sprinkle baking soda over the tomato soup and stir well. Set aside.
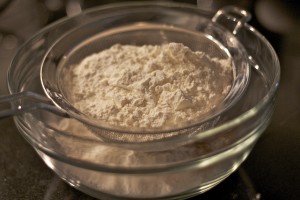
3. In a medium bowl, sift together flour, cinnamon, nutmeg, allspice, salt and baking powder.
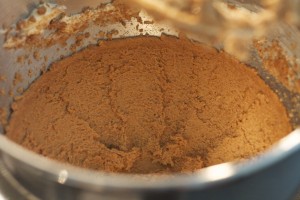
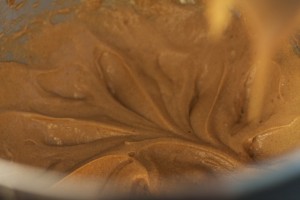
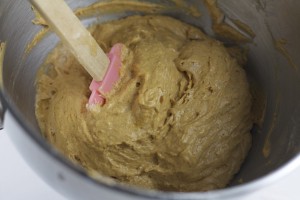
4. Beat butter and sugars together on medium speed until fluffy, three to four minutes. Add eggs, one at a time, and beat until just combined. Scrape down the sides and bottom of the bowl and beat for a few seconds. Turn the mixer to low. Add the flour mixture in three parts, alternating with tomato soup, beginning and ending with flour mixture. Scrape down the bowl again, and mix on low speed for a few more seconds. Fill the prepared cupcake papers about three-quarters full. Bake the cupcakes 25-28 minutes or until a toothpick inserted in the center of a cupcake comes out clean.
5. Allow the cupcakes to cool for 30 minutes in the pan, then turn them out onto wire racks to cool completely.
Mascarpone Frosting
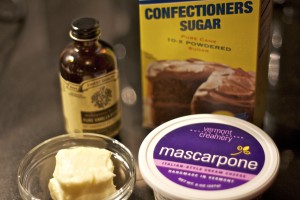
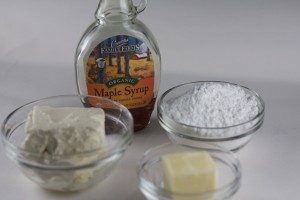
6 tbsp unsalted butter, softened
6 oz mascarpone cheese, softened
2 cups confectioners’ sugar, sifted
1/2 tsp pure vanilla extract
1. Beat softened butter until it is completely smooth (it’s easiest to do this in a standing mixer). Add mascarpone and beat until combined.
2. Add sugar and vanilla and beat until smooth. Be careful not to overbeat; this will cause the frosting to lose structure. (At this point, you can tightly cover the frosting and refrigerate overnight if you want. Let it soften at room temperature before using.)
3. Fit a pastry bag with the largest tip, fill with frosting, and cover each cupcake with a big mound. If you do not have a pastry bag, use an ice cream scoop with a release mechanism; scoop the frosting and dispense it onto the top of the cupcake. You can also use an offset spatula to frost the cupcakes.
4. Refrigerate any leftovers in an airtight container for up to three days. Bring the cupcakes to room temperature before serving.
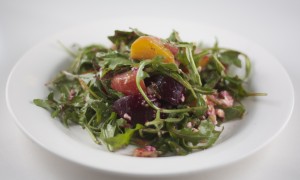
Roasted Beet, Blue Cheese and Walnut Salad with Arugula
Posted on 29 October 2010 | 6 responses
Until last summer I thought that there was one type of beet. The large bright purple bulb that haunts your dreams as a small child if you have any German relations (I can say that because I do have German relatives), served chilled and pickled with a tangy vinegar sauce. They were honestly the stuff of nightmares to me as a child. Thankfully I have grown up since then and last summer I signed up for our local CSA. Even though I know CSAs are pretty crunchy and very predictable for a girl living in Brooklyn, I decided to go full force into the cliche.
Almost instantly our fridge was inundated with far more lettuces, dark green vegetables and varieties of eggplants than I knew possible (we ate eggplant parmesan and baba ganoush about twice a week) and of course beets! Piled up and spilling out of our fridge. As one of my friends said, it looked as though a greenmarket had exploded in our fridge.
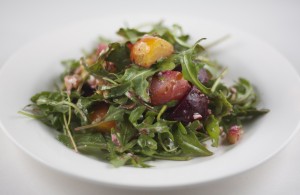
Needless to say, I had to get creative with ways to cook all the vegetables that I had so little experience with. Sometimes the best is also the most simple. Roasting beets with a sprinkle of salt and a little butter brings out their sweetness and their flavor. Combining this with crumbled Gorgonzola, chopped toasted walnuts and peppery arugula with a wholegrain mustard is a fast and easy yet beautiful salad full of color. If you serve it when the beets and the walnuts are still warmed for the oven it is perfect for the season.
I roast the different varieties of beets separately as they leach their color as they bake. Having them in different foil pouches keeps their bold colors so they are all distinguishable in the salad.
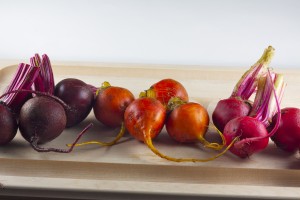
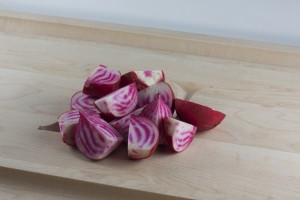
I use a mixture of beets so the salad has a lot going on, in tastes, texture and visually. The three varieties I recommend are baby beets (the same as regular beets but smaller and slightly sweeter), golden beets and candy beets. Candy beets (shown below) are beautiful when sliced open, especially through the middle. When they are roasted the colors do blend a little but you can also use them raw, sliced very finely, in salads to get that great concentric circle design. The candy beets shown below are sliced from top to root.
Notes: In the directions for the vinaigrette I state that you should whisk the dressing until it is emulsified. An emulsion is simply a mixture of two liquids that do not want to blend together being mixture together, in this case oil and vinegar. When they are mixed they form as unstable emulsion which means that it will divide up again into the two separate parts. Mustard acts as a stabilizer and helps the dressing stay together (egg yolk, garlic and some nut butter also work).
Roasted Beet, Blue Cheese and Walnut Salad with Baby Arugula, serves 2 as an appetizer
6 beets (preferably 2 golden, 2 candy and 2 baby), scrubbed thoroughly
1 1/2 tbsp unsalted butter
1/2 whole walnuts
1/2 cup blue cheese (preferably Gorgonzola), crumbled
2 cups arugula, washed and dried thoroughly
1 recipe of Mustard Vinaigrette (see below)
1. Heat oven to 350ºF. Trim the beetroots by cutting the roots and tops off. Tear off three 4 by 4 inch squares of foil. Keeping the different variety of beetroot separate, place 2 beetroot in each square. Add 1/2 tbsp of butter to each set and sprinkle with kosher salt. Make a pouch out of the foil and place on a baking tray in the oven. Roast for 60-90 minutes until a knife can slide through them easily.
2. When the beetroots are tender enough, pull them out of the oven and open the foil pouches to release the steam and let them begin to cool. Place the walnuts on the baking sheet and pop in the oven until they are lightly toasted, about 7-8 minutes.
3. When the beetroots are cool enough to touch, begin to rub the skins off with paper towels. You can do this by picking them up and surrounding them with a paper towel and rubbing the beetroot lightly, the skin should slide right off. Cut each beetroot, from top to bottom, into 4 or 8 segments depending on the size of the beet. Remove walnuts from the oven and chop into
4. In a large bowl, add the cut beets, crumbled blue cheese, arugula and chopped walnuts. Drizzle the mustard vinaigrette over and toss the salad together. Serve immediately.
Mustard Vinaigrette
1 1/2 tbsp white wine vinegar
1 tsp whole grain mustard
3/4 – 1 tsp clover honey
2 – 2 1/2 tbsp olive oil
Salt and pepper
1. Put vinegar, mustard and honey in a small mixing bowl. Using a whisk, mix the ingredients together well. Continuing to whisk rapidly, begin to pour the oil into the bowl in a slow but steady trickle, until you get the desired consistency. Continue to whisk until the dressing is emulsified (see Notes). Set aside until the salad is assembled.
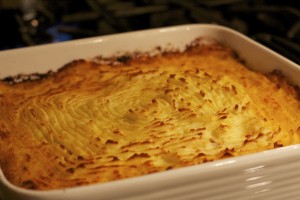
Traditional English Shepherd’s Pie
Posted on 27 October 2010 | 11 responses
I know this is going to come as a surprise to most of you but… shepherd’s pie is made with lamb and not beef. I know, I know, I know… You have spent your whole lives believing otherwise but no. Surely the clue is in the name? Shepherds look after sheep ergo shepherd’s pie is made of lamb. And for those of you who just had your mind absolutely blown, the pie you thought was called shepherd’s pie (the one made with beef) is actually called cottage pie! Who knew?!?
With all that said, I have no doubt that everyone here can imagine just how satisfying a real English shepherd’s pie is. There is nothing quite like it for hitting the spot of a cold miserable fall or winter evening. This dish reminds me so much of home. My mum used to always make it for me growing up and even though I have haphazardly pulled this dish together before, I have not focused and tried to create an exact replica of mum’s awesome shepherd’s pie – until last week. My dad and sister were in town so I suppose home was on my mind a lot and I was inspired to cook this wonderful pie. I am happy to say I nailed it. This tasted absolutely divine and just like mum’s!
The beauty of it is you can make the whole thing with minimal interaction with your kitchen, leaving you to do fun indoor winter activities like puzzles or board games (if anyone sees my husband please tell him these things are fun, thank you!). Literally all you have to do is spend ten minutes prepping everything; leave the sauce to simmer while the potatoes are boiling, mash them quickly and pop it in the oven. Half an hour later, viola! A beautiful meal, perfect for an evening in.
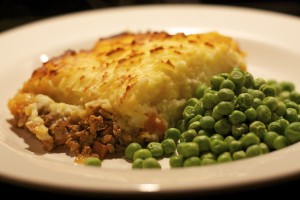
Another amazing thing about this meal, all the ingredients are commonplace ones that I usually have in my fridge and pantry, like celery, carrot, onion, stock, tomato puree, with the exception of the pound of ground lamb (preferably antibiotic free), which you can get from your local butcher or grocery store. I also suggest serving it with frozen peas (you can of course use fresh if you are so inclined), this not only is a throwback to childhood suppers but is the easiest vegetable in the world to add. I think all around this makes the perfect midweek meal. Enjoy!
Shepherd’s Pie, serves 4-6 as a main course
2 tbsp unsalted butter
1 medium onion, chopped
1 celery stalk, chopped
1 carrot, peeled and chopped
1 lb minced (ground) lamb
1 1/2 – 2 tbsp tomato paste
1 cup beef stock
1 splash Worcestershire sauce
5 large Yukon Gold potatoes, peeled and chopped into 1 inch pieces
1 tbsp unsalted butter
2 tbsp cream
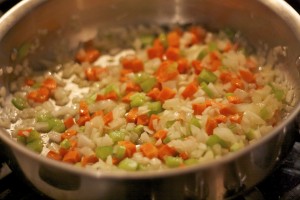
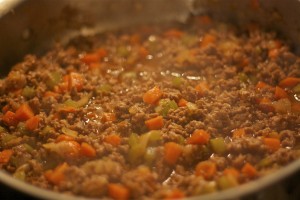
1. Melt butter in a large saute pan over medium high heat. Add onion, celery and carrot and cook for 5 minutes stirring to prevent sticking or burning, until the vegetables soften.
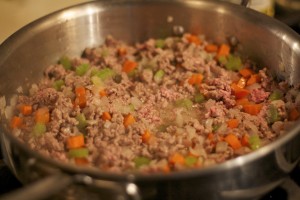
2. Add lamb and break up any large pieces with the back of a wooden spoon, stirring regularly, cook until browned about 4 minutes.
3. Add tomato paste and stir through vegetables and lamb. Add stock and Worcestershire sauce, simmer gently for 30 minutes. Season with salt and pepper.
4. Meanwhile, as the mixture is simmering, place potato pieces in a large saucepan and add enough cold water so that they are under an inch of water. Add 1 tsp of kosher salt to the water. Bring to a boil over high heat and cook until fork tender. Drain potatoes. Pour potatoes back into the saucepan and mash them, using a hand held masher. Add butter and cream and season with salt.
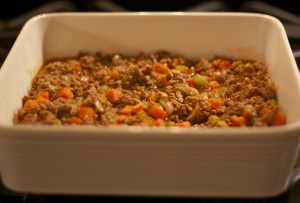
5. Pour the reduced lamb mixture into a large baking dish (I used this 2 1/2 quart Gordon Ramsey by Royal Doulton roaster and it fit perfectly), smooth out with a spoon.
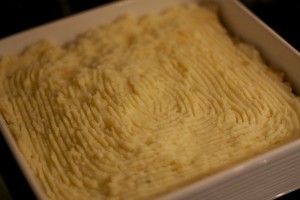
6. Top with the potatoes and by dragging a fork gently across the top, create a pleasing pattern.
7. Bake in oven for 35 minutes until the sides are beginning to get slightly orange from the sauce beneath. Put the whole dish on the top rack of the oven under the broiler (or oven grill) and broil for 3 minutes, until the top begins to brown. Remove and serve with peas.
Mini Pumpkin Cupcakes with Maple and Cream Cheese Frosting
Posted on 26 October 2010 | 4 responses
I made these little cupcakes for a party we were attending over the weekend. The party was a P Party and the theme was all about pumpkin! We had to wear as much orange as we could muster and not say the word ‘pumpkin’ once we were inside the doors. If we did not turn up in an orange outfit and if we did say the word there would be forfeits! As I, like most people, own barely any orange clothing (bar some cute orange ballet flats and orange nail polish, does that count?) and fearing the wrath I thought I wise to make these cupcakes.
Thankfully they were well received and even when I did say the word pumpkin by mistake I didn’t have to do a forfeit! So I advise you to take these mini cupcakes to all situations where you feel you have to curry favor… They just might help you out!
These cupcakes are light and fluffy unlike lots of pumpkin containing foods. There have only been a few occasions where I have wanted to continue eating something containing pumpkin past the first bite but these may have converted me for good. The pumpkin and the spice taste exactly how fall should taste! The maple cream cheese frosting is the perfect accompaniment, it isn’t overly sweet but it adds moisture and a creaminess to the cupcake. Another perfect thing about them, the fact that these cupcakes are mini means that you can eat a whole lot more of them (wait! That isn’t how it works?!?)
As the party was part P party part fancy dress Halloween, I decided to dye the maple cream cheese frosting an orange color to embrace the festivities. I added 4 drops of yellow food color and 2 of red to get the shade of light shade of orange that I decided to go with. You can of course leave them the light cream color the frosting is naturally (which I will do when I make them again closer to turkey day) or you can make them a bolder color. When mixing up the food coloring, make sure to add a drop at a time and combine thoroughly before adding more to make sure there isn’t dye at the bottom of the bowl.
Notes: This recipe can also be made into 17-18 cupcakes or a two layer cake by following the directions below.
For the cupcakes – Place 17 to 18 cupcake liners in a cupcake baking tray. Double ingredients and follow the directions below. Bake for 20-25 minutes (until a toothpick comes out clean).
For the double layer cake – butter two 8 by 2 cake pans, line with parchment circles, butter the parchment and lightly flour, tapping out the excess flour. Double the ingredients and follow the directions below. Divide the batter between the two cake pans and rap the pans on a counter to remove any air bubbles. Bake for 30-40 minutes (until a toothpick comes out clean). Cool in pan for 10 minutes, then invert the cakes onto racks and remove parchment paper. Completely cool. After assembling and frosting the cake (in between layers and then top and sides), refrigerate for 30 minutes to allow the frosting to set.
Mini Pumpkin Cupcakes with Maple and Cream Cheese Frosting, makes 36 mini cupcakes (see Notes)
Adapted from Smitten Kitchen‘s cupcakes and David Leite‘s two layer cake
Mini Pumpkin Cupcakes
1 cup cake flour
1 tsp baking powder
1/2 tsp baking soda
1/2 tsp ground cinnamon
1/2 tsp ground ginger
1/4 tsp ground nutmeg
1/16 tsp ground cloves
1/4 tsp fine salt
1/8 tsp freshly ground pepper
1/4 cup buttermilk
1/2 tsp vanilla extract
4 tbsp unsalted butter, room temperature
1/2 cup firmly packed dark brown sugar
2 1/2 tbsp sugar
1 large egg
1/2 cup plus 2 tbsp canned pure pumpkin (not pumpkin pie mix)
1. Heat oven to 350ºF. Line two and a half 24 cup mini muffin baking pans with mini cupcake papers. Sift flour with baking powder, baking soda, cinnamon, ginger, nutmeg, cloves, salt and pepper into a medium bowl. Stir vanilla extract into the buttermilk. Set both aside. In the bowl of a stand mixer, mix the butter and the sugar together on medium speed until light and fluffy, about 5 minutes. Scrape down the sides of the mixer.
2. Continue to mix at medium speed and add the egg. Scrape down the sides again.
3. Add the flour in three additions, alternating with two additions of the buttermilk and vanilla, so you begin and end with flour. Beat in the pumpkin until the mixture is smooth. Remove bowl from stand mixer and stir the mixture gently to make sure the all the flour and pumpkin are combined.
5. Using a teaspoon begin to scoop the batter into the prepared baking trays until they are 3/4 way full. Bake in oven for 16 minutes, check with a toothpick. If the toothpick comes out clean, remove from oven and let cool for 5-10 minutes in baking trays before removing to a cooling rack to cool completely.
Maple Cream Cheese Frosting
1 8oz cream cheese package
4 tbsp unsalted butter, at room temperature
2 tbsp maple syrup
1 cup confectioners’ sugar
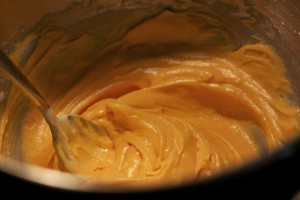
1. In the bowl of a stand mixer, mix the cream cheese, butter and maple syrup together on medium speed until smooth and fluffy, about 5 minutes. With the mixer on low speed begin adding the confectioners’ sugar continuously. When it is all added and combined (any sooner and the sugar will fly everywhere!), turn the mixer to medium high and whip the frosting for 1 minutes.
2. Scoop into a piping bag (or ziploc bag) fitted with a #16 tip (a small flower tip by Wilton) or equivalent. Frost the cooled mini cupcakes and serve!
Roasted Garlic Mashed Potatoes
Posted on 22 October 2010 | 2 responses
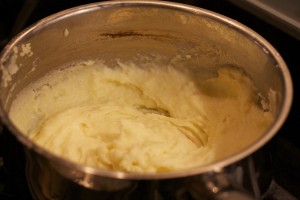
These potatoes are just the thing when you want something a little different from regular mashed potatoes. I make Creamy, Buttery Mashed Potatoes all the time but sometimes feel like mixing it up. With almost no extra work, I am able to whip these up in the same length of time. Roasting the garlic tastes almost the same amount of time as boiling the potatoes and requires no active involvement on your part. Simply bundle the garlic up in some foil (almost like the bag on the end of a bindlestick) and pop it into the oven, then rice the softened cloves with the potatoes and viola!
Adding roasted garlic to my mash also helps to bump up my vegetables count for the day. Garlic has been linked with helping prevent heart disease, cancer, lowering “bad” cholesterol levels and removing the plaque from around your aorta (which I am terrified of after reading this article), see Notes. When garlic is roasted it takes on a sweeter, more mellow taste than raw or sauteed garlic but still contains all the nutrients you want it to.
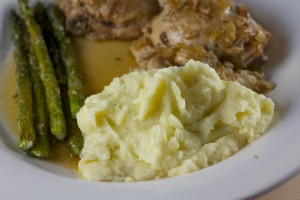
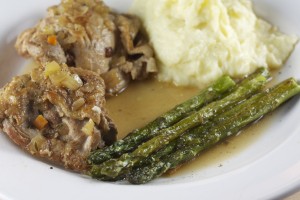
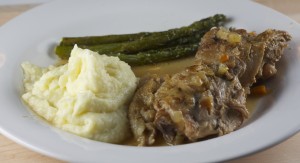
I served this with French Style White Wine Poached Chicken Thighs and Oven-Roasted Asparagus for a delectable fall meal.
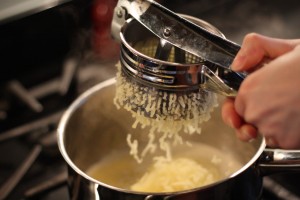
Notes: Due to space constraints I do not like to have utensils or tools that only do one job but this tool has changed mashed potatoes for me. I had never seen a potato ricer until a couple of years, having always used a regular masher, but now, unless I am making lumpy mashed potatoes for a texture reason, I always use a ricer. A ricer is basically a device that squeezes the potatoes through small holes so the streams of potato are no thicker than a grain of rice (see below for photo). Ultimately, it produces the smooth, silky texture that makes this mashed potato recipe so good!
To make this dish completely heart healthy you can cut down on the butter and cream. Using olive oil is also a viable switch – I will post a recipe for an all round healthier mashed potatoes if anyone wants one.
Roasted Garlic Mashed Potatoes, serves 2-3 as a side
1/2 head of garlic
1 tsp olive oil
Kosher salt
3 large Yukon Gold potatoes, washed, peeled and cut into 1 inch chunks
2 tbsp unsalted butter
2-4 tbsp heavy cream
1. Heat oven to 400ºF. Place garlic on a 4×4 inch piece of foil. Drizzle olive oil over the garlic and sprinkle with salt. Gather the sides of the foil up to create a bundle around the garlic and pop it in the oven. Roast for 20 minutes, until the garlic is soft.
2. Meanwhile, place potato pieces into a large saucepan. Cover with water until the potatoes are under 1 inch of water, add 1 tsp kosher salt to the water. Heat over high and bring to a boil, continue to boil until the potatoes are fork tender, about 15-18 minutes.
3. Drain potatoes and place into a bowl. Add butter and cream to the pan you just used and heat over low heat. Using a ricer (see Notes), begin to puree the potatoes, adding the roasted garlic cloves to the first batch of potatoes. Continue to squish the potatoes through the ricer, making sure to scrape down the sides to get as much through as you can. Stir the cream and butter into the potatoes, adding more if necessary. Season with salt and serve hot.
Roasted Asparagus
Posted on 19 October 2010 | Comments Off on Roasted Asparagus
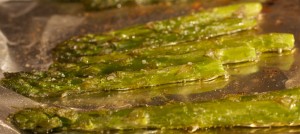
Even though the asparagus season should be in spring, we are still (somehow) able to get tender asparagus stalks at this time of year. Recently they have been on sale at most grocery stores and I thought I would take advantage of the lower price points. Asparagus is a versatile vegetable to cook. You can add it to stir-fries, steam them, boil them or roast them. All of them are simple but I think that roasting is the method that brings out the flavor in the asparagus. It adds a nutty element without having to add the commonly used pine nuts, almonds or hazelnuts.
Asparagus is one of those super vegetables that contain every vitamin and mineral under the sun (vitamin A, vitamin B6, vitamin C, vitamin E, vitamin K, calcium, magnesium and zinc, thiamin, riboflavin, rutin, niacin, folic acid, iron, phosphorus, potassium, copper, manganese and selenium – to name a few!). They are chock full of antioxidants, high in dietary fiber and protein, while being low in sodium and calories. Basically something you should try to eat about six times a day!
Boiling, steaming and even blanching can leach all these goodies out of the asparagus but roasting helps keep them in… plus one for roasting.
I served this with a classically French style White Wine Poached Chicken and Garlic Mashed Potatoes.
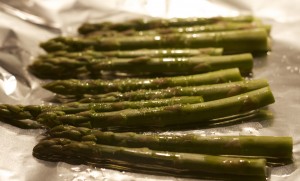
Notes: To trim the asparagus and separate the tender asparagus tip from the woodier stalk, snap the asparagus with two hands at the point where the woodier stalk begins. Gently try bending the stalk up its’ length, when you reach the point to snap the stalk will ‘give’ a little more and be easy to snap (after the first stalk it should become much more instinctive). You can either trim the rest of the stalks to the same length or repeat using your hands.
Roasted Asparagus, serves 2 as a side
10 aspragus spears
1/2 tbsp olive oil
A large pinch of fleur de sel
1. Heat oven to 400ºF. Line a baking sheet with foil. Wash and trim asparagus (see Notes). Toss the spears with the oil and lay them in one flat layer on the prepared baking sheet. Sprinkle with the salt.
2. Place sheet in oven for 15-17, until the spears are slightly wrinkled at the ends. Remove from oven and serve on their own or tossed with a light vinaigrette.
White Wine-Poached Chicken Thighs
Posted on 18 October 2010 | 12 responses
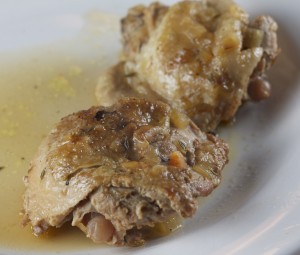
When it comes to fall comfort food, you can’t go go wrong with this classically French chicken dish. As it slowly cooks, it fills the house with an amazing scent. Everything about this dish is textbook French cuisine. Poaching chicken is one of the most common cooking methods in France as it helps to keep the meat tender but still full of moisture so when it comes out of the poaching liquid, the meat falls off the bone.
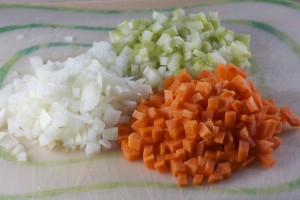
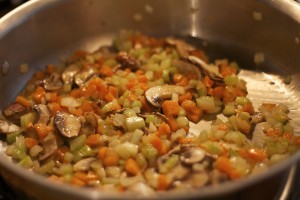
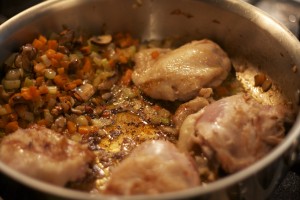
The mixture of onions, celery and carrots is called mirepoix by the French and is the most commonly used flavor base in French food (it is similar to the Cajun “holy trinity” of onions, celery and bell peppers, or the Spanish sofrito or Italian soffritto). By sauteeing the vegetables before adding the chicken, you release some of the sweetness and flavor from them. I threw in a couple of cremini mushrooms I had left over from the Truffled Mushroom Risotto to add another meaty element. You can also steep some dried porcini or morels in boiling water and use them instead for that umami flavor.
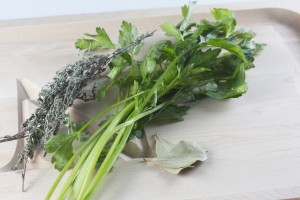
I also threw in some classic herbs: parsley, thyme and bay leaves. I tied them together with butcher’s twine to form a very quick bouquet garni. These three herbs form the most basic of the bouquet. You can also switch this up by adding other herbs, such as chervil, rosemary, or tarragon. Peppercorns are also frequently added but they you have to switch the twine for some cheesecloth to make a little sachet.
I served this with Roasted Asparagus and Garlic Mashed Potatoes. I strained (well the hubbie did really) the cooking liquid and ladled some over the top to act as a sauce and saved the rest to used a fortified chicken stock. It will contain all of the great flavors of the herbs, mirepoix, wine and chicken and cut down on the time needed to build flavor.
French-Style White Wine Poached Chicken Thighs, serves 2 as an entree
2 tbsp unsalted butter
2 stalks celery, small dice
1/2 Spanish onion, small dice
1 large carrot, peeled and cut into small dice
4 cremini mushrooms, thinly sliced
4 bone-in, skin-on chicken thighs
2 tbsp plain flour
1 cup white wine
2 cups water
2 cups chicken stock
2 bay leaves
10 thyme stalks
5 parsley stems
Butcher’s twine
1. Melt butter in a large saute pan over medium heat, as it is foaming add carrot, celery and onion. Cook until soft, about 7 minutes. As the vegetables are cooking, tie the bay leaves, thyme and parsley together using the butcher’s twine. Add mushrooms and cook until they soften, about 3 minutes.
2. Push all the vegetables to one side and turn heat up to medium high, add chicken and cook until browned all over, about 5 minutes each side.
3. Add wine and scrape any browned bits from the bottom of the pan. Add water and stock and the bouquet garni (the herbs) to the pan. Bring up to a fast simmer and turn it down to a gentle simmer. Allow to cook until the chicken is tender and the liquid has reduced by a third. Skim fat off the top occasionally.
4. Serve with a couple of tablespoons of the braising liquid over the top of the chicken. (You can strain and reuse the liquid as a fortified chicken stock for future braises.)
White Bean and Kale Soup with Sweet Italian Sausage and Gruyère Croutons
Posted on 14 October 2010 | Comments Off on White Bean and Kale Soup with Sweet Italian Sausage and Gruyère Croutons
As someone who attempts to eat healthily, kale along with cabbage, collards, and mustard greens, is a hot topic. It is a hot topic because I do not like any of those dark, leafy, bitter, chewy greens at all. I try, regularly, but I just cannot get past the taste and the texture. It also does not help having a husband who loves to get collard greens, doses them with hot pepper vinegar and tries to make me taste them, insisting that “this time you’ll like them”…!
I really do want to like kale though. It is an antioxidant, has anti-inflammatory properties and it is chock full of vitamins; beta carotene, vitamin K, vitamin C, lutein, zeaxanthin (whatever that is!), and calcium. So I did what I always do when I want to like something but just cannot seem to (see my many rants on mushrooms), I switch up the texture. I decided to try to make up my own recipe for a kale and white bean soup. I love cannellini beans, my favorite soup of all time is Pasta E Fagioli, and if anything can make me love kale it will be them.
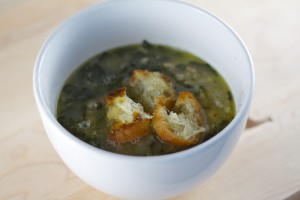
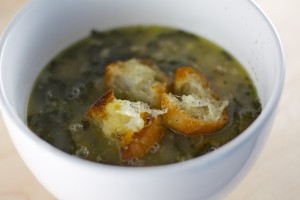
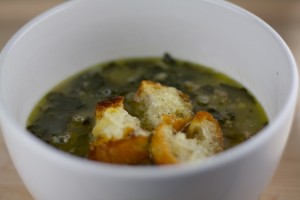
Thankfully (and to my surprise) I love this soup, even, dare I say it, the kale… After sweating the kale (see Tips below) for a few minutes and then gently simmering, produces a tender textured vegetable which is silky and soft. The beans and sausage add some protein and texture to the soup. You can leave out the sausage if you are making this for vegetarians, just double the amount of beans and switch out the chicken stock for vegetable stock.
Tips: Sweating a vegetable is basically cooking it over a low heat for a while to draw out the moisture. Adding salt helps to do this faster. There are two main reasons for sweating, either you want to release the moisture to evaporate it so you leave the lid off or like in this case, you want to get the moisture to release to add more depth of flavor to the stew, soup or sauce you are making so you leave the lid on to trap that moisture.
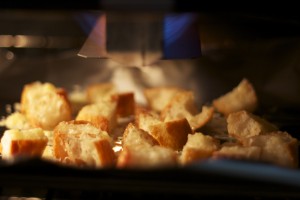
The Gruyère croutons are amazing and SO easy to make (by now you may be sensing a crouton obsession as this is my third crouton recipe posted!). I was snacking on some leftover ones even though I was full of delicious soup. The croutons add a cheesy fattiness (without adding many calories mind you) in an otherwise impeccably healthy soup. As does the optional Parmesan rind. I collect Parmesan rinds rather than throwing away as I love to add Parmesan rind to soup and stocks as it adds another level of flavor and touch of richness without actually adding fat without any extra money! It does add some salt though so taste the soup at the end to season rather than seasoning with salt and pepper throughout.
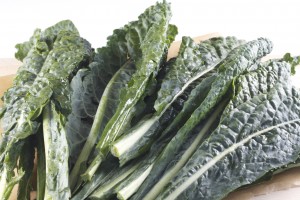
Notes: To prep the kale, wash thoroughly and dry. Using a sharp knife, cut the vein out of the center resulting in a V-shaped leaf. The easiest way it to fold the leaf in half and cut along the vein. You can also trim on either side if the center line is not straight.
White Bean and Kale Soup with Sweet Italian Sausage and Gruyère Croutons, serves 2-3 as an entree
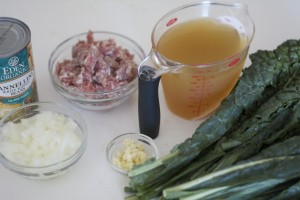
1 15oz can cannellini beans
2 cups chicken stock
1 tbsp olive oil
2 sweet Italian sausages, approx. 4oz each
1/2 Spanish onion, chopped
3 garlic cloves, crushed and roughly chopped
1/2 lb kale leaves (see Notes)
1 cup water
1 Parmesan rind, optional
Gruyère Croutons
1 mini ciabatta loaf, approx. 3oz
Olive oil
1/4-1/3 cup grated Gruyère
1. Drain and rinse beans. Blend half the beans with the chicken stock. Set aside. Make a slight cut down the casing of the sausage and peel it off. Break the filling into small pieces. Set aside.
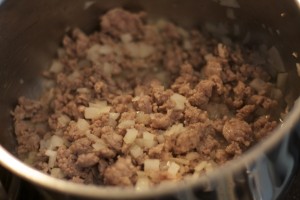
2. Add olive oil to a large lidded saucepan over medium high heat. Add sausage and cook until browned, about 4 minutes, breaking up the pieces with the back of a wooden spoon. Add onion and cook until softened, about 5 minutes. Add garlic and cook until fragrant, about 1 minute.
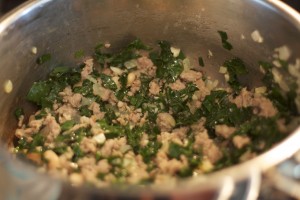
3. Add kale (see Notes) and sprinkle with a pinch of salt, sweat over medium heat for 4 minutes while the saucepan is covered with a lid.
4. Add beans, stock, water and rind and simmer for 30 minutes.
5. As the soup is simmering, make the croutons. Cut the ciabatta into 3/4inch pieces and toss with olive oil, kosher salt and pepper. Place on a foil lined baking sheet and top with grated Gruyère. Place until a broiler for 2 minutes until cheese is melted and beginning to brown.
6. Check the seasoning of the soup and add more salt and pepper if needed. Add 3-5 croutons to each bowl of soup. Serve with hot. Enjoy!
Slow Braised Hungarian-style Lamb Stew
Posted on 12 October 2010 | Comments Off on Slow Braised Hungarian-style Lamb Stew
Even though parts of the country do not seem to know this, it is October. In most parts of the country, including New York, this dish is perfect this time of year but not so much in others… Yes, Raleigh I am talking to you! The hubbie and I just spent a weekend down in Raleigh where the temp was up to 82ºF. This suited us down to the ground as the weather hasn’t been too hot (literally and figuratively) in NY recently. Seeing the beaming sun came as a surprise to both of us so I, of course, did not bring any sunscreen… BIG mistake. If you look up “English rose” in the dictionary there is a photo of me next to it, no joke (may I please refer you to my About page). Seriously pale person + freckles + sun – sun block + far too much fun running from tailgate to tailgate thus completely forgetting I needed it = pink nose and randomly pink collar bones.
So after a fabulous trip and slight heat exhaustion (among staying-up-late exhaustion) I had never been more thankful to remember that we had some stew readymade in the fridge. I had made this stew the Thursday before our trip and made a large quantity of it knowing that I would not want to have to cook a meal after getting off the plane. It may have been the best decision I ever made! This stew could not be more perfect for leftovers. The lamb gets more tender the longer you cook it but just be careful of the consistency of the vegetables, too much cooking and the carrot and sweet potatoes could become mushy.
Tips: If you are making this dish for the first time the day before you serve it, pull out the lamb pieces from the rest of the stew and refrigerate them separately, the next day reheat over a medium low heat with a splash of water and a lid on the pot (about 15-20 minutes should do it). If you are reheating a little bit that is left over, you should be fine storing it in tupperware all together and reheating it the same way.
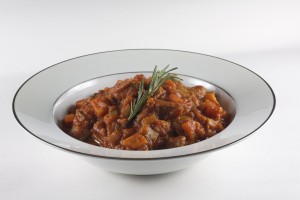
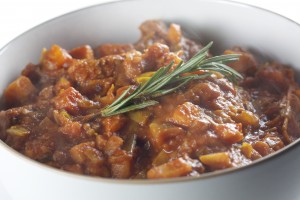
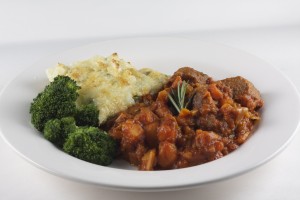
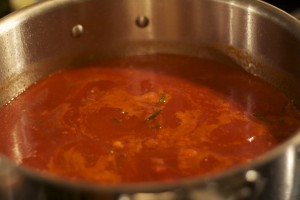
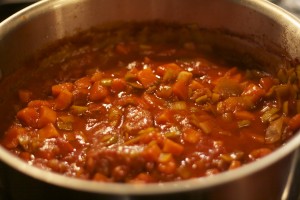
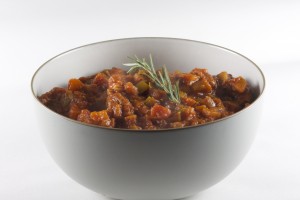
The lamb is melt-in-your-mouth tender as it slowly braises for almost two hours after being seared quickly to make sure all the moisture stays inside each piece. The Hungarian smoked and Andalusian sweet paprika work together in harmony providing their sweet and smoky flavors to the lamb and the vegetable and the cayenne pepper adds a spicy kick. The lamb and rosemary are the savory version of ice cream and hot fudge sauce, far better together than apart!
What I also love about this dish, other than the amazingly tender lamb and the perfect viscous sauce, is the amount of vegetables. I am always trying to cram more vitamins and minerals into the hubs diet (he would eat takeout everyday if left to his own devices – trust me, he did until we met!), so this is a great way to sneak them in. *P.S. not only will this work on most husbands but kids too!*
I served this with Crank’s Homity Pie, which I made with equal parts Gruyere and Parmesan rather than the aged Cheddar, and some steamed broccoli – delish!
Notes: Deglazing the pan is simply using a cold liquid to remove the browned bits (not any burnt or blackened bits though) from the bottom of the pan. In this stew you can use red, white or even rose wine. The wine is not a huge flavor component in this dish and is there to help get the browned bits of the bottom of the pan and to add a splash of acidity, so feel free to use whatever wine you have sitting around.
Slow Braised Hungarian-style Lamb Stew, serves 4 as an entree
2 tbsp plain flour
1 lb lamb stewing meat, cut into 1 inch cubes
2 tbsp olive oil
1/2 red onion, medium diced
2 cloves garlic, finely chopped
2 stalks celery, medium diced
1/2 cup wine (can use white or red, depending on what you have around, see Notes)
2 cups beef stock (can also use chicken or turkey)
1 26.45oz (750g) Pomi brand strained tomatoes
1 sprig rosemary
1 1/2 cups chopped carrots (approx. 1 very large carrot)
2 sweet potatoes, peeled and chopped
1/2 tsp sweet paprika
1/2 tsp smoked Hungarian paprika
1/8-1/4 tsp cayenne pepper
1 leek, quartered, chopped, throughly washed and dried
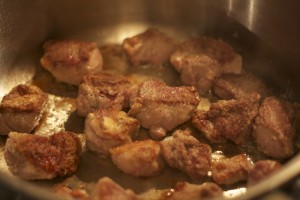
1. Place flour on a large plate and season with salt and pepper. Toss lamb in flour. Heat olive oil in a 6-qt, lidded saute pan over medium high heat. Add lamb and sear for 3 minutes on each side, until browned but not burnt. Remove lamb and set aside on a clean plate.
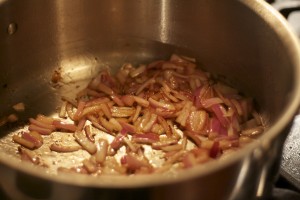
2. Turn heat to medium and add onion to pan, sprinkle with kosher salt and cook for 4-5 minutes or until they are begin to soften. Add garlic and cook for 1 minute more.
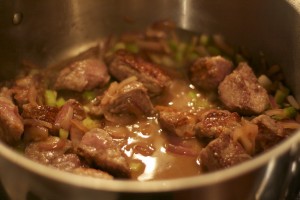
3. Add celery and cook, stirring to prevent any sticking or burning, cook for 4-5 minutes. Deglaze the pan (see Notes) by adding the wine and scraping the browned bits from the bottom of the pan. Be careful of scraping any burnt bits as they will add a bitter taste to the stew. Reintroduce the browned lamb.
4. Add stock, tomatoes and sprig of rosemary and stir. Almost cover pan with a slightly ajar lid and simmer the stew gently for 1 hour.
4. Add the carrot, sweet potato, paprikas and cayenne pepper (begin with 1/8 tsp and re-taste). Taste and season with salt and pepper and slightly more cayenne if wanted. Continue to simmer with lid ajar for another 35-40 minutes, or until the carrots and the potatoes and almost fork tender. Add leeks and cook for 30 minutes on low-medium heat, until leeks are tender and sweet potatoes are cooked through.
5. Taste again and season with salt and pepper. Serve with Creamy, Buttery Mashed Potatoes or Crank’s Homity Pie and a green veggie. Enjoy!
Prickly Pear Margarita with Homemade Infused Tequila
Posted on 8 October 2010 | 2 responses
Do you have that Friday feeling? At the end of a long week I am often so excited to sit down for a moment with a perfectly balanced cocktail. All summer long, my Friday evening drink was gin and Red Jacket Orchard’s Summer Blend of Apple and Lemon with a splash of tonic. It was in all honesty, the perfect summer drink. As summer has moved into fall, our store has stopped selling the Summer Blend to make way for new seasonal blend so I was on the lookout for a new beverage and it looks like I found one!
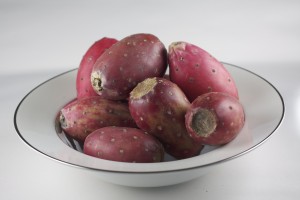
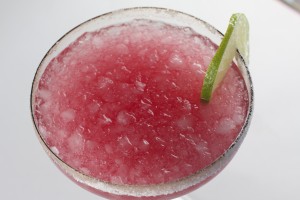
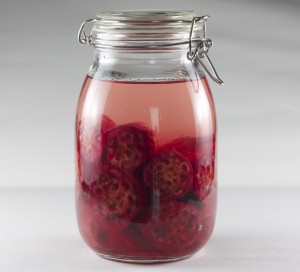
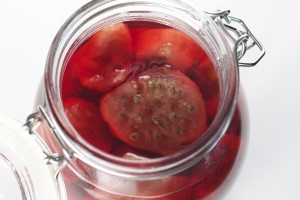
Fresh Direct recently began selling prickly pears so I thought I would try out a recipe – Prickly Pear Infused Tequila to make some Prickly Pear Margaritas. The infusing could not be easier, see recipe below, and I made the margarita with the usual proportions – 3 tequila: 2 triple sec: 1 freshly squeezed lime juice. All together so easy, a little different and my new favorite autumn drink. It’s a little too late to make for this weekend, unless you believe in Sunday Funday…, but perfect for next Friday.
Prickly pears are also called cactus pears in some parts of the country.
Tips: To make this a frozen margarita, blend recipe below with 1 to 1 1/2 cups ice until desired consistency. I like my ice slightly chunky so it doesn’t melt as quickly and dilute the drink.
To rim the glass, I used Stirrings Cosmopolitan Rimmer. I thought its’ cute pink color matched the drink perfectly!
Notes: Be cautious when peeling pears, even though the larger spines are usually removed there are almost invisible ones which will still be on the skin. I found three in my fingertips after I had finished peeling them. If you do find yourself looking like Winnie the Pooh after he has fallen in a briar patch, the best way to remove them is with tweezers (and this is going to sound weird but the best way to find them is with either another fingertip or your tongue which will be more sensitive… almost tmi I know!)
I left my tequila infusing for 2 days while we were away last weekend because I wanted to make sure it did not spoil while I was gone. When we came home I removed it from the fridge and let it sit at room temperature for 5 days and no adverse effects – it is still delicious and maybe even more pinky/red as a result!
Prickly Pear Margarita, makes 1 cocktail
6 tbsp Prickly Pear Infused Tequila (see recipe below)
4 tbsp triple sec
2 tbsp freshly squeezed lime juice
1. In a cocktail shaker add tequila, triple sec, lime juice and a cup of ice. Shake for 30 seconds, until the liquid is chilled, strain into a cocktail glass with a salted rim (see Tips) and garnish with a slice of lime.
Prickly Pear Infused Tequila, makes 1 liter
1 liter tequila (I used a medium priced brand)
8 prickly pears, peeled and halved (see Notes)
1. Place pears in a large airtight container, pour tequila over and leave to infuse for at least 2 days in the refrigerator (see Notes).
2. Strain and discard pears. Use infused tequila as you would regular tequila.
