Buttermilk Fried Chicken
Posted on 24 September 2010
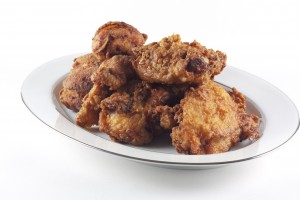
If you are after the ultimate fried chicken recipe, this is it! I do not have a long and varied history with fried chicken although I am sure many of you do; the first time I ate fried chicken was only about 6 years ago. I have, however, made up for lost time, attempting to eat as much fried chicken as my body will allow me to without my ballooning as a consequence. Sadly my severe germophobia (and food-borne-illness-ophobia) has prevented me from eating at some of the classic fast food fried chicken places, but I feel as though I give ever clean looking establishment a chance to show me what they’ve got.
The winner hands down was Thomas Keller’s restaurant Ad Hoc in Napa Valley. A few years ago, the hubbie and I went out to Napa for a spot of wine tasting and a whole lot of eating. We are at Ad Hoc on our second night and had an extraordinary pepper rubbed pork tenderloin served with a salad with yellow wax beans and a herby vinaigrette. We adored every minute of our time in the laid back home style restaurant.
The culinary pinnacle of our trip was meant to have been our lunch earlier in the day at the French Laundry but sadly we did not have the best experience (despite what the cheque would indicate) and we honestly had a far better time and meal at Ad Hoc. While chatting to our waiter throughout our dinner, we brought this up. I suppose he felt bad for us because somehow he got us on the list for the fully-booked, fabled fried chicken night later that week.
Our last meal at Ad Hoc was the perfect end to our trip and we walked across the road, back to our hotel feeling sated, slightly sleepy and the best possible kind of greasy.
I served the fried chicken with a bacon and pepper potato salad (working on the recipe) and peas (don’t ask, the hubs really wanted them and could not be swayed…)
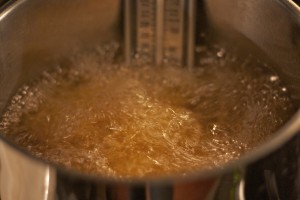
Tips: I chose thighs and drumsticks as I am a dark meat kinda gal but you can, of course, use wings and breasts. The temperature of the oil needs to be slightly higher at 340ºF and the cooking time for breasts is 7 minutes and for wings, 6 minutes.
Notes: In the original recipe it states that the chicken should be brined for 12 hours. I brined mine for 2 1/2 hours and found it to be flavorful and extremely moist. If you have 12 hours or have made in the brine in advance (you organized person, you!), then double the amount of water added to the brine from 8 cups to 16 cups. This dilution will help prevent the chicken from becoming over-seasoned.
Oil for frying always seemed to be a huge waste as I used to through it away. But it can be strained and rebottled and used again for frying other things. The only oil I would not reuse is oil used to fry seafood (unless of course it is for more seafood), as the flavor stays in the oil.
Buttermilk Fried Chicken, makes 8 pieces of chicken
4 thighs, bone in and skin on
4 drumsticks, bone in and skin on
Brine
5 lemon halves (from 2 1/2 lemons)
24 bay leaves
1/2 bunch parsley (approx 2 oz)
1/2 bunch thyme (approx 1/2 oz)
1/4 cup clover honey
1/2 head of garlic, halved through the equator
2 tbsp black peppercorns
1 cup kosher salt
6 cups water, separated (see Notes)
2 1/4 cups ice
1. Combine 4 cups water and the rest of the ingredients (except the ice) in a large pot, cover and bring to the boil. Boil for 1 minute, stirring to dissolve salt. Remove from the heat and add the remaining 2 cups water and the ice. Stir and cool at room temperature and then chill before using. (Can be made up to 3 days in advance.)
2. Brine for up to 12 hours (see Notes).
For dredging and frying
Approx. 48 fl oz peanut oil, (see Notes)
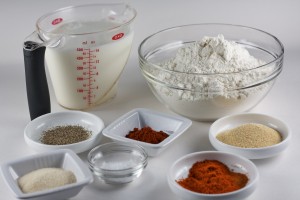
2 cup buttermilk
Coating
3 cups all-purpose flour
1/4 cup garlic powder
1/4 cup onion powder
2 tsp sweet paprika
2 tsp cayenne pepper
2 tsp kosher salt
1/2 tsp freshly ground black pepper
1. Remove chicken from brine and discard brine. Rinse pieces under cold water and pat dry with paper towels. Let the chicken sit out for 1 hour, or until it comes up to room temperature.
2. Heat oven to 400ºF. Pour your oil into a large tall pot until the oil is 2 inches deep (make sure that the oil only comes up 1/3 the height of the sides of the pot). Using a deep fry/candy thermometer, heat oil to 320ºF.
3. Combine all the ingredients for the coating in a large bowl, stirring to make sure that they are evenly mixed. Transfer half the coating mixture to a second large bowl. Pour the buttermilk into a third bowl and season with a sprinkle of salt and pepper. Set up your dipping station – the chicken pieces, one bowl coating, the buttermilk, then the second bowl of coating.
4. When the oil comes to temperature, dip as many pieces as will fit in your pot at one time, without being crowded, in to the coating, gently shaking off any excess; then buttermilk, allowing any extra to drip off; then second layer of coating, again gently removing any excess. Carefully lower the pieces into the oil.
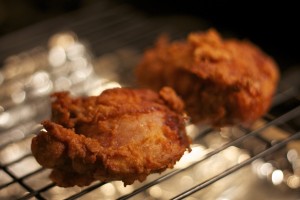
5. Fry for 2 minutes, before carefully moving the chicken pieces, continue to turn the chicken to make sure it cooks evenly. Fry for 10-12 minutes, or until the chicken is deep golden brown. Remove chicken pieces from the oil and place on a rack over a foil lined sheet pan to rest.
6. Continue to cook the rest of the chicken in batches, adding the finished pieces to the cooling rack. When you have finished cooking your chicken, turn the heat under the oil off. If you feel as though the chicken is not warm enough, place the baking sheet in the oven for 2 minutes to ensure that the chicken is hot and the crust is crunchy.
7. Let rest for a couple of minutes before serving, to allow the oil to cool slightly. Serve and enjoy!
Responses are closed for this post.


