Kansas City-Style Barbecue Sauce
Posted on 5 August 2010 | 2 responses
I am slightly crazy about barbecue. As I have mentioned before, I grew up in England and barbecue there is not so much an art form but more slabs of meat blackened over charcoal. My first foray into the world of bbq was a place in Washington DC called Rockland’s. The initial bite into the tender, juicy chopped pork with a tart but sweet ketchup-vinegar sauce on a soft potato roll was only rivaled by my last delicious moist one. My favorite part of a good barbecue sandwich is when all the juices and oils from the meat and sauce combine in the joint between the top and the bottom of the bun. The joint becomes soaked with the liquid and the potato roll is the perfect vessel for absorbing it… mmmm…
Since that first chopped pork sandwich my mind has been blown repeatedly by the variety of barbecue in the US. My husband is from the Southern Outer Banks and while he can appreciate a good barbecue sandwich from other places, he is still loyal to the vinegar based Eastern North Carolina style that he grew up with (we will have recipes for this coming in the fall). He has tried to convert me into becoming a devotee, with early morning and late night trips to Smithfield’s Chicken n’ Bar-B-Q. While he presents a convincing case, especially when I can get extra coleslaw on my sandwich, it is still a tie. South Carolina’s mustard based comes in close at 3rd but I also haven’t tried the mayonnaise based white sauce that’s been coming out of Alabama recently…
Whenever we make pulled pork at home we always separate the batch three ways from the get-go. One third my husband douses with vinegar sauce, one third is packaged up immediately for me to make Brunswick stew later and one third is left plain for everyone to add the variety of sauces we have lined up, including, but not limited to, Kansas style sauce, South Carolina mustard style sauce, a sauce that I am obsessed with called J.T. Pappy’s Flamin’ Gator sauce (it really is as good as the name!) and about 6 different hot sauces we have on rotation…
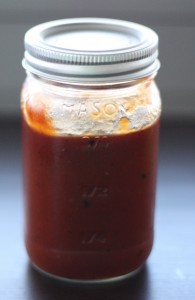
The sauce used at Rockland’s is a fairly traditional Kansas City-style sauce. The requirements of a traditional Kansas City sauce is that is be ketchup based with vinegar, molasses, brown sugar and usually with onions or onion powder and red pepper or powdered cayenne for a little heat. The recipe below is also for a Kansas style sauce and the only differences between this sauce and the Rockland’s sauce is their addition of white vinegar and molasses.
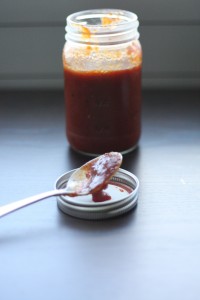
This sauce is thick and sweet but also has more that a slight hint of heat at the end. It is perfect on chicken, pork and ribs. I baked chicken thighs in this sauce last week and they turned out juicy, moist and flavored through with the sauce.
Notes: you can replace the 1/2 onion for 1/2 tbsp onion powder if needed.
Kansas City-Style Barbecue Sauce, makes 3 cups
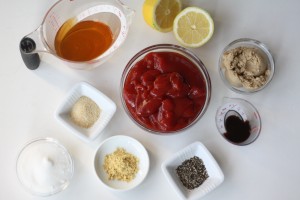
2 cups ketchup
1 cup water
1/2 cup cider vinegar
1/2 onion, finely sliced from root to tip (see Notes)
8 tbsp brown sugar
2 tbsp white sugar
1 1/2 tbsp freshly squeezed lemon juice
1 tbsp Worcestershire sauce
1/2 tbsp freshly ground black pepper
1/2 tbsp ground mustard
1. Combine all ingredients in medium saucepan. Bring to a boil and then reduce to a simmer. Simmer gently until the sauce is thick and smooth, about 1 1/2 hours, stir occasionally to prevent burning.
2. Can be stored in an airtight container for up to 1 month.
Portuguese Tomato Rice
Posted on 4 August 2010 | 4 responses
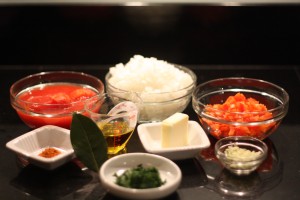
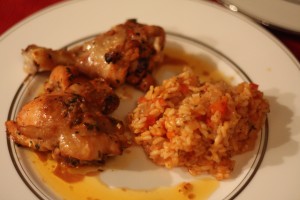
As I mentioned in yesterday’s recipe, Piri Piri Chicken with Tomato Piri Piri Sauce, this Tomato Rice works wonderfully with spicy and flavorful foods while adding its’ own sweet and herby taste. It is so easy to make, only requiring simply adding the ingredients and then stirring occasionally while it is happily cooking away. As it is wholly vegetarian dish it fills a void that is too large in my repertoire… For some reason I have never been a vegetarian for any length of time. There was perhaps a week long stage in high school where I decided that I just had to be one (I am sure my mama was so excited!) and another stage when I first moved out to New York where I ate nothing but tofu and vegetable stir-fries; it was cheap and tofu and vegetables just so happened the only foods I could guarantee my roommates wouldn’t eat late night! But in general I have always been a strict carnivore, so having a dish like this up my sleeve makes it so much easier when I want to have a dinner party for people with dietary restrictions. You could also leave out the butter for vegans but we may be overdoing it…
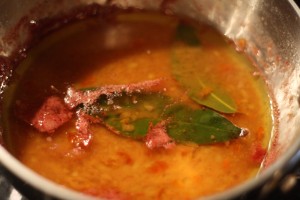
When I was testing this dish out I used fresh bay leaves. You can find them at some larger gourmet supermarkets and also online stores or if you are lucky enough to have bay trees in your garden you could pop outside. I bought mine from my go-to speciality supplier, Kalustyan’s, where they cost $1.99 for a half ounce.
Notes: A good way to measure the amount of water going in with basmati rice is to place your index finger on top of the rice and add enough water to reach the first joint. Somehow this trick works and produces perfect basmati every time!
Tomato Rice, serves 4 as a side
2 tbsp olive oil
1 onion, finely chopped
1/2 red bell pepper, finely chopped
2 garlic cloves, chopped
1 tbsp finely chopped parsley
1 fresh bay leaf, or half a dry
7 oz chopped Italian plum tomato (1/4 of 28 oz can)
1/2 tsp sweet paprika
1 tbsp butter
1 cup basmati rice
1. Heat a medium saucepan over low heat. Add the oil and the onion, cook slowly stirring once or twice to prevent burning. Cook until onions are softened and turning golden, about 10 minutes.
2. Add pepper and cook, stirring occasionally, until sticky and jammy, about 10 minutes.
3. Add garlic, parsley and bay leaf and cook until fragrant, about 2 minutes.
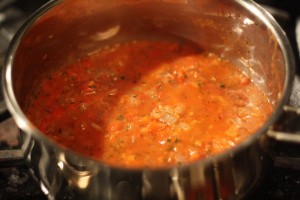
4. Stir in tomatoes, paprika, butter, 1 tsp kosher salt and a little pepper and simmer until thickened, about 5 minutes.
5. Add rice and stir to coat in tomato mixture. Pour cold water in to cover (see Notes).
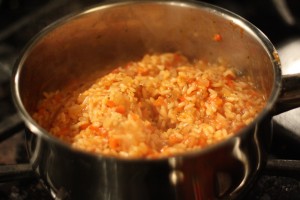
6. Bring to a boil and simmer for 10 minutes, stirring often to make sure the base is not burning. Turn off the heat and fluff the rice with a fork, cover and leave it to steam for another 10 minutes. Fluff it again before you serve, making sure that all the liquid has been absorbed. Serve hot.
Piri Piri Chicken with Tomato Piri Piri Sauce
Posted on 3 August 2010 | 4 responses
This recipe, with its’ three parts, may look slightly daunting I promise it is completely easy to make. As each step adds another delicious layer of flavor, making all the steps is important. You can make the tomato piri piri sauce and basting sauce while the chicken is marinating and the oven or grill is heating up saving you a lot of time. The marinade adds so much flavor to the chicken that if you need to, you can bake it in the oven rather than get your grill all messy. As is we are still in the midst of summer, I have still included the grilling directions in the recipe below for those of you who just can not live without an extra char to your meat!
Piri piri chicken has become increasingly popular with the astronomic rise of the Nando’s restaurant chain (where they spell the dish peri peri – the chain came to the UK and the US by way of South Africa) and their ubiquitous supermarket sauces. I would say that this sauce is the equivalent spiciness to their medium heat peri peri sauce. You can of course add more of the peppers to kick this up a notch, which of course I did!
This recipe is from the Books for Cooks’ volume 9 and it was originally from Piri Piri Starfish: Portugal Found by Tess Kiros. I absolutely adore Notting Hill’s Books for Cooks! If you ever find yourself without lunch plans while in London, eat in their kitchen in the back of the bookshop. Just like mine, their test kitchen is tiny too!
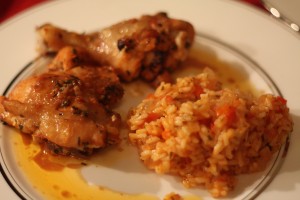
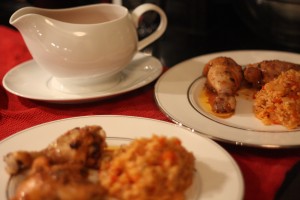
I served this with the traditional accompaniment Tomato Rice – perfect for a satisfying dinner! And the tomato piri piri sauce can go on anything. I saved the leftovers of the sauce and tried it with the addition tomato rice and some grilled, sliced steak for a quick, inexpensive meal!
Notes: If you are too short of time to marinate the chicken for 4 plus hours you can leave the chicken pieces in the marinade for 30 minutes at room temperature rather than placing it in the refrigerator and waiting longer.
The peppers used in this dish are piri piri peppers (also called African birds eye chilies or peri peri peppers), they are native to Mozambique and are found in dried form all over Portugal. I bought mine from Kalustyan’s in New York where I got a little 1/2 ounce bag for a very reasonable $3.49 (you can also buy them by over the phone). Or if you are in the UK from The Spice Shop in Notting Hill also sells them.
Piri Piri Chicken with a Tomato Piri Piri Sauce, serves 4 as an entree
Marinade
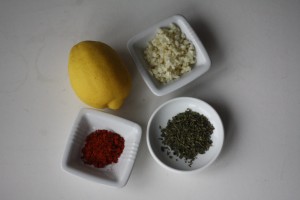
1 lemon, washed and cut in half
4 garlic cloves, finely chopped
1 tsp dried oregano
1 tsp sweet paprika
8 bone-in and skin-on chicken thighs and/or drumsticks
1. Using a sharp kitchen knife, carefully slash each chicken piece with 3 deep cuts through the meat to the bone.
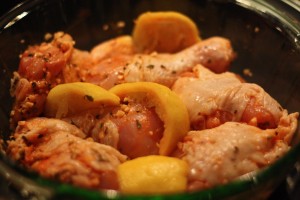
2. Squeeze all the juice out of the lemon into a medium sized bowl. Add the lemon halves, garlic, oregano and paprika. Add chicken pieces and sprinkle generously with salt. Turn the pieces to coat and rub the marinade in well, making sure to get marinade into the cuts. Cover and refrigerate for at least 4 hours and up to 24 hours (see Notes).
Tomato Piri Piri Sauce
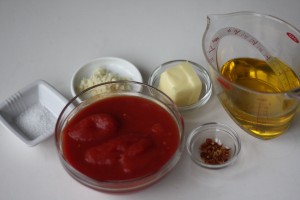
1 cup olive oil
3 tbsp unsalted butter
14 oz chopped Italian plum tomatoes (half of a 28 oz can)
1/2 tsp salt
large pinch sugar
6 dried piri piri chilies, finely chopped (see Notes)
4 large garlic cloves, finely chopped
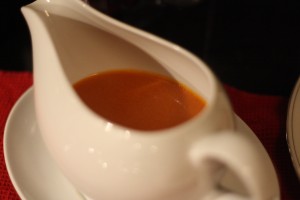
1. Heat a small saucepan over low heat and add oil, butter and tomatoes. Cook for 25 minutes, until the tomatoes are thick. Add salt, sugar, chili and garlic and cook for 10 minutes, until the mixture is fragrant and the garlic is soft. Remove from heat and blend in a blender or with a hand blender until smooth. Cover to keep warm and set aside. (You can store this sauce for up to a month. Cover with a layer of oil and reheat as needed. Re-blend to emulsify if it splits while reheating.)
Basting Sauce
6 dried piri piri chilies (see Notes)
3 garlic cloves, roughly chopped
5 tbsp butter
2 tbsp olive oil
1 tsp kosher salt
Juice of 1 lemon
2 fresh bay leaves or 1 dry bay leaf
2 tbsp port
2 tbsp whisky
1. Crush chilies and garlic with a pestle and mortar to make a rough paste (or use a food processor and pulse). Heat a small saucepan over medium heat, add butter and oil and add paste, cook until sizzling and fragrant about 2 minutes. Stir in salt, lemon juice, bay, port and whisky and let bubble for 5 minutes. Remove from heat, taste and adjust seasoning.
Piri Piri Chicken
In the oven
1. Heat oven to 400°F. Remove chicken from marinade and place in a single layer in a roasting tin. Roast, turning once during cooking and drizzling with the basting sauce a couple of times of each side, until golden skinned and cooked through with no hint of pink, about 30 minutes.
On the grill
1. Grill chicken over a medium hot barbecue, turning and drizzling with basting sauce every 3 minutes, until cooked through with no hint of pink at the bone, for 15-20 minutes.
To serve…
Drizzle over any remaining basting sauce before serving. Serve with“> Tomato Rice and the Tomato Piri Piri sauce.
Tagliolini with a Zucchini Flower Cream Sauce
Posted on 27 July 2010 | 3 responses
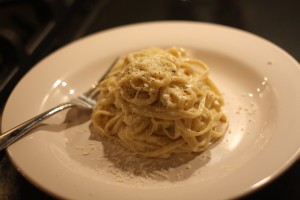
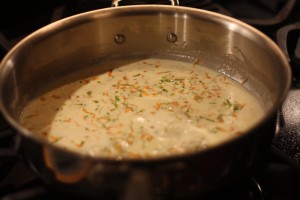
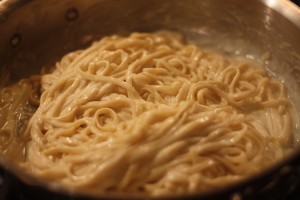
In this month’s Fusilli with Summer Squash, Bacon and a Cream Sauce recipe I mentioned that we had just been to foodie heaven trip to Italy. We basically ate our weight in food everyday attempting to absorb as much of the local culture through our tummies. I have a huge, huge soft spot for Rome (massive) so I think my favorite meal of the trip was our last meal in Italy at a tiny square called Piazza Ricci. I had a spectacular dish, fresh tagliolini with a zucchini flower cream sauce. It was so flavorful and well balanced but all the flavors were subtle and I was terrified that I would not be able to make it again at home.
Thankfully, somehow it was far easier than I thought it would be. Using a similar technique to the one I used for the fusilli with yellow summer squash, I was able to recreate this delightful dish at home – and now you can too!
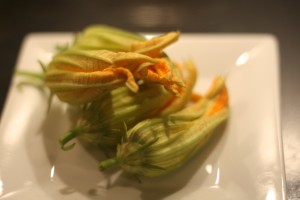
Zucchini flowers or blossoms are the flower that grows out, surprising, zucchini! (They are also called squash blossoms.) They are edible after you have removed the stamen from the males or the pistils from the female (they are inside the flowers and twist off easily). I used the female flowers as they are slightly larger than the males and cut off the stem before slicing. Often, especially in Italian cuisine, they are stuffed and then deep fried. Sauteing them is less common in Italy but equally delicious!
Notes: While this recipe is modeled after the one we ate while we were in Rome, I was unable to find fresh tagliolini and although I know I should make my own, ordering pre-made makes this recipe so easy! I ordered in Ravello’s fresh linguine from our local online grocery store, Fresh Direct.
Tagliolini with a Zucchini Blossom Cream Sauce, serves 2 as an entree
1 tbsp unsalted butter
1 tbsp olive oil
1 clove garlic, minced
12 zucchini blossoms, sliced finely
1/2 cup heavy cream
1/4 cup grated provolone
8 oz fresh linguine
Freshly grated Parmesan
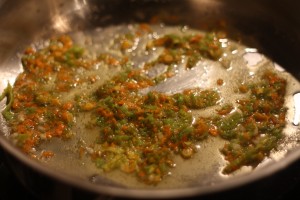
1. Heat a large saute pan over medium heat. Add butter and olive oil. When the butter begins to bubble, add the garlic. Cook for 1 minute, until garlic is a light golden brown and beginning to soften. Add the sliced zucchini blossoms and stir to coat with the butter, oil and garlic. They should cook gently so if the heat seems too high, turn down to medium-low heat. Cook until blossoms soften, begin to wilt and become fragrant, about 8-10 minutes.
2. Add cream and stir to combine. Cook until cream begins to thicken. Using a strainer (or a sieve in the UK), strain the sauce, pressing on the solids to get as much of the flavor as possible into the sauce.
3. Place a large pot of salted water on the stove and bring to a boil. Add fresh pasta and cook according to directions, (see Notes). While pasta is cooking, return strained sauce to pan, and place over a medium heat. Add provolone and stir until melted. Drain pasta and add to sauce. Stir to combine.
4. Serve immediately with freshly grated Parmesan.
Pecan Blondies with Cream Cheese Swirl
Posted on 22 July 2010 | 1 response
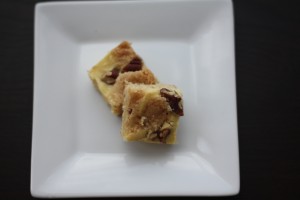
Sorry about the lack of a post yesterday. While I was making these delicious brownies, my kitchen seemed to rebel against me, making sure that what should have been a simple twenty minute long recipe into one that took me about forty. The first occurrence was as I was measuring everything out, I had finally finished with each ingredient when for absolutely no reason my red food coloring fell out of the cupboard above and landed directly in the baking soda, creating a small but powerful mushroom cloud of powder to cover my countertops. After this the first batch of pecans seem to take tanning too seriously and came out burnt and black rather than fragrant and nicely browned. Then I confused the salt with the sugar and had to begin the filling again. Finally when it came to taking photos the blondies and their pan seemed to hold their heat forever so I could not cut them! I think I must have said ‘why is nothing easy’ about a million times!
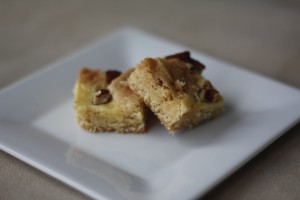
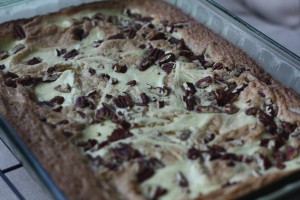
But without further ado let’s talk blondies! As the timeline for these was all kinds of crazy I had to force feed the hubby some blondies this morning. At first I was met with a weak ‘but I just brushed my teeth’, before he gave in moments later. The verdict, good taste but more cakey than chewy or fudgy. He could be not used to the texture as the brownies I usually make, Katharine Hepburn’s Brownies, are so rich, chewy, sinfully amazing, while these are lighter and less dense. They are however still amazingly more-ish and despite my ham fisted attempt at making these, with falling ingredients included, they are remarkably easy to make. Using just two bowls, this recipe could not be less complex.
Notes: To toast the pecans, place pecans on a baking sheet and into a 350°F oven for 7 minutes, checking to make sure they are not getting too dark. You want them lightly browned and fragrant.
Pecan Blondies with a Cream Cheese Swirl, makes 24 (from the More from Magnolia cookbook)
Cream Cheese Filling
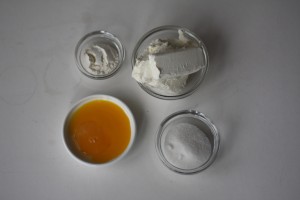
4 oz cream cheese, cold
2 tbsp sugar
1 large egg yolk, at room temperature
1 tbsp all purpose flour
Blondies
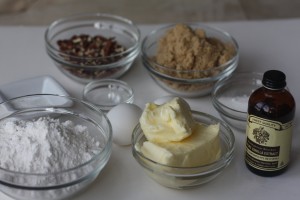
1 1/2 cups cake flour
1 tsp baking powder
1/4 tsp fine salt
6 oz unsalted butter, at room temperature (1 1/2 sticks)
1 1/4 cups firmly packed light brown sugar
1/4 cup sugar
2 large eggs, at room temperature
2 tsp vanilla extract
1/2 cup coarsely chopped toasted pecans (see Notes)
1. Heat oven to 350°F. Grease and lightly flour a 13″ by 9″ baking pan.
2. Make the cream cheese filling. In a medium bowl or in the bowl of a stand mixer, beat the cream cheese and sugar until smooth. Add the egg yolk and flour and beat well. Set aside.
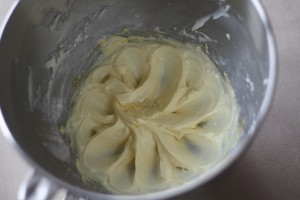
3. Combine flour, baking powder, salt and set aside. In a large bowl or in the bowl of a stand mixer, cream the butter with the sugars, about 2 minutes. Add eggs and vanilla and beat until well combined. Add the flour mixture in 1 addition and stir until thoroughly mixed. Spread the batter in the baking pan.
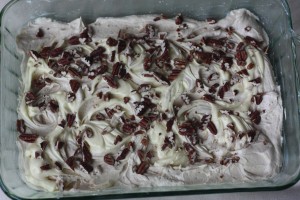
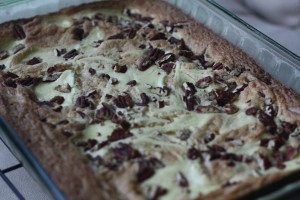
4. Add spoonfuls of cream cheese mixture over the batter. Using a bread knife make circles through the cream cheese mixture to make a pattern. Sprinkle the pecans over the batter.
5. Bake for 30-40 minutes, checking after 20 minutes, until an inserted toothpick comes out with moist crumbs attached (but not batter).
6. Allow to cool to room temperature before cutting into 24 1½” by 1½” squares and serving.
Woman at Work: Part 2
Posted on 21 July 2010 | Comments Off on Woman at Work: Part 2
Sorry about the lack of a post today. I have just pulled out a delicious batch of Pecan Blondies with a Cream Cheese Swirl! They are currently cooling and I can not cut them to take photos but I will. Recipe and post coming tomorrow, I promise!
Here’s a sneak peak at the whole tray! Yummy!
Sauteed Chicken Breasts with a Tarragon and White Wine Reduction
Posted on 20 July 2010 | 2 responses
On this blog there are a few things that have been well documented, my love of spice and curries (I’ve even post a recipe so you can make your own curry powder at home!) and my love of Thomas Keller’s book Ad Hoc at Home. This one, just like the Cauliflower Soup, combines both. Thomas Keller seems to share my love of curry powder using liberally in recipes throughout the book. This recipe takes a simple every day and well priced ingredient and makes it dinner party worthy.
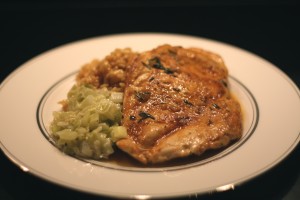
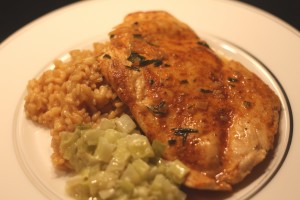
I love recipes that can jazz up chicken breasts rather than just serving them as it with a sauce. This recipe requires you to season the breasts with an aromatic mixture of sweet paprika (I used Hungarian sweet paprika) and curry powder and let them marinate for two hours. The presentation of the dish is different than usually as you pound the breasts to a thin quarter of an each, this also greatly reduces the cooking time to just 3 minutes! This tarragon and white wine sauce is the perfect accompaniment to the chicken, adding richness from the butter and chicken stock but lightness from the tarragon and white wine. The sauce is also easy peasy to make, from start to finish just 5 minutes!
I served these last night with a Basic Risotto (replacing the Parmesan with a tiny sprinkling of curry powder) and some creamed leeks (just leeks added to olive oil and butter over a medium heat, seasoned with salt, put a lid on top until they were sweated down and very soft, removed lid, cooked off moisture and add a splash of cream and then season with salt and pepper).
Notes: Even though now is prime time growing season for tarragon, I was unable to find it fresh anywhere when I made this dish. (This also could have been because everyone else rushed out looking for this light summery herb.) I substituted dried French tarragon; for substitutions the ratio is 1:3. In this recipe I used 1 teaspoon of dried but if you can find fresh, replace it with 1 tablespoon of chopped fresh tarragon. You can also garnish the finished dish with tarragon leaves.
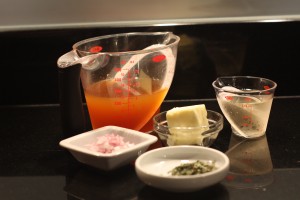
Sauteed Chicken Breasts with a Tarragon-White Wine Reduction, serves 4
Sauteed Chicken Breasts
1 tsp sweet paprika
1 tsp curry powder, homemade or store bought
4 large chicken breasts, about 6-8 ounces each
Tarragon-White Wine Reduction, recipe below
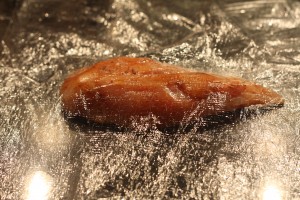
1. Combine paprika and curry powder in a small bowl. Season chicken breasts with mixture. Cover with plastic wrap and refrigerate for 2 hours.
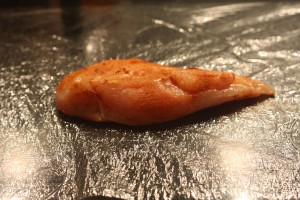
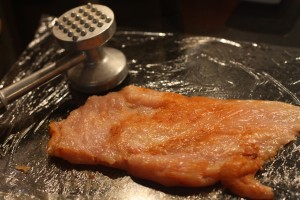
2. Place a large piece of plastic wrap on your counter. Lay 1 chicken breast on top. Cover with another piece of plastic wrap. Using a meat pounder, pound the breast to 1/4″ thick. Transfer to a plate and repeat with other chicken breasts. (At this point the chicken can be wrapped and refrigerated for up to 12 hours.)
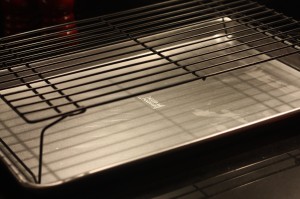
3. Heat oven to 200°F. Set a cooling rack over a baking sheet (as shown below).
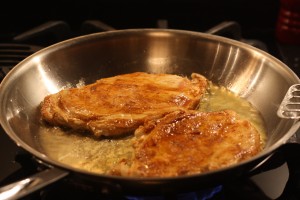
4. Season chicken on both sides with salt. In a large frying over medium high heat, add a large glug of canola oil. Working in batches, making sure the chicken is not touching, add chicken to the pan, presentation side down (whichever side is smoother and looks nicer – usually the side that was not pounded) – I managed to fit 2 pounded chicken breasts to a 12″ frying pan. Cook until bottom of chicken is golden brown, 1 to 1 1/2 minutes. Turn to the second side and cook until golden, 1 to 1 1/2 minutes again.
5. Transfer to rack and keep warm in the oven. Add oil to the pan as needed as you continue to cook chicken in batches.
Tarragon-White Wine Reduction
3 tbsp unsalted butter
1 tbsp minced shallot, about 1/4 of a shallot
1/4 cup dry white wine
1 cup chicken stock
1 tsp dried tarragon (see Notes above)
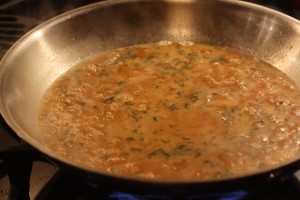
1. Once the chicken is cooked, pour any remaining oil from the pan and wipe out any burned bits. Melt 1 tbsp butter over medium high heat. Add shallot to pan, reduce heat to medium, cook for 30 seconds, stirring shallot to make sure they are coated in butter and to prevent burning.
2. Pour in wine and turn up heat to medium high, cook until wine has been reduced by half, about 1-2 minutes. Add chicken stock, bring to a boil and cook until slightly thickened and reduced, about 1-2 minutes. Stir in tarragon, remaining 2 tbsp butter and any juices that have accumulated on the baking sheet. Season with salt and pepper to taste.
To serve…
Arrange the chicken on a platter, pour sauce over it and if using fresh tarragon (see Notes) garnish with tarragon leaves. For accompanying side dish ideas, see above.
Hot Dog Chili
Posted on 19 July 2010 | 1 response
This is one of my hubby’s all time favorite things to eat, which is handy as I have loved hot dogs more than any healthy person should since I was little. In fact hot dogs, along with cotton candy, beer, fresh lemonade, barbecue, funnel cakes, and occasionally salted peanuts (but not on windy day, the shells go everywhere), are one of my favorite things about the sport of baseball. Sadly the hot dogs at the stadium do not have this chili on them as I would probably eat about 10 of them (maybe it is actually a good thing thing then!).
This chili is so easy to make; almost everything except the fresh beef is a pantry item which I have in my cupboard or fridge at all times. This is a great entree to make for a crowd in the summer with a couple of side salads, like a corn salad or a pasta salad or a potato salad (recipes coming soon!), just double, triple or quadruple the recipe.
As I am usually only cooking for the two of us this makes enough for two batches. Rather than eat 4 hot dogs in a week each (which I hear may be unhealthy 🙂 ), we make grilled cheese and chili sandwiches with the second half of the chili. We make them the same way we make regular grilled cheeses just adding the pre-warmed chili right before we sandwich the two slices of bread together.
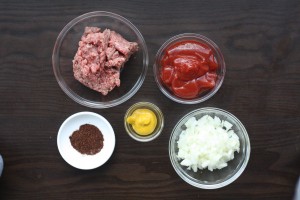
Hot Dog Chili, makes 2 cups, enough for 8 hot dogs
2 tbsp olive oil
1/2 onion, chopped finely
1/2 pound ground beef, preferably chuck
1/2 cup ketchup
1 1/2 tsp yellow mustard, preferably French’s
3/4 tsp chili powder
1. Add olive oil to a medium pan over medium-high heat. Add onion and cook until soft, about 5 minutes. Add beef and cook until browned, using a spoon to break up any large pieces. Add ketchup, mustard and chili powder. Bring to a simmer and cook for 15 minutes, until the chili has thickened.
2. Add on top of cooked hot dogs, preferably grilled, on toasted potato rolls. Serve with extra ketchup and mustard.
Buttermilk Pancakes
Posted on 16 July 2010 | 6 responses
Two breakfast classics in one week – I must be spoiling you! Just like the waffles posted on Wednesday this recipe is also from Fine Cooking Magazine and it too is the pinnacle of pancakes. To get all philosophical, the Platonic ideal of a pancake, if you will… The buttermilk gives them a slight tang so it is more adult that the cloying false, sweet-tasting package mixes and the way the baking powder and soda reacts with the buttermilk gives the pancakes unimaginable lightness and softness. The recipe is simple as mixing wet ingredients into dry and then spooning the batter onto the griddle – so easy and perfect for the weekend!
I love making these buttermilk pancakes on my stovetop cast iron skillet. As our kitchen is on the smaller side (hence this blog’s name!) I love having equipment and tools that do multiple things, so our cast iron grill (which I used to cook the Brined Pork Chops, Marinated Skirt Steak, the flank steak for the Carne Asada Fajitas, the Pat LaFrieda Beef Burgers, and the asparagus for the deconstructed Grilled Asparagus with Prosciutto, Fried Bread, Poached Egg, and Aged Balsamic Vinegar salad) is a double sided grill/griddle. This opens up storage space as both would be big and bulky, and as they are cast iron, heavy! We own this not-too-expensive Lodge grill/griddle, which is perfect for some indoor grilling (with the extractor fan on high!) or some weekend breakfast pancake action.
Notes: You can tell the griddle is hot enough when water droplets dance for a few seconds on the surface. To test this, sprinkle water from your fingertips onto the griddle, the water should form droplets and jump around for about 3-4 seconds. If it evaporates sooner turn the heat down slightly, and if it takes longer keep heating the griddle.
You can keep you pancakes warm in a 200°F oven on a baking sheet. Try to have the pancakes in a single layer.
Buttermilk Pancakes, makes 12 4″ pancakes
2 1/4 cups all-purpose flour
4 tsp sugar
1 1/2 tsp baking powder
1/2 baking soda
1/2 tsp fine salt
2 1/2 cups buttermilk
2 large organic eggs
2 tbsp melted unsalted butter
Vegetable oil, for greasing the griddle
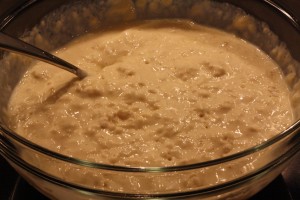
1. In a large bowl, whisk together flour, sugar, baking powder, baking soda and salt. In a medium bowl, combine buttermilk, eggs, and melted butter. Pour the wet ingredients over the dry ingredients and stir gently until just combined (there may be a few small lumps as shown below).
2. Very lightly oil a griddle and heat it over medium heat (see Notes). Drop 2 tbsp of batter, gently use a spoon to create a round 3 1/2″ shape (they spread slightly). Make sure to leave space between the pancakes for flipping. Cook until the pancakes are covered in bubbles and are golden brown on the bottom.
3. Carefully flip the pancakes and cook until the bottom is golden brown as well and the center feels firm when poked.
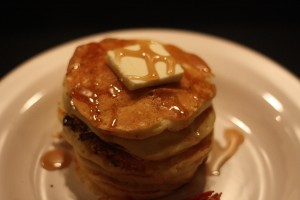
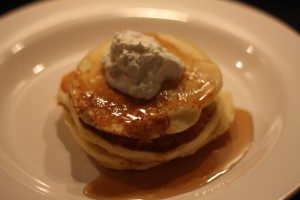
4. Serve with your choice of toppings and sides; I prefer freshly whipped cream and Vermont maple syrup (first photo) but the hubby keeps it real with applewood smoked bacon, butter and Aunt Jemina’s syrup 🙂 (second photo) – I think we can probably all agree that his may look better!
My cream and maple syrup
C’s bacon, butter and syrup!
Chewy White Chocolate Chip Cookies
Posted on 15 July 2010 | 2 responses
Some may say that writing a recipe for white chocolate chip cookies before I have posted a recipe for regular choc chip cookies is sacrilege. The good news is you can replace the white chocolate chips with semisweet chocolate chips to make regular choc chip cookies. I am one of the weird breed of people who prefers white chocolate over milk chocolate or dark chocolate… I know, I know… white chocolate is not really chocolate (it’s based of cocoa butter rather than cocoa solids and then flavored with vanilla). Apparently I have stunted chocolate maturity!
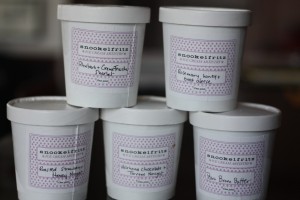
One of our friend’s friend just opened an artisan ice cream company called Snookelfritz in Chi-Town. Instantly after opening they received rave reviews from Daily Candy, Time Out Chicago, Grub Street, Tasting Table (basically ALL the major food sites everyone reads!) and a local paper, the Chicago Reader. And it is easy to see why.
The premise behind Nancy Silver’s Snookelfritz is using local and sustainable ingredients to make amazing sounding (and tasting) ice creams, such as Pear and Brown Butter; Rosemary, Honey and Goat Cheese; Roasted Strawberry and Honey Nougat; Valrhona Chocolate and Torrone Nougat; and Rhubarb and Creme Fraiche Sherbert. With the ingredients coming from the nearby farmers’ market and all the ice creams made by hand with different choices each week, I was intrigued and knew I had to get my sticky fingers on some samples. Thankfully our friend was receiving a large shipment that weekend and I got to try them all!
Said large shipment
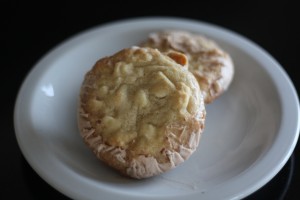
When I first tasted Snookelfritz’s Roasted Strawberry with Honey Nougat ice cream I knew that a chewy white chocolate chip cookie would compliment it perfectly. This is the recipe for those cookies.
* I also made ice cream sandwiches with the Rhubarb and Creme Fraiche Sherbert. I used the vanilla bean cookies from my Raspberry Cream Sandwiches, de-li-cieux!
Notes: As mentioned you can switch these cookies to any kind of chocolate for semisweet chocolate chip cookies, double choc chip cookies, or even triple chocolate chunk cookies for the ultimate indulgence!
In the recipe I mention that the cookies need to cool completely. This is not the case if you do not intend to make ice cream sandwiches… in the case that you are making them to eat as is, I fully encourage eating them the second they are cool enough to be eaten. Nothing tastes better than a warm, and just fresh out of the oven cookie!
Chewy White Chocolate Chip Cookies, makes 16 cookies
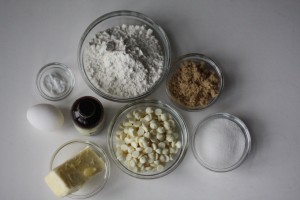
1 cup plus 6 tbsp all purpose flour
1/2 tsp baking powder
1/2 tsp fine salt
1 stick butter, room temperature (4 oz)
3/8 cup light brown sugar
3/8 cup sugar
1 egg, room temperature
3/4 tsp vanilla extract
1 cup white chocolate chips (preferably Guittard Choc-Au-Lait chips)
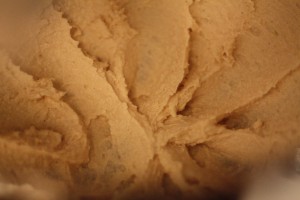
1. Heat oven to 375°F. Line 2 baking sheets with Silpats or parchment paper. Combine flour, baking powder and salt in a medium bowl and set aside. In the bowl of a stand mixer, cream together butter and sugars. Beat on medium speed for 4 minutes until light and fluffy, scraping down halfway through. Add egg and vanilla and beat for 1 minute, or until combined. Scrape down the side of the bowl.
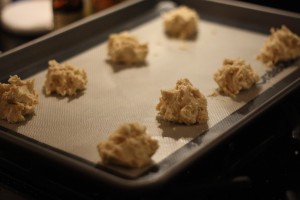
2. Turn speed to low and add flour mixture in 3 additions. Turn off mixture and stir in chocolate chips. Roll into 16 equal balls, about 1 1/2″ to 2″ each and space out well, 8 to each sheet.
3. Bake for 6 minutes, then rotate and cook for 6 more minutes or until cookies are golden. Leave to cool for 2-3 minutes on the sheet and then move to a cooling rack to cool down completely.
