Turkey Chili
Posted on 7 December 2010 | Comments Off on Turkey Chili
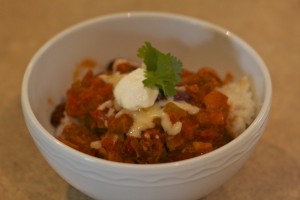
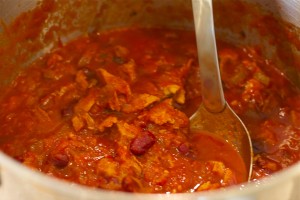
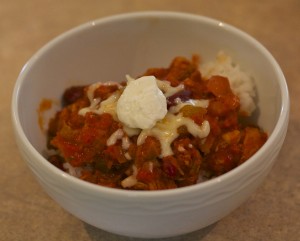
I’m not sure if it’s the cold weather or the absence of the summer but for some reason I have been craving Mexican food all winter long. This turkey chili, made with leftover Thanksgiving turkey, is no exception. The mild heat in this dish will warm your cold bones and is perfect for a quiet day in front of the telly. I served mine with rice for a stick to your bones meal and topped it with grated Monterey Jack (which melts almost instantly on contact), sour cream and fresh cilantro. I also served a large bowl of guacamole and tortilla chips, which I topped with more grated Jack and broiled quickly just to get the cheese gooey and molten. It was the perfect lazy day after Thanksgiving meal!
Turkey is such an underused meat which is so sad as it is also very versatile meat. Its’ versatility comes in handy, however, when it is transformed into a thousand different dishes in households all over the Western world after Thanksgiving and Christmas. In England coronation turkey or chicken is just synonomous as the roasted turkey and gravy on the day. If for some odd reason you do not have the copious amounts of turkey that I did that day (!), you can of course use chicken instead and the chili will taste just as delicious.
Notes: I cut my celery by cutting each stalk into three along its’ length. I then hold the three pieces together and chop across the short side to get a regularly dice. I find this makes for smaller, more manageable chunks in the final dish.
Turkey Chili, makes enough for 8
2 tbsp olive oil
1 white onion, chopped
3 celery stalks, chopped (see Notes)
6 cups cooked turkey (white or dark meat)
4 tsp chili powder
1 tsp ground chipotle pepper
1 tsp sweet paprika
1/2 tsp crushed red pepper
1/4 tsp roasted ground coriander
1 15.5oz can of low sodium kidney beans
1 28-oz box/jar of crushed tomatoes
2 cups chicken stock
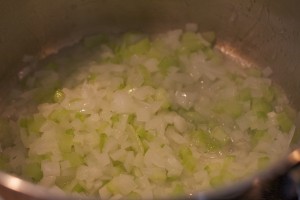
1. Heat olive oil in a large pot over medium high heat. Add onions and celery and cook for 10 minutes or until soft.
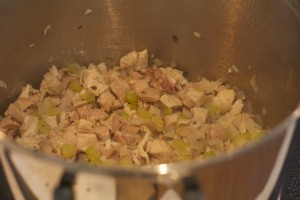
2. Add turkey and stir to combine the meat and vegetables. Cook for 3-4 minutes or until heated through.
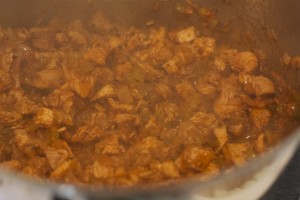
3. Add spices and stir to coat the turkey and the vegetables.
4. Add remaining ingredients and turn heat to low. Allow chili to simmer for at least 40 minutes and up to 2 hours, adding more chicken stock whenever the chili begins to look dry.
3. Serve with rice, grated Monterey Jack cheese, fresh chopped cilantro and sour cream.
Thanksgiving Recap…
Posted on 3 December 2010 | 2 responses
Goodness, goodness, goodness! It is hard to believe that we left for our Thanksgiving trip a week ago and with it my last post! Apologies on the massive gap (perhaps my longest yet, oops!) But rest assured I do have some holiday treats and goodies and some things that are not quite so seasonal but still supremely yummy.
Last week we flew to my husband’s home town on Morehead City in North Carolina to indulge in some quality family time. Armed with a perhaps more than slightly OCD-like binder, Thursday morning was spent in the kitchen getting everything ready for the feast later that afternoon.
While in theory everything should have been executed as planned, as always there were a few hiccups throughout the day.
Like when my sister-in-law and I tried to dry the inside of the extremely heavy and cumbersome bird only to find a peculiar plastic device designed to keep the turkey in the correct position for roasting. After a few hilarious moments trying to manuoeur the turkey over the sink, we finally discovered that the legs popped out of their plastic cage after reading the packaging. You know when technology has gone too far when you have to read a turkey’s directions!
Or when said bird was out of the oven, resting and about to be carved and my brother-in-law found the paper bag containing extra giblets… (I’m going to say it added to the flavor)…
The worst, though, was when I forgot to bake the pie crust blind with weights or dried beans. I just added the prepared filling to the chilled dough and popped it in the oven. Only after about 3 minutes did I suddenly realize my mistake. A quick peak in the oven confirmed it – the dough has melted and was beginning to combine with the filling, leading me to quickly pull out the pie so I could pour out the filling to attempt to salvage some, which thankfully I was able to do. Sadly I was completely unable to save the pie crust and had to slide that sucker into the trash… A last minute run to the grocery store right before closing saved the day with prepackaged pie crusts (shhhh, don’t tell anyone!)
I always enjoy a day when you get to eat so much your body needs to sleep to recuperate. My first trip home with my now husband was over Thanksgiving. Immediately following the meal I had to go have a lie down. I am sure I made a great first impression 🙂
The recipes for Thanksgiving are a mixture of family recipes, one improvised on the spot (hello deviled eggs and butterscotch pumpkin pie!) and recipes from my rather too large collection of back issues of food magazines.
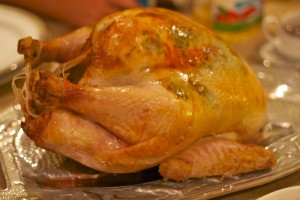
For the main event I used this Fine Cooking recipe for Three Herb Butter and placed in under the skin of the turkey. The resulting meat was tender and gently flavored with the herbs.
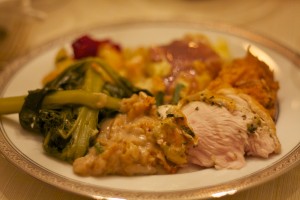
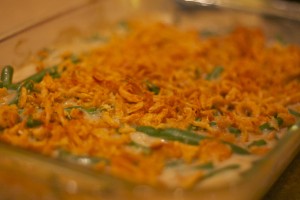
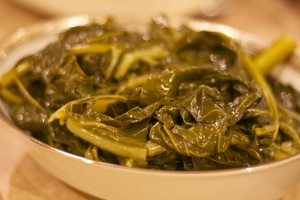
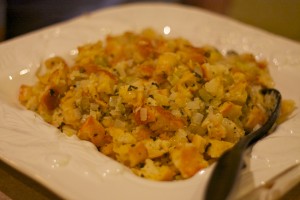
We also ate Sweet Potato Crunch (a recipe of the hub’s family so I would have to ask for permission before publishing it, fingers crossed!), Creamy, Buttery Mashed Potatoes, Braised Collard Greens, which my father-in-law made, a very traditional and faithful to the original Campbell’s Green Bean Casserole, and a sage and onion stuffing made with fresh baguette and plenty of butter and chicken stock (I’ll post this recipe next week in time for Christmas) and a Cranberry Sauce made with Fiji apples.
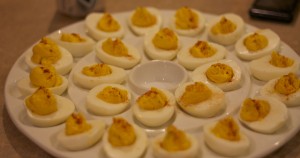
For today’s recipe I decided to write up the Deviled Eggs I made as snacks through out the day. This recipe will not blow anyone’s mind as it is fairly classic with just a few tweaks to fine tune deviled egg goodness but they are exceedingly moreish as your empty plate will testify! I served this with the Gougeres before we ate our main meal.
Notes: You can refrigerate these up to step 3 until ready to serve and then sprinkle with paprika right before service. You can also boil and peel the eggs in advance as well.
Deviled Eggs, makes 24
12 large eggs
5 tbsp mayonnaise plus 1/2 tsp
1 1/2 tbsp cider vinegar
1 1/2 tbsp sweet pickle relish
1 1/2 tbsp melted butter
1 tbsp yellow mustard
1 tbsp sugar
Sweet paprika, to dust the eggs with before serving
1. Put eggs into a pot and cover with at least 1″ of cold water. Place a lid on the pot and bring the water to a boil over high heat. Turn off the heat and leave the pot on the hob and let sit with the water undisturbed (making no movement) for 12 minutes. Drain water and run under cool water until cool enough to handle. Peel eggs gently.
2. Cut eggs in half and remove yolks. Place yolks in a medium bowl and combine with the rest of the ingredients, mash together with a fork until the mixture is smooth.
3. Place egg white halves on a serving platter. Using a piping bag or a Ziploc bag with the corner cut off, pipe the filling into the egg white where the yolk was originally. (You can also use a small spoon to add tidy dollops).
4. Sprinkle with sweet paprika just before serving.
Miniature Crab Cakes
Posted on 23 November 2010 | 2 responses
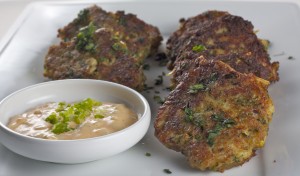
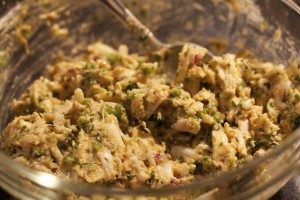
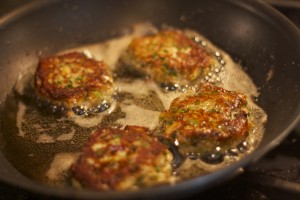
While every other food blog is preparing their week of Thanksgiving posts all about cranberries, candied yams, pecan pies and all things turkey I thought I’d go a little outside the box and talk about crab cakes! Not the most Thanksgiving-y of meals but delicious nonetheless. Like most loved dishes, every state down the East coast has their own way of making a crab cake. Some use breadcrumbs to fill, others egg, some add red pepper, some say green… This crab cake is a mixture of all them; there’s breadcrumbs, egg, red onion and jalapeno as well as cilantro, Old Bay and Dijon. All together it somehow creates a brand new but completely familiar crab cake taste.
You can make these as either a main course or as I like to do as a two-bite finger food. To make more from the same recipe, just make the patties slightly smaller, about an inch to an inch and a half rather than two. They will become the perfect one bite hors d’oeuvres. Even though they pack a flavorful punch all on their own, I love to serve them with a really quick spicy mayonnaise, which adds some more moisture and a little more flavor.
The recipe is adapted from Martha Stewart’s Hors D’Oeuvres Handbook. For anyone who throws a lot of parties or just adores finger food, this is a cannot be missed book!
Tips: I love to garnish the crab cakes with a little extra minced cilantro and add some scallion greens to the dipping sauce for freshness.
Miniature Crab Cakes, makes 8 2-inch crab cakes
Adapted from Martha Stewart’s Hors D’Oeuvres Handbook
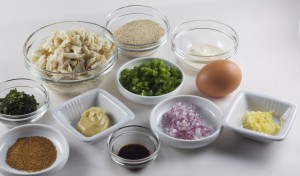
1 1/2 jalapeno peppers, seeds and ribs removed and finely chopped
2 tbsp cilantro, minced
1 tbsp red onion, finely chopped
1 egg, beaten until white and yolk combine
1 tbsp mayonnaise
2 tsp Dijon mustard
1/2 – 3/4 tsp Worcestershire sauce
1 tsp Old Bay seasoning
1/4 tsp freshly ground pepper
Zest of 1/2 lemon
1/2 lb lump crabmeat
1/4 cup breadcrumbs
1/4 cup canola oil
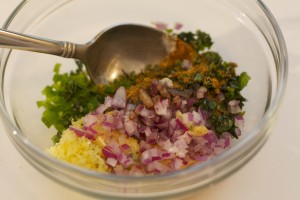
1. Heat oven to 400ºF. Line a baking tray with foil and set aside. Mix the jalapenos, cilantro, red onion, egg, mayonnaise, mustard, Worcestershire, Old Bay, pepper and lemon zest in a small bowl, set aside.
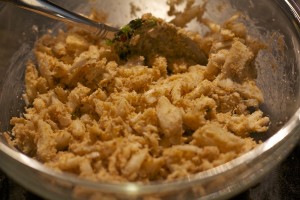
2. Place the crabmeat and breadcrumbs in a medium bowl and stir to combine.
3. Add the mayonnaise mixture and fold together, making sure that everything is well combined.
4. Form the crab mixture into 2″ patties. Heat oil in a saute pan over medium high heat. Add as many patties as will fit into the pan without touching and saute until golden brown on the bottom, about 1-2 minutes. Flip over carefully and cook for 1 minute on the other side.
5. Remove from pan and place on the prepared baking sheet and keep warm in the oven. Repeat with the rest of the crab mixture. Serve hot with dipping sauce.
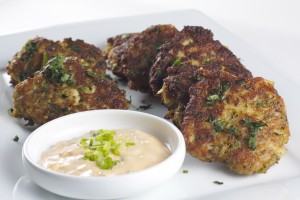
Spicy Mayonnaise
1/4 cup mayonnaise
2 tsp Sriracha or Chili Garlic sauce
1. Stir together and serve!
Clinton St. Baking Company’s Brookies
Posted on 19 November 2010 | 6 responses
Clinton St. Baking Company is a diner/cafe/baked goods mecca (Zagat even gives it a 24). The lines for brunch on a weekend can be up to 3 hours or so. They recently released a cookbook so you can now get all the home baked goodness in your own home, which is perfect as very few have the constitution to wait 3 hours during a New York winter (and if you do, I applaud your dedication!)
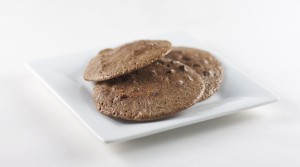
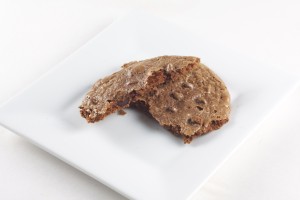
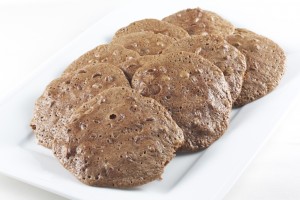
While they are most famous for their ‘crack’ pancakes and their buttermilk biscuits, these brookies are pretty unbelievable as well. A cross between a cookie and a brownie, they have an exterior with a slight crisp to it but a center with gooey, molten chocolate and a melt in your mouth moistness, which is soft but not cakey. I have to warn you in advance, they are INCREDIBLY more-ish… I may or may not have eaten four of them for breakfast the next morning but I really can’t talk about it.
Notes: Even though I do state that you should leave the brookies to cool on the baking sheet, implicitly I mean if you have the willpower – personally, I just had to taste one while they were still warm, fresh out of the oven!
Brookies, makes 20
Recipe from Clinton Street Baking Company Cookbook
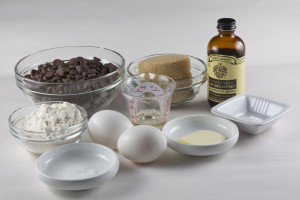
1 tbsp. canola oil
1 tsp. unsalted butter
2 c. semisweet chocolate chunks (52-62% cacao)
2 large eggs
¾ c. light brown sugar
½ tsp. vanilla extract
½ c. all-purpose flour
¼ tsp. baking powder
¼ tsp. salt
1. Heat oven to 350ºF. Place 1 cup of the chocolate in a small bowl with oil and butter. Heat in the microwave for 1 minute on high setting. Stir and place back in the microwave, stirring every 10 seconds. Set aside to cool. (You can also do this over a double boiler.)
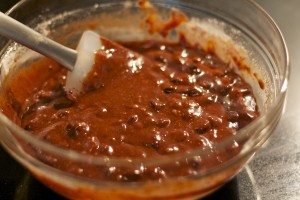
2. In a medium mixing bowl, whisk eggs, brown sugar and vanilla until combined. Gently fold the cooled chocolate mixture into the egg mixture. Stir the flour, baking powder and salt together in a small bowl. Add the flour mixture to the chocolate mixture and then fold in the remaining 1 cup of chocolate chunks.
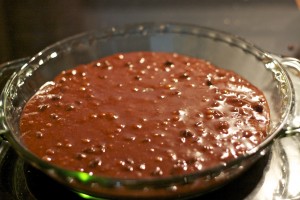
3. Freeze the batter in a shallow pan (such as a pie plate) 10-15 minutes until it sets and hardens slightly.
5. Line 2 baking sheets with Silpats or parchment paper. Using a tablespoon measure, measure out 1 tbsp sized rounds and spread them out equally on the baking sheet. Bake 11-12 minutes, until the tops look dry and cracked. Allow to cool on the baking sheet before eating (see Notes)
Cobb Salad with the Original Brown Derby Dressing
Posted on 18 November 2010 | 6 responses
Many girls love the movie Sabrina due to Audrey Hepburn and even though I would entirely love all the clothes she wears through that movie (designed by Givenchy!), I love Sabrina even more because of William Holden. I have always been obsessed with the 1950s. It probably stems from a misspent youth of watching far too much Nick at Nite. My sister and I spent countless hours watching I Love Lucy, Bewitched, I Dream of Jeannie and Get Smart. Out of all the shows I Love Lucy holds a special place in my heart (I’ll still stop what I’m doing and watch an episode of it, if I see it one on tv, only Lucy and Friends have this power over me), so when Bill Holden guest starred on an episode of I Love Lucy it was like two amazing worlds colliding.
Lucy’s love of celebrities is well documented through the series, often putting herself and her husband, Ricky, in cringe inducing and hilariously awkward situations. This episode was no exception. Having moved out to Hollywood for a film Ricky was shooting, Lucy, Ethel and Fred ate lunch at the Brown Derby‘s Hollywood location. The Brown Derby was the chic dining place of the stars at that time and William Holden was seated in the booth next door to theirs. Needless to say cringe inducing hilarity ensued!
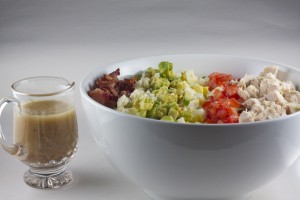
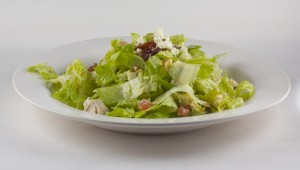
As well as having a reservation list that read like a Who’s Who in Hollywood, the Brown Derby is also the birthplace of the Cobb salad, which was named after one of the owners, Robert Howard Cobb. In the clip above Bill Holden orders one for lunch. Just like the Caesar salad it’s unknown who actually created the first salad but thankfully we still have the recipe. Not many people know the exact dressing to use with a Cobb salad and add a blue cheese dressing, which of course is fine but the original dressing works so much better. The original dressing is tangy, spicy and flavorful with garlic, fresh lemon juice, Worcestershire sauce, ground mustard and vinegar. It compliments the many ingredients in the salad without overpowering them.
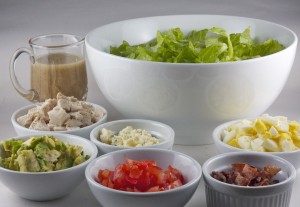
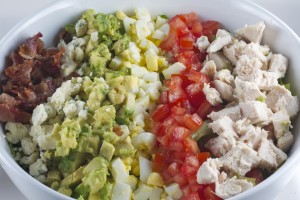
While this salad is beautiful to look at it is a bit tricky to pull together. No component is hard to master, it is just the fact that there are quite so many. I find it easiest to cook everything all at once using 3 separate pans, eggs cooking in one, bacon frying in another and chicken poaching in the third. While they are cooking, I chop the romaine, tomatoes and avocados and crumble the blue cheese and quickly blend the dressing. I serve my salad with all the components in rows, like a rainbow, and then toss it with the dressing table side to prevent the lettuce from wilting.
Notes: Sadly all of the original, iconic Brown Derby locations are no more, (one burnt down and is being combined into a W hotel, one was demolished and another is now the home of a strip mall called the Brown Derby Plaza), but you still see the iconic brown derby hat the restaurants were named for incorporated into the strip mall where it now houses a cafe.
You can still get a similar salad at another Beverly Hills institution, the Polo Lounge in the Beverly Hills Hotel. It’s one of their classics so it’s served morning, noon and night. Ask for the beets on the side and to switch to blue cheese for a Cobb or stick with the original McCarthy salad for a whole new but delicious experience!
p.s. If you didn’t get your fill of Bill Holden with above clip, here he is again on the game show, What’s My Name. (I even adore his handwriting.)
And if you want to see the fall out of Lucy’s lunch, here is a clip of another awkward encounter!
Brown Derby Cobb Salad, serves 3-4 as a main course
3 eggs
2 chicken breasts
6 strips of bacon
2 romaine hearts, sliced into 1/2″ strips
1 avocado, diced
1 tomato, diced
1 batch of Original Brown Derby Dressing, recipe below
1. Place eggs into a small saucepan and cover with cold, salted water. Put a lid over the pan and place over high heat to bring water to a boil. As soon as the water is boiling, turn the heat off but leave the pan on the hob. Leave eggs to sit in the hot water for 12 minutes. Remove promptly from the water and run under cold water, peel and chop. Set aside.
2. Bring a medium saucepan of cold, lightly salted water to a slow simmer. Add chicken breasts and poach for 8-10, until chicken is cooked through. Set aside until cool enough to handle and then chop into 1/4″ pieces. Set aside.
3. Place bacon strips in a cold pan and set over medium high heat. Cook for for 8 minutes, or until crispy but not burnt. Cut into 1/2″ pieces.
4. In a large salad bowl, add the chopped romaine lettuce. Top with rows of the egg, chicken, bacon, avocado, tomato and blue cheese. Toss with the dressing immediately before serving.
Original Brown Derby Dressing, makes 3/4 cup
1/4 cup water
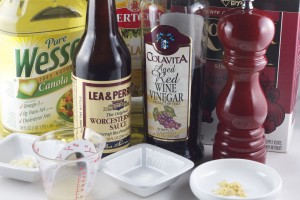
1/4 cup red wine vinegar
1/4 teaspoon sugar
1 teaspoon freshly squeezed lemon juice
2 teaspoons salt
3/4 teaspoon freshly ground black pepper
3/4 teaspoon Worcestershire sauce
1/4 teaspoon dry English mustard
1 small clove garlic, finely minced
1/4 cup full-flavored olive oil
3/4 cup canola oil
1. Place all the ingredients together in a medium mixing bowl or a blender except the oils. Stir to combine. Drizzle the oils in, whisking continuously until the dressing thickens. Serve with salad.
Buttermilk Cheddar Biscuits with Sausage Gravy
Posted on 12 November 2010 | Comments Off on Buttermilk Cheddar Biscuits with Sausage Gravy
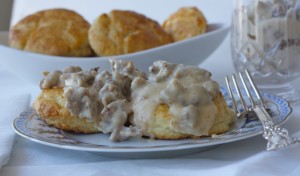
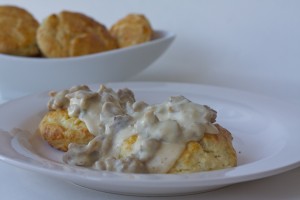
Last weekend we decided to stay in the whole weekend, this meant I could be extra productive and bake a batch of these homemade biscuits with gravy. I shouldn’t say I was super productive as the hubs did have to nag/beg me to get up and make these for him. Whenever we go back to North Carolina we usually eat some type of biscuit with either sausage and cheese or bacon and egg for breakfast. These buttermilk cheddar biscuits with rich, creamy sausage gravy combine all those flavors in one perfect brunch time meal.
The buttermilk in the biscuits makes them fluffy and moist. The butter puffs up while the biscuits are baking in the oven and melts into the dough, making flaky layers and giving the biscuits a layer of richness. The sausage gravy adds even more moisture to the meal and adds some umami notes to the already savory biscuits.
As well as being the perfect brunch (if you could add poached eggs somehow it would be stellar!), it is also a snap to make! All the ingredients come straight from the fridge, so the butter, eggs and buttermilk should all be fridge cold so there is no waiting around time. In a mixer the whole dough mixing process takes about 6-7 minutes. If you don’t have a mixer these are still so easy to make. Honestly, sometimes I prefer to use my hands to rub the butter into the flour as I know that I will not over mix the butter in the way a mixer can. It should take about 10 minutes by hand, so not a terrible amount of difference.
Notes: If you are serving these biscuits on their own, without the sausage gravy, increase the amount of kosher salt to 1 1/2 teaspoon.
Sweet Italian sausage is ground pork sausage meat flavored with fennel seed, anise and pepper. If sweet sausage is unavailable, any mild tasting, not spicy sausage will work.
Buttermilk Cheddar Biscuits, makes 10 biscuits
Recipe adapted from Ina Garten’s Barefoot Contessa Back to Basics
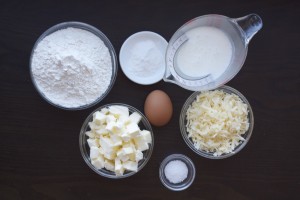
2 cups flour, plus more for rolling out the dough
1 tbsp baking powder
1 tsp kosher salt (see Notes)
12 tbsp cold unsalted butter, cut into small cubes (1 1/2 sticks)
1/2 cold buttermilk, shaken
1 cold large egg
1 cup grated extra-sharp Cheddar (see Notes)
1 egg beaten with a splash of water
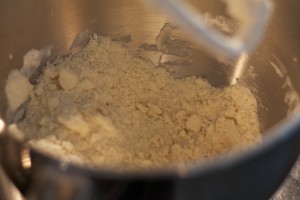
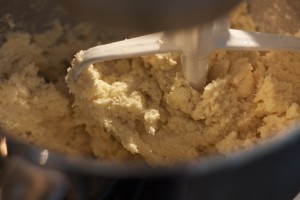
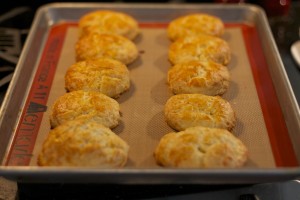
1. Heat oven to 425ºF. Add the egg to the buttermilk in a measuring jug and beat to combine, set aside. Take a tablespoon of the flour and add it the grated cheese. Toss to coat the cheese with the flour, set aside. Line a baking sheet with a Silpat or parchment paper and set aside. Place the remaining flour, baking powder and salt into a bowl of an stand mixer fitted with the paddle attachment. Combine the ingredients with the mixer on low. Add the butter and mix until the butter is the size of peas. You may need to shut the mixer off and manually rub the butter into the flour to get the butter pieces all the same size.
2. Turn the mixer back to low and add the buttermilk mixture to the flour in one addition. Mix until just combined. Add the cheese mixture to the dough and mix until just combined. Stop the mixer.
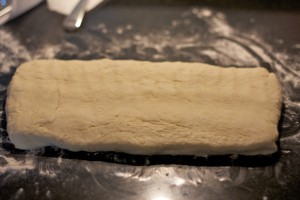
3. Using clean counter space, flour a 12×12″ area well. Form a ball with the dough in the mixer bowl and place it on the flour. With lightly floured hands, knead the dough gently. Using your hands again, form a 5×10″ rectangle with the dough.
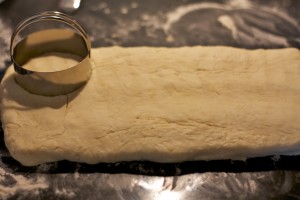
4. Using a 2 3/4″ biscuit cutter, cut out 8 biscuits from the dough. Reform squares of the same thickness to get the last two biscuits.
*You can also cut the dough into 8 squares as the original recipe suggests.
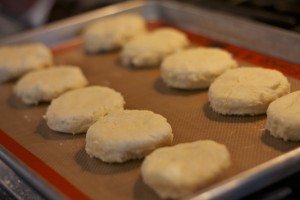
4. Place biscuits on the prepared baking sheet.
Brush the tops of the biscuits with the egg wash and pop in the oven for 20 minutes, until golden grown.
Sausage Gravy
1/2 tsp canola oil
1/2 lb sweet Italian sausage (see Notes)
1/2 tbsp butter
2 tbsp flour
1 1/2 cups whole milk
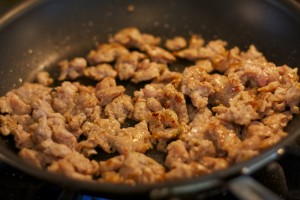
1. Heat the oil in a 9″ saute pan over medium high heat. Add sausage and break up any large pieces with a wooden spoon. Cook until the sausage is browned.
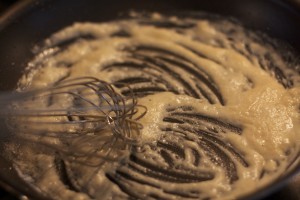
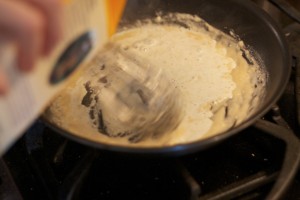
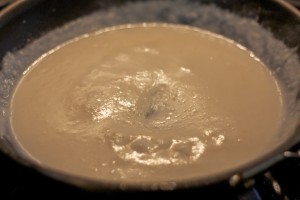
2. Remove the sausage with a slotted spoon, trying to keep as much of the oil and fat in the pan as possible. Add the butter (less if you have a lot of oil) and allow to melt. Add flour and begin to whisk continuously for 2 minutes until the flour and butter have formed a smooth paste (a roux) and the flour is cooked.
3. Begin to add the milk in a thin stream, whisking all the time to prevent lumps.
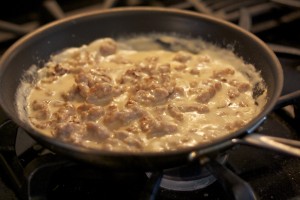
4. When all the milk is added, let the gravy simmer gently for 2-3 minutes to make sure the milk is heated through.
5. Re-add the sausage and cook on medium low heat for 2-3 minutes.
To serve: Place two of the still warm from the oven buttermilk cheddar biscuits on a plate and pour the sausage gravy over the top. Enjoy!
Mahi Mahi with a Homemade Teriyaki Glaze
Posted on 11 November 2010 | Comments Off on Mahi Mahi with a Homemade Teriyaki Glaze
In a more than disturbing turn of events, when C and I first began dating I asked him whether he liked fish. Sushi is an all time passion of mine (it’s also pretty much the only thing I can eat whenever I am hungover – I know, it’s weird), so I knew that if this relationship was going to go long term he would need to like fish, ne love, fish. C replied spectacularly said that his favorite fish was dolphin. No joke! After a quick heart stop and spell of dizziness, he quickly went on to explain that that is what people in North Carolina call mahi mahi. Which begs me to ask, why couldn’t he just have said mahi mahi to begin with?
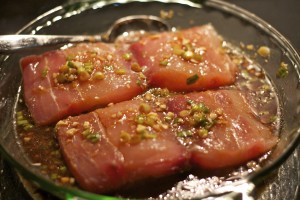
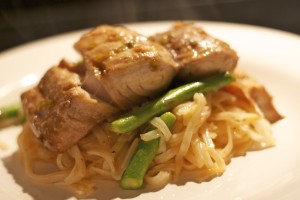
This dish was quickly pulled together from things I always have in my cupboard or fridge and some fabulously fresh mahi steaks. We had spent a day in town trying to get ahead with our Christmas shopping (entirely unlike us I assure you!) and finished up at Chelsea Market. For someone like me Chelsea Market is one giant foodie playground. I am sure that I will do a whole separate post on it so I shan’t go into too much detail but needless to say if you are visiting New York, you HAVE to go! These steaks were from the entirely amazing Lobster Place, where we also bought some thick, creamy, sherry enriched lobster bisque for a quick pitstop and some butterfish (black cod) to marinate in miso (recipe up next week). As the trip was impromptu we didn’t have a list so I bought whatever took my fancy and then had to iron chef myself a dinner when we got home. The result was this delicious dish!
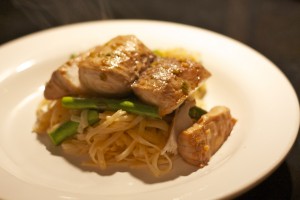
I served this with asparagus pad thai made with rice noodles and pad thai sauce from Chelsea Thai Wholesale and quickly blanched asparagus. For dessert we have biscotti, mascarpone and stracciatella gelato from L’Arte del Gelato. Honestly Chelsea Market is amazing!
Cute Notes: Later on in the conversation C went on to tell me that the first time he ever ate sushi was in Japan… Only to tell me that he meant the Japan section in the Epcot Center at Disney!
Mahi Mahi Marinated in a Homemade Teriyaki Sauce, serves 2
2 8oz mahi mahi steaks
3 scallion, thinly sliced
2 garlic cloves, crushed with the side of a chef’s knife and roughly chopped
2 tbsp soy sauce
1 tbsp canola oil
1 tbsp lemon juice
1/2 tbsp mirin
1/2 tbsp rice vinegar
1/2 – 1 tsp grated ginger (depending on your love of ginger)
1. Combine all the ingredients above and add mahi mahi steaks. Allow to marinate at room temperature for 20-30 minutes.
2. Heat a saute pan over medium high heat. Add 1/2 tsp canola oil. Remove mahi mahi from marinade and place in pan. Cook for 4 minutes with a lid covering the pan. Flip steaks and cook for 2-3 minutes longer. Serve immediately.
An optional step if you want a sauce – Remove fish from the pan and set aside on a plate and cover with foil. Add the marinade to the pan and allow to boil and reduce until it is thick enough to coat the back of a spoon, about 4 minutes. Drizzle over the cooked fish and serve immediately.
Fall-Off-The-Bone Sticky, Sweet Kansas City Style Ribs
Posted on 10 November 2010 | Comments Off on Fall-Off-The-Bone Sticky, Sweet Kansas City Style Ribs
Around the time when the really cold fall weather finally sets in (for real this time, I’m hoping!) I begin to fine tune all my game day recipes. For the last few years the hubs and I have valiantly tried to cook the perfect oven cooked pork shoulder for pulled pork sandwiches, finally getting it to exactly where we wanted it to. Well, not exactly, we’ve found the perfect slow cooked pork shoulder has to get cooked extreeeemly slowly and waking up at 6am on a Saturday was not exactly where I wanted to be!
This year it is the ribs turn. I am trying to find the perfect recipe for ribs made in the oven. I love sweet and sticky ribs with a spicy kick to them. For me, they have to be pork. Of course I will eat lamb, beef and even rabbit ribs if presented with them, but I feel that pork gives you the most authentic ‘rib’ taste and you get the most meat in the meat to bone ratio.
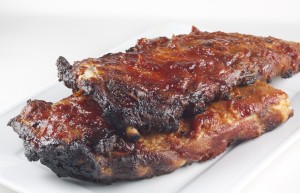
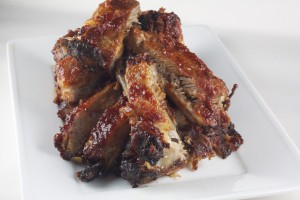
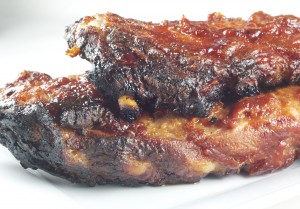
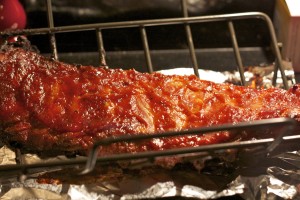
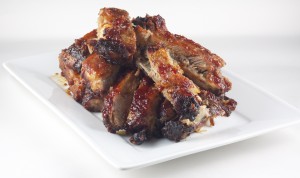
These Kansas City style ribs are slightly messy to make and far messier to eat, which is just the way you want them if you are a rib lover. You should require several napkins to get you through a plate if you are eating them with the gusto required so do not make these for a first date… You will not look cute eating them, but you will be exceptionally happy! During their long time in the oven the fat melts into the rib meat making it juicy and tender so the meat just slips off the bone. The sauce cuts any richness with its’ spicy and peppery notes and its’ vinegar base.
I served this with Creamed Corn and Potato Salad (a slightly different recipe than the one linked – I fried some bacon until crispy, crumbled it and added a touchof the bacon fat to the potato salad. I also added some finely chopped red onion and orange bell pepper and extra Dijon mustard).
Tips: If you want to make a whole batch of the Kansas City Style Barbecue Sauce I have a few more recipes to use it in. These Barbecue Chicken Thighs are the simplest things in the whole world to make. Just baking the skinless, boneless thighs in the barbecue sauce is enough to make them tender, moist and still absorb all the flavors. Another recipe that I love, Pulled Chicken and Avocado Sandwich, uses any leftover chicken thighs you might have (I make extra to make sure I do) and combines them with extra barbecue sauce, mashed avocado and peppery watercress leaves on a soft brioche bun.
Notes: I have this Calphalon non-stick roasting pan with rack. It works perfectly for everything from pulled pork, to my Thanksgiving turkey to these ribs. As it is non-stick, the clean up is always a snap too. Even with the heavily caramelized barbecue sauce (read: burnt) that dripped off the ribs as they were cooking, it just took a quick soak and rinse to get it clean.
Fall Off The Bone Sticky, Sweet, Spicy Ribs, serves 3-4 as a main course
1 3-lb slab of pork St. Louis style ribs (also called spare ribs)
3/4 cup light brown sugar
3 tbsp ground mustard
2 tsp cayenne pepper
1 1/2 tsp smoked paprika
1 1/2 tsp garlic powder
1 1/2 tsp onion powder
1 1/2 tsp kosher salt
1 tsp freshly ground black pepper
1 cup homemade Kansas City Style Barbecue Sauce
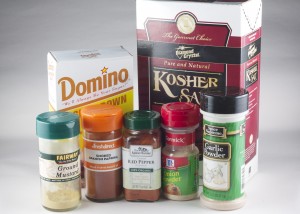
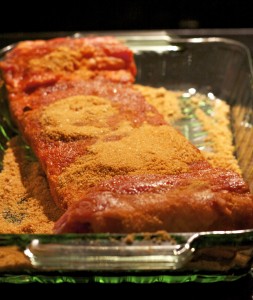
1. Mix all the dry ingredients, sugar, mustard, cayenne, paprika, garlic and onion powder and salt and pepper, together in a small bowl. Place the slab of ribs in a large baking dish. Rub the sugar mixture into the ribs, using generous amounts until they are completely covered. Cover the dish and place in the fridge. Allow the rub to penetrate the ribs for at least one hour.
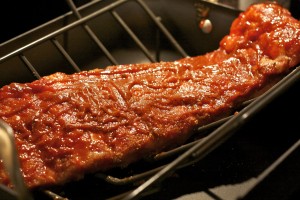
2. Heat oven to 350ºF. Place ribs on a rack set over a roasting dish (see Notes), spoon over enough of the sauce to cover the ribs and using your hands or a spoon smooth out the sauce to make sure all parts are covered. Lay a piece of foil gently over the rack so the ribs are covered but the foil is not touching most of the ribs (the ends may be unavoidable). Place in the oven for 3 1/2 hours, until the meat is fork tender, basting with the sauce every 30-45 minutes.
3. After the last basting, remove foil and place the ribs back in the oven and continue to cook for another 15 minutes. Remove from oven and remove the rack with the ribs from the roasting dish. Cover the ribs loosely in foil and rest for 10 minutes.
4. Cut in between the bones to slice into individual ribs.
Easy, Foolproof and Perfect Roast Potatoes
Posted on 4 November 2010 | 2 responses
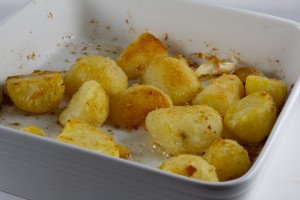
Now I know that I talk about potatoes a lot, I mean I do have recipes for Creamy, Buttery Mashed Potatoes, Roasted Garlic Mashed Potatoes, an Easy Potato Salad (and working on another one with bacon, peppers and scallions!), Homity Pie, the Ultimate Potato Gratin, I’ve used them in my Pork and Potato Croquettes and Roast Duck Hash, and as a side for my Bangers and Mash, oh, and a topping for my Shepherd’s Pie… you get the picture, but when I was younger I was told I was allergic to potatoes by a nutritionist. As the list above shows I absolutely refused to listen! Being allergic to potatoes is not something I am willing to be, even though I am sure that my body would like it better if I did listen, my tummy definitely wouldn’t! So I am going to share another potato recipe with you – the perfect crunchy-on-the-outside-and-soft-on-the-inside roast potato.
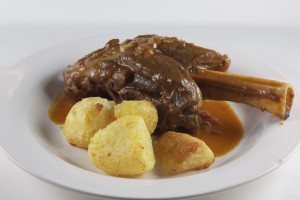
Now that it’s beginning to get colder I need to begin mixing up my sides with something other than mashed potatoes as delicious as they are, and it’s getting a little too cold for potato salads so I made roast potatoes to go alongside Braised Lamb Shanks. The soft, tender meat was the perfect contrast to the crispy exterior (and they are divine smothered in the gravy!) To get the perfect textural difference within the potato, you have to begin with the right kind of potato. In the US I swear by Yukon Golds for almost anything but baking and potato skins (russets get fluffier with the perfect thicker skin) or some potato salad (smaller waxier potatoes, like creamer or red potatoes hold their shape neatly) and in the UK, I adore Maris Pipers and King Edward for their light yet creamy texture.
Even though potatoes (and starches in general) have gotten a bad rep recently with all the Atkins and G.I. diet stuff, I personally ignore all the naysayers by looking at the benefits of potatoes. Potatoes contain a ton of vitamins C, B6 and potassium, more with the skin on which of course you can do with these for a more rustic feel. The skin gets extra crispy which actually tastes better but can look a bit messy, especially after banging the potatoes around after parboiling them.
As a side note, the nutritionist also told me that I was extremely allergic to corn and avocados and to avoid them at all costs so please refer to my Creamed Summer Corn, Guacamole, Pulled Chicken and Avocado Sandwich and Seared Tuna Salad for further proof. Oops!
Notes: If you have any leftover roasted potatoes, they are amazing in warm salad. I reheated some and added them to my Roast Beet, Blue Cheese and Arugula Salad and they were amazing.
The Perfect Roast Potatoes, serves 2 as a side
5 Yukon Gold potatoes, peeled and cut into 2-2 1/2″ chunks
2 garlic cloves, with skins on and crushed with the side of a large knife
2 tbsp butter, cut into tiny squares
2 tbsp olive oil
1 tbsp flour
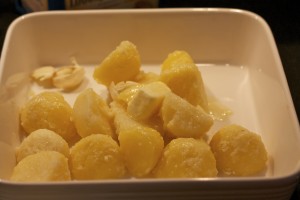
1. Heat oven to 400ºF. Place potatoes pieces into a large saucepan of cold, salted water and place over high heat. Boil potatoes for 10 minutes, until they are still hard but just beginning to soften. Drain well. Place lid over saucepan containing potatoes and shake the saucepan vigorously, making sure the potatoes get banged around a bit. Sprinkle over the flour and stir to coat the potato pieces. Pour the potatoes into a baking dish. Sprinkle the butter pieces and a generous pinch of salt over the top, add the garlic cloves and drizzle the olive oil, stirring gently to get everything combine.
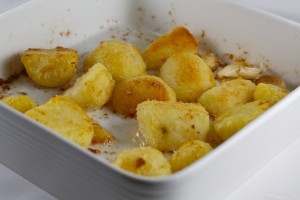
2. Place dish in the oven for 45 minutes, until the potatoes are golden and crispy, turning over the pieces once halfway through cooking.
Gastropub Style Braised Lamb Shanks
Posted on 3 November 2010 | 6 responses
In the winter nothing is better than a braise or a stew. Lamb shanks are the perfect choice for such a dish. With a long, slow braise the meat becomes tender and begins to fall off the bone and it is the perfect thing to prep quickly and leave simmering on the stove all day. It is this type of food that gastro pubs make so well but it is just as easy to make at home.
For the herbs I just a bouquet garni again, just like in my White Wine Poached Chicken Thighs. It adds so much flavor with so little effort. I served this with Crunchy on the Outside, Soft on the Inside Roasted Potatoes (the recipe is coming tomorrow)!
Braised Lamb Shanks with a Red Wine Jus, serves 2 as a main course
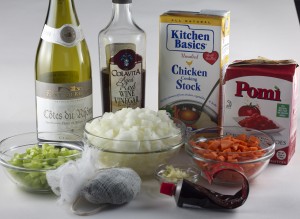
3 tbsp olive oil
2 lamb shanks (weighing approx. 1 1/4 lb each)
1/2 cups Spanish onion, chopped (about 1 1/2 cups)
2 stalks celery, chopped (about 1 cup)
1 carrot, peeled and chopped (about 1 cup)
3 garlic cloves, crushed and roughly chopped
2 tbsp tomato paste
2 tbsp flour
3/4 cup red wine
3 cups chicken stock
1 cup chopped Italian plum tomatoes
2 stalks rosemary
5 stalks thyme
5 stalks parsley
20 peppercorns
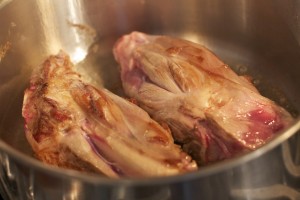
1. Heat oil in a large, tall saucepan over medium high heat. Add lamb shanks and sear for 8-10 minutes, browning all the way around the shank. Remove lamb to a plate and set aside.
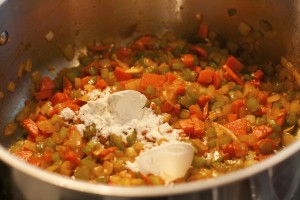
2. Turn heat down to medium and add celery, onion and carrots to the pan. Cook for 10 minutes, stirring occasionally to prevent sticking or burning, until the vegetables have softened. Add the garlic and tomato paste and stir well to coat the vegetables, cook for 1 minutes. Add flour and cook for 2 minutes, stirring continuously.
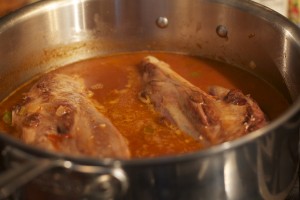
3. Pour in the red wine and scrape any browned pieces of the bottom of the pan, allow to simmer for 2-3 minutes. Add chicken stock and wine and lamb. Make sure the lamb is covered by liquid (if it is not, add more chicken stock). Place a lid on top and simmer gently for at least 1 1/2 hours.
More stock was added after this photo was taken.
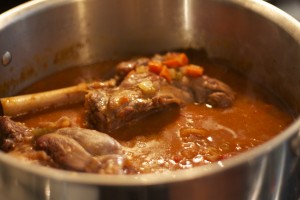
4. In the meantime, wrap the rosemary, thyme, parsley and peppercorn in cheesecloth to form a bouquet garni. Add bouquet garni after the lamb has braised for 1 1/2 hours, remove lid and simmer for at least 45 minutes longer, until the lamb is almost falling off the bone and the sauce is thick enough to coat the back of a spoon.
