It’s Time For The Masters Again…
Posted on 8 April 2011 | 2 responses
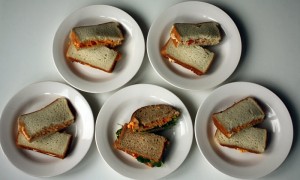
This time last year the hubs and I were sitting down and conducting a very serious and extensive taste test of pimento cheese sandwiches. He had recently come back from Augusta, Georgia where he had watched a day of the practice rounds. Sweetly, of course is he ever anything other, he bought, ate and memorized the taste profile of the famous pimento cheese that is sold every year on the course. As an added bonus he brought back the wrapper.
The results of our findings are in this post, The Unofficial Masters Pimento Cheese Sandwich, which details the closest you are going to get to an authentic Masters pimento sandwich without being lucky enough to make the trip to Georgia yourself. And for cuteness’ sake, it also has a recipe for a sandwich that is the closest we got to the hubbie’s childhood sandwiches.
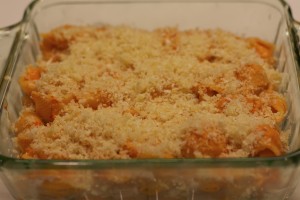
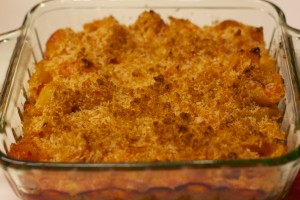
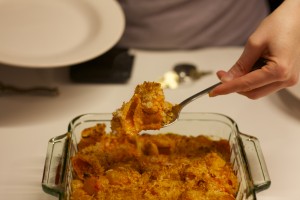
If your corner of the world isn’t quite as warm as the US’ Southeast (hint hint NY weather!) but you still want to get in the spirit, give this Pimento Mac and Cheese a whirl! Enjoy your tv watching this weekend!
Magnolia Bakery’s Banana Pudding
Posted on 25 March 2011 | 36 responses
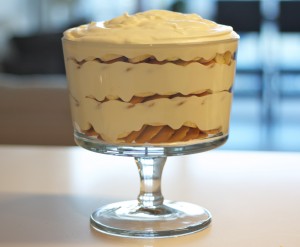
I served this at our Oscar’s night party, right after the Spicy Chipotle Chili and Creamed Corn Cornbread. I thought the two home style courses fit well together and this banana pudding recipe makes a lot which is perfect for making a lot of dessert for a lot of people. It is also completely ‘make ahead’ so when your guests arrive you don’t have to do a thing but pull this delectable dessert out of the fridge and you look like the perfect Stepford (if, of course, that is your wish. If it isn’t, might I suggest you try to ‘messy-up’ the layers!).
When I first moved to New York I naively thought knowing about Magnolia Bakery made me an insider, knowing at least a few of the secrets this huge and fabulous city has to offer. Little did I know that this fabled bakery was written up in publications the world over after being frequented by Carrie in Sex in the City circa 2002. I always favored the vanilla cupcake with pink vanilla buttercream icing until I was introduced to the banana pudding. Growing up in London I had never had banana pudding before, or any pudding when it comes down to it, so when I first tasted it it was a revelation. The rich creamy vanilla pudding, the slices of banana layered with the moist but still intact vanilla wafers, I had no idea on how to begin to recreate it. After buying the More from Magnolia cookbook, I knew the first recipe I was going to make would be Magnolia’s famous banana pudding. I usually utilize fresh ingredients, cooking food that is as natural as possible but I will make an exception for particularly delicious desserts!
Leaving the dessert to sit for 4 hours lets the pudding soak into the nilla wafer cookies and gets them melt in your mouth tender. This is a step that cannot be skipped so plan ahead. It is also what makes it the perfect make ahead dessert.
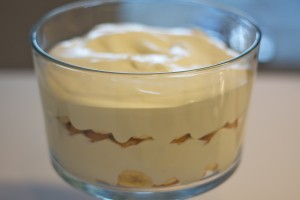
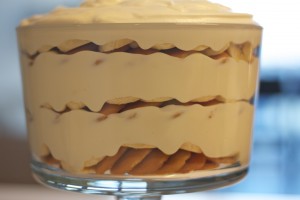
This recipe makes a large amount of pudding, it is recommended for 12-15 people. I have halved the recipe with no consequence for smaller crowds. Also this recipe is easy to make with a stand mixer, if you don’t have one a hand mixer or whisk are just as good, just a little harder on the arm, but sometimes I skip the appliances just to get a workout! I serve this pudding in a glass trifle bowl that allows you and all your guests to see the layers in the dessert which makes for an impressive presentation. As this make a lot so you will need a 4-5 quart bowl (about 4 litres) for a full recipe.
Notes: I wish I had a photo of a served portion of pudding but I could not capture one in time. I am not fibbing when I say that there were NO leftovers for me to take photos with! If you need the mental image, just imagine fluffy, creamy clouds of vanilla intermingling with melt on your tongue wafer biscuits and layers of fresh banana. Next time I’ll try to get a photo that does this dessert justice.
Magnolia’s Famous Banana Pudding
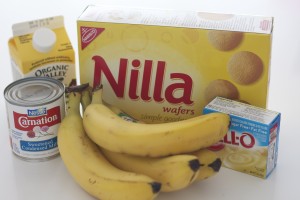
1 14-oz can sweetened condensed milk
1 1/2 cups ice cold water
1 3.4 oz package instant vanilla pudding mix (preferably Jell-O brand)
3 cups heavy cream
1 12-oz box Nabisco Nilla Wafers (recommended brand)
4 cups sliced ripe bananas (about 3 medium bananas)
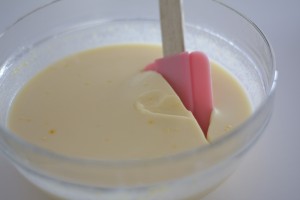
1. On medium speed of a stand mixer or in a small bowl, beat together sweetened condensed milk and water until well combined, about 1 minute. Sprinkle pudding mix over the liquid and beat well until all the powder has dissolved, about 2 minutes. Cover and place in refrigerator until completely set, about 3-4 hours or over night.
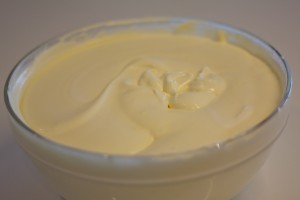
2. On medium speed of a stand mixer, whip cream until stiff peaks form. Gently fold in set pudding mixture until blended and no streaks remain (the mixture should be a pale yellow color).
3. In the bowl you wish to serve the pudding in, arrange 1/3 of the wafers on the bottom of the bowl, they may need to overlap to fit.
4. Then one third of the bananas as the next layer.
5. Then one third of the pudding mixture, repeat three times in total, until you fill the serving dish.
6. Save any bits of the wafers for garnish. Cover tightly and place back in refrigerator for 4 hours to chill. Garnish with crumbs and bits of the wafers.
Pimento Mac and Cheese
Posted on 23 March 2011 | Comments Off on Pimento Mac and Cheese
The hubs and I recently took a trip to Park City, Utah for a wedding of some good friends. Ordinarily this trip would fill me with a fair amount of glee. Ski, waffles and crepes, aprés ski and a couple of cuties getting married, why yes please! The skiing and aprés skiing part changes slightly when you are with child. My usual falling-down-a-mountain style of skiing would be even less graceful with my new center of gravity and the requisite hot toddies and spiced cider seemed like a decidedly bad idea, so I decided wisely to sit this one.
I filled my days with trips to Park City (where I got all altitude-y and had to high tail it to the nearest place that sold copious amount of water) and Whole Foods while waiting for everyone to return cold and rosy cheeked from the slopes (and way too gleeful if you ask me!). On one of said trips to the Whole Foods I was waiting in line and spied the March issue of Bon Appetit. I was a long time subscriber, until we recently moved and I decided to cancel all my magazine subscriptions, and I had not seen this edition. If you also haven’t seen it I suggest you hot foot it over to the website tout de suite. The cover picture of this pimento mac and cheese is divine. With gooey cheese dripping down the side of a Staub mini casserole tempting me, I grabbed a copy and waited until we flew home to make it.
I knew the dish would be a home run as my pimento loving husband also thankfully loves mac and cheese (which he pronounces mac and chee… Don’t worry I am trying to train it out of him before littler, impressionable ears can hear!) I myself get a little scared of pimento cheese, I don’t know what it is but I always expect it to be vinegary or sour tasting. Thankfully this dish is neither. The three cheeses ensure a good level of goo, the ground ancho chiles (which I replaced with New Mexico chiles) add a hit of heat and the brine from the Peppadew peppers add just the right amount of tang. The topping is a crust of toasted, crispy Panko breadcrumbs, salty Parmesan cheese and butter. What could be more perfect?
I served this with a green salad with avocado and tomatoes and a light white balsamic vinaigrette.
Love pimento cheese? You may also be interested in my scrummy “Unofficial” Masters Pimento Cheese Sandwich recipe.
Notes: Panko breadcrumbs are light and crispy Japanese breadcrumbs. Very similar to fried tempura batter. They can be found in the ethnic section of most supermarkets.
While I was not familiar with Peppadew peppers (nor apparently is my spell check), I had to do some looking around. They are usually sold with the jarred olives and pickles and in larger supermarkets, on the olive cart.
I replaced the ground ancho chile with ground New Mexico chile as I had it on hand. In this recipe, I would also substitute the same amount of chile powder if you do not want to buy another spice. Which trust me, I understand, y’all need to see my spice cabinet! I need to organize!
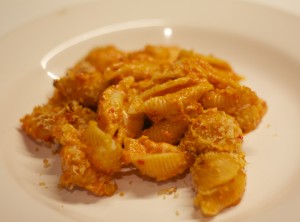
For the shell type pasta, I used DeCecco conchiglie rigate no. 50 which were large enough for the sauce to encapsulate so you get a cheesy bite every time.
Pimiento Mac and Cheese, serves 4-6 as a main course
Recipe reproduced from Bon Appetit, March 2011
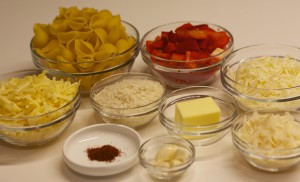
1 medium red pepper, cut into 1 inch chunks
2 garlic cloves, peeled and cut in half
1/2 cup panko breadcrumbs (see Notes)
3 tbsp unsalted butter, room temperature
1/2 cup finely grated Parmesan cheese
3/4 cup drained mild Peppadew peppers in brine, 1 tbsp brine reserved (see Notes)
1/4 tsp ground ancho chiles (which I replaced with ground New Mexico chile, see Notes)
1 1/4 cups packed coarsely grated extra-sharp Cheddar cheese
1 cup packed coarsely grated whole-millk mozzarella
8 oz medium shell pasta (see Notes)
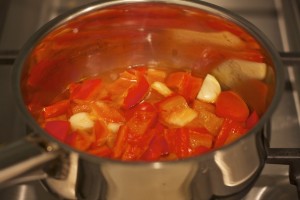
1. Heat oven to 400ºF. Butter a 2-quart baking dish and set aside. Bring 1/2 cup water, the bell pepper and 1 1/2 garlic cloves (you should still have 1/2 set aside) to a boil in a small saucepan. Cover and reduce heat to medium low, simmer for 15 minutes until pepper is tender.
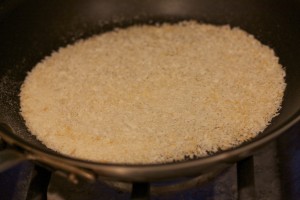
2. At the same time, heat a sauté pan over medium high heat and add the panko. Toast until they are golden brown, about 5 minutes. Remove from pan into a small bowl and set aside until they are cool to lukewarm. Rub 1 tbsp of the butter into the crumbs. Mix in 1/4 cup of the grated Parmesan.
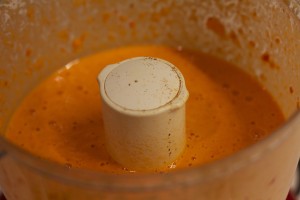
3. Transfer bell pepper mixture, without draining, into a food processor and add Peppadews and reserved brine, 2 tbsp butter, ground chile, the remaining 1/2 clove garlic, cheddar and remaining 1/4 cup grated Parmesan. Blend sauce until smooth.
4. Cook pasta according to directions until al dente. Drain and return to pot, stir in sauce and grated Mozzarella until the pasta is coated. Season to taste with salt and pepper (you may not need much salt due to all the cheese). Pour into the buttered baking dish and spinkle with the panko topping.
5. Bake for 25 minutes, until the topping is crisp and the sauce is bubbling.
6. Let stand for 10 minutes before serving.
Curried Cauliflower Soup, part 2
Posted on 22 March 2011 | 2 responses
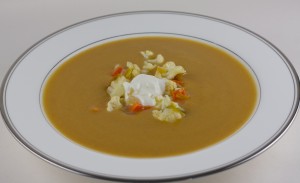
Sometimes when I am reading a blog I find a post that I am sure I have read before. It’s like a sense of déja vu web 2.0 style. While some of you longer term readers may remember that I did a Curried Cauliflower Soup from Thomas Keller’s book Ad Hoc, this is a different recipe. How many curried cauliflower soup recipes does one food blog need, you may ask. In this case of this food blog, at least two!
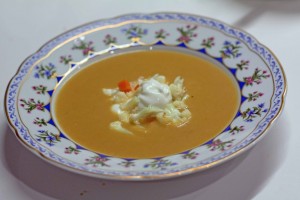
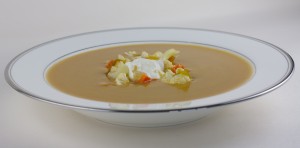
Where the Ad Hoc soup is silky and sophisticated and made using French culinary techniques (which I promise I fully explain!), this is rustic, homey and easy to prepare. Think of this soup as the younger brother of the other soup. Even though this soup is a little more wild than the other does not mean you can’t ‘fancy’ it up with some nice china.
This recipe comes from Chris Bradley, who is a sous chef at Gramercy Tavern in New York. As soon as I received this recipe in my inbox, I knew I was going to have to make this soup and it was a sure to be winner. It looked the perfect recipe to post for spring time and it is has a host of my favorite ingredients. Freshly chopped leeks, curry powder, yoghurt… Coriander, cumin, cilantro oh my! While I wish I could say that sous chefs from the city’s top restaurants just email me recipes, sadly this is not the case. Well not until Tasting Table had the genius idea to do a ‘Sous Chef Series‘ where exactly that happens. Sous chefs from around the country submit recipes and you get the recipes right in your inbox! Sign up for the series here.
I made this recipe for a casual dinner at home for my dad’s visit from the UK (which is odd because I also made the Ad Hoc Cauliflower Soup for him, apparently I subconsciously believe he loves cauliflower), and I served it with a freshly baked baguette, rich, creamery butter and a green salad.
Notes: I used freshly squeezed Meyer lemon juice but in the original recipe it calls for freshly squeezed lime juice. I just wanted to add something a bit bolder but you can of course stick with the lime juice if that is what you have on hand.
Curried Cauliflower Soup, serves 4-6 as a main course
Recipe reproduced and slightly modified from Tasting Table’s Sous Chef Series
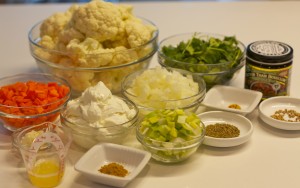
2 heads of cauliflower, cut into florets (about 10 cups)
1 onion, diced (about 1 cup)
1/2 leek, white and light green only, diced (about 3/4 cup)
2 large carrots, diced (about 1 cup)
1/4 cup plus 1 tbsp vegetable oil
1/2 tsp coriander seeds
1/2 cumin seeds
1/2 bunch coriander, roughly chopped (about 2 cups)
1/4 tsp ground tumeric
1/2 tsp ground curry powder
4 garlic cloves, roughly chopped
8 cups vegetable or chicken stock
3/4 cup Greek yoghurt
2 tsp freshly squeezed Meyer lemon juice (see Notes)
3 tbsp olive oil
1. Reserve 1 cup of small cauliflower florets, 1/4 cup diced onion, 1/4 cup diced leek and 1/4 cup diced carrot and set aside for garnish.
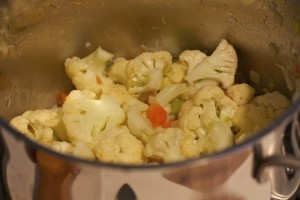
2. In a large pot, warm 1/4 cup of the vegetable oil over medium heat. Add the remaining onion, leek and carrots and cook, stirring frequently, until the vegetables have begun to soften, about 6 minutes. Add the cauliflower and cook until soft, about 10 minutes longer.
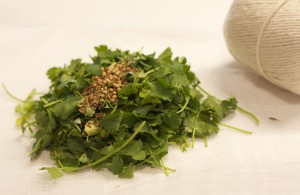
3. In a small skillet over medium-high heat, combine the coriander and cumin seeds and toast until they are fragrant and slightly browned, about 2 minutes. In a square of cheesecloth, combine the toasted seeds and the cilantro and tie into a bundle, securing it with a piece of kitchen twine. Add the spice bundle, turmeric, curry powder and garlic to the vegetables in the pot and cook until fragrant, about 1 minute.
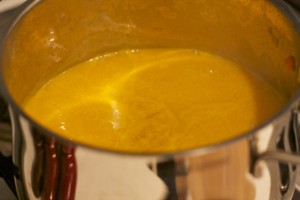
4. Add the vegetable stock, bring a simmer and cook until the vegetables are very tender, about 25 minutes. Remove the cheesecloth bundle, then puree the soup in a blender until smooth. Season to taste with salt and pepper. Return the puree to the pot and keep warm.
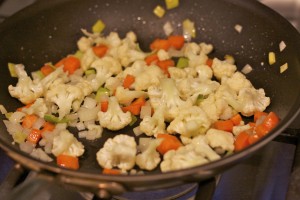
5. In a large skillet, warm the remaining 3 tablespoons of vegetable oil over medium-high heat. Add the reserved cauliflower, onion, leek and carrots and cook until the vegetables are just tender and lightly browned, about 6 to 8 minutes. Season to taste with salt and pepper and reserve.
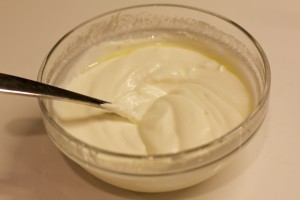
6. In a small mixing bowl, whisk together the yogurt, olive oil and Meyer lemon juice and season to taste with salt and pepper.
7. Divide the hot soup among 6 deep bowls, garnish with the reserved vegetables and drizzle with the yogurt mixture. Serve immediately.
Spicy Chipotle Chili
Posted on 15 March 2011 | 6 responses
For the last four years, we have hosted an Oscar’s party. The theme changes each year from black tie and fancy hors d’oeuvres to jeans and t-shirts and this chipotle chili (although one year we might have to do black tie and chili!) As I have some news, I was feeling a little too tired to make the 13 or so different kinds of small bites last year, although hopefully I will be able to get it together to do that again next year to keep mixing it up but friends’ advice tells me that might not be happening. My news, which I suppose is our news, is that I am expecting. Currently 19 weeks and counting!
I hope this explains the patches of absence over the last few months. So not only were we moving, I was just trying to stay awake! Now that I am through the craziness of the first trimester, I am excited about giving Tiny Test Kitchen and you, my dear readers, the attention you deserve!
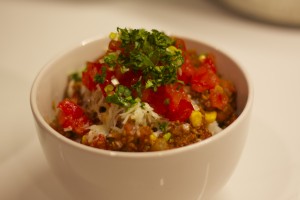
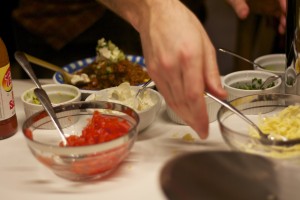
So without further ado, let us move on to the recipe. When I am making this chili for a crowd I tone down the spicy, for recommendations on how to do this please the Notes below. As you can see by the topping list, I have a fair few out. The crazy thing is even when I am just making this for me and the hubby I add them all as they all work so well. If I was stuck on a desert island and could only bring my chili and three of the toppings, I would pick the mascarpone, the diced avocado and the chopped tomato. Do with this information what you will. But seriously, they all do add something so if you can I recommend serving them all.
This chili is always a huge hit, no matter how many times I make it or how often people tell me that they don’t like chili immediately before eating it (weirdly, this has happened more than once!) At our last Oscars party I made twice the amount I thought I would need for 14 or so people coming so that we would have plenty of leftovers for us for a few meals…. The hubs and I eked a bowl each out of the remainder the next night… I usually serve it with my Creamed Corn Cornbread (recipe coming) which also all went. I am sure it will be just as popular in your house! Oh drat, going back to my desert island trip, I really wish that I had brought some grated cheddar. Could I bring just 4 toppings?
Notes: To help make this chili less spicy, I only use one seven ounce can for three times the other ingredients so you are more that welcome to do that as well. If you are not a big fan of spice, use about two peppers from the can and finely chop them and add a teaspoon or two of the adobe sauce to the chili. Taste and add more if you think you can handle it. Make sure to wash your hands thoroughly after handling the peppers. Like any hot pepper it will more than sting if you get the juices near your eyes so handle with care!
Spicy Chipotle Chili, serves 4-6 as a main course
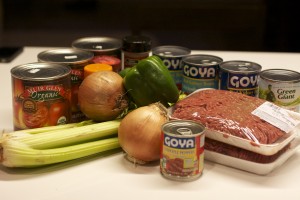
3 tbsp canola oil
½ sweet onion, finely chopped
½ green pepper, finely chopped
2 stalks celery, finely chopped
1 pound ground beef, organic and anti-biotic free
28 oz can crushed tomatoes, fire-roasted (Muir Glen organic brand)
1 7oz can chipotle peppers in spicy adobe sauce (La Preferida brand)
2 tsp chili powder
1/8 tsp paprika
1/8 tsp cumin seed
1 15.5 oz can kidney beans (goya brand)
5 splashes Tabasco
1 splash Worchestershire sauce
Salt and pepper to taste
¼ cup sweetcorn
Suggested toppings –
Sliced scallions
Chopped tomatoes
Sweetcorn
Diced avocado
Chopped sweet onion
Cilantro leaves
Grated sharp cheddar
Mascarpone
1. Heat oil in a large saucepan over medium heat. Add onion, green pepper and celery and heat until softened, about 7 minutes. Add beef and cook until done (browned but not over cooked).
2. Add crushed tomatoes to saucepan, stir to combine. Add chipotle peppers, chili powder, paprika, cumin seed, kidney beans, Tabasco and worchestershire sauce. Lower heat and simmer gently for 30 minutes. Season to taste. (See Notes).
3. Add sweetcorn and continue to simmer for at least 10 minutes. Serve hot with toppings and Creamed Corn Cornbread.
Pulled Pork Quesadillas
Posted on 14 March 2011 | 2 responses
As I mentioned in my Smoked Gouda Gougéres recipe, the tiny test kitchen has moved. The hubs and I recently moved from dumbo in Brooklyn to Williamsburg just up the river. While we love, love, loved dumbo, we were sometimes frustrated by the lack of culinary diversity in the area (although if we could have eaten at Vinegar Hill House every evening we may have never left the neighborhood – it’s our TOP dumbo pick and one of our favorite restaurants, perfect for a romantic date night or taking out of town family). In Williamsburg we are inundated with new places to try and we are loving it. (If I figure out how to become tech savvy, I want to add another couple of pages to the site, one for restaurant reviews and one for reviews of places on our travels.) One of our favorite restaurants is now within walking distance from our apartment and on the night of our move, when we were exhausted and surrounded by boxes, we decided to make the journey over to get some great grub. Fette Sau has been voted best barbecue in NYC since 2009 but my friends and I have been taking advantage of the outdoor picnic benches and beer served by the gallon in glass growlers since they first opened in 2007. While we were there, I found out that they delivered and we lived in their delivery zone!! Whoop whoop!!
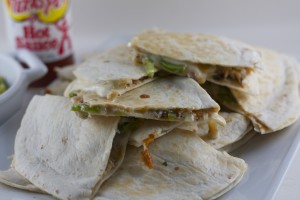
As anyone could have predicted we have ordered takeaway from Fette Sau about two times a week since our move. We usually over order, leaving me with leftovers to get creative with. The pulled pork is tender, moist and has a delectable lick of smoke so the resulting dishes are usually pretty delicious, none more so than these pulled pork quesadillas.
Side note: If you are able to make it to Fette Sau I would highly recommend the pulled pork and the pork belly, I get them every time I go (the pork belly occasionally runs out later on busy Saturday nights so get there early) and the ribs, lamb and baby back, are perfect examples of fall off the bone, smoky deliciousness. For sides we get either baked beans or broccoli salad depending on who wins, I pick beans, hubs picks brocolli – go figure. When we are with friends a gallon or few of a beer called Liquid Gold is drunk. Be careful though, it is more potent that you would think! My favorite, however, is a Manhattan. The bourbon and rye (which is what a Manhattan should be made with) collection is AWEsome there and you can even get a flight of a few to try. Oh, also please do marvel at their Southen Pride cooker, which can fit 500 pounds of meat at one time and their amazing wall of meat cut diagrams, which is sure to inspire your dining choices while you are waiting in line for your food. On a slightly obvious note, this temple of meat is not the place to take that comely vegetarian you have been trying to woo!
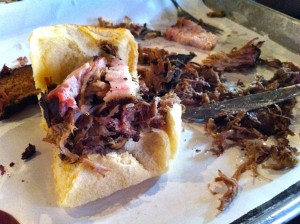
This is my husband’s invention, pork belly atop pulled pork on a potato roll at Fette Sau. Just one of the multitudinous reasons why I love him!
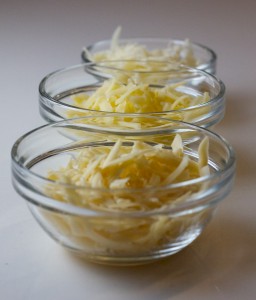
Tips: make sure the Oaxaca melting cheese is refrigerator cold when you grate it as becomes harder to work with as it gets warmer. Grate just before using as it begins to wilt at room temperature. If you do grate the cheese ahead of time, refrigerate until you assemble the quesadillas.
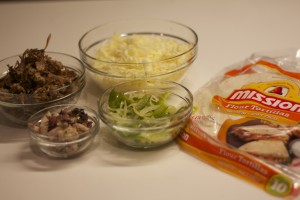
Pulled Pork Quesadillas, serves 4 as an entree
1 tsp canola or vegetable oil
½ green pepper, finely sliced
½ Spanish onion, finely sliced
8 medium-sized tortillas (approx. 8″)
12 oz Oaxaca cheese, coarsely grated
1 ½ cups pulled pork, finely shredded
1. Heat oven to 275º and line a baking sheet with foil. Heat a medium sauté pan over medium high heat. Add oil to hot pan. Add sliced peppers and onions and cook until wilted. Remove and set aside. Wipe pan out with paper towel and set aside.
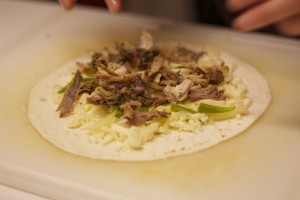
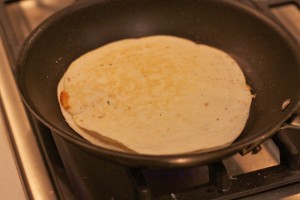
2. Begin to assemble the quesadillas. On one tortilla, spread about 1/2 cup of grated cheese evenly. Sprinkle cooked peppers and onions and shredded pork on top. Add another small handful of cheese evenly over the fillings and top with another tortilla.
3. Place sauté pan used to cook peppers and onions over medium low heat until warm. Add quesadilla and cook for 3 minutes until cheese has melted. Using a spatula flip quesadilla and cook for another 2 minutes. While this quesadilla is cooking, assemble the other 3 quesadillas.
4. Once the quesadilla is cooked through and the cheese has melted, remove from pan and place on the foil lined baking sheet into the oven. Repeat cooking technique with the other 3 quesadillas.
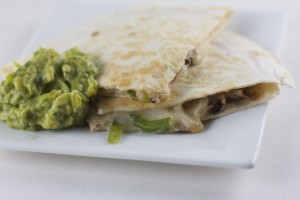
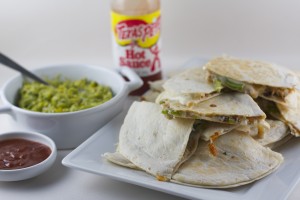
To serve: Cut into quarters and serve with Guacamole (and hot sauce and barbecue sauce, if wanted).
Smoked Gouda Gougéres
Posted on 24 February 2011 | 4 responses
After several months of very sketchy scheduling with my blog posts, I am sure this is not the post you were expecting… Please do think of it as an mini amuse bouche to the plethora of recipes that I will begin posting. Things have been a little crazy around these parts recently. Your favorite tiny test kitchen has moved about a mile and a half north and to the waterfront and in the process has gotten a little smaller.
But what we lost in cabinet space, we gained in counter space which has proven to be perfect for photographing and making multiple things at one time. I hope to do a whole post on how we have overcome our space challenges and the nifty ways we have found for storing all my kitchen equipment, so that shall come at a later date.
For now though, I would like to share with you this recipe for Smoked Gouda Gougéres. If you are a long time reader, you may remember that I posted a recipe for traditional Gougéres several months ago. Both are equally cheesy and crispy-on-the-outside, gooey-on-the-inside but these ones have a slightly smoky taste. The three different cheeses all add something to final little bite. The gouda lends its’ smoky taste, the Gruyére is gooey and a little nutty and the Parmesan has a crisp and salty flavor.
I decided to make them as an hors d’oeuvres before our Valentine’s Day meal last week (better late than never on posting these, right?!) They are a snap to make, taking more time to prepare to assemble the ingredients (about 6-7 minutes) than to actively make (about 5 minutes), then you have to quickly pipe them onto a sheet pan and pop them in the oven until golden and a little crispy on the bottom before eating them right out of the oven!
Smoked Gouda Gougéres, makes 20 hors d’oeuvres
4 tbsp unsalted butter, cut into chunks
1/4 tsp kosher salt
3/4 cup all purpose flour
1/2 cup grated smoked Gouda (with the rind removed)
1/4 cup grated Gruyére (optional)
2 tbsp grated Parmesan
Pinch freshly ground black pepper
2 large organic eggs, beaten until yolks and whites are combined
1. Heat oven to 400ºF. Using vegetable or canola oil, lightly grease a baking sheet.
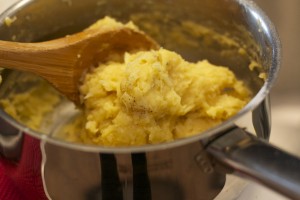
2. Place 1/2 cup water, the butter and salt in a small saucepan and bring to a boil over medium high heat, stirring to make sure the butter melts evenly. Once the mixture is boiling, add the flour in one addition and stir firmly and quickly until a dough forms. The dough should begin to form one mass and begin to pull away from the sides of the pan. Turn the heat down to medium low and continuing to stir for 2 minutes until the dough begins to dry out slightly. Remove the pan from the heat and add the eggs slowly, stirring continuously until the eggs are incorporated. Add the cheeses and pepper and stir until combined.
3. Using a wide, round tip with a piping bag or a Ziploc bag with a hole cut in one corner, pipe the dough into 1-inch rounds. Place in oven allow to bake for 15-20 minutes until the gougéres are golden brown and the bottoms are slightly crispy. Serve warm.
Warm Asian Slaw
Posted on 7 January 2011 | 4 responses
After yesterday’s disturbingly healthy soup (except for the generous heap of Jack cheese I add to each bowl), I bet you were all hoping for a delicious gooey cream cake or a buttery pastry. Sorry to disappoint. You’ll have to wait until the next post for a sugary treat! But this recipe is also amazingly healthy and thankfully, just as tasty.
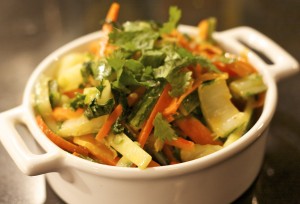
It is chock full of vegetable and tastes healthy but not in that holier than thou way that some foods have. (Seriously, if something is low-fat, vegan or in any other way “healthier” than usual, please do not let me know. I will instantly be looking for flaws.) By quickly sautéing the vegetables, they are warmed through, slightly wilted but with a crispy bite and the peanut dressing has a spicy, vinegary kick that coats the vegetables. As the sautéing is so quick, this slaw takes about as long as chopping the vegetables takes, (which depending upon your knife skills can be mere moments or maybe slightly more!).
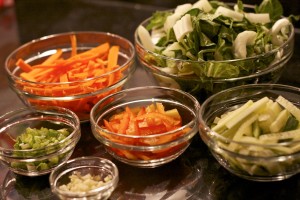
Notes: In the recipe below I give some direction to the length and width of the different vegetables. These are just guidelines, please do not feel as though you have to get them exactly to these measurements. As long as they are roughly about this size and a consistent size overall, they will cook evenly and in the same time as listed below.
Warm Asian Slaw, makes 4 side servings
Peanut Dressing
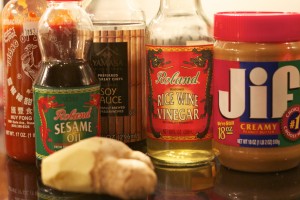
4-5 tsp peanut butter
1 tbsp rice wine vinegar
2 tsp soy sauce
3/4 tsp Sriracha sauce
3/4 tsp sesame oil
1/4 tsp freshly grated ginger
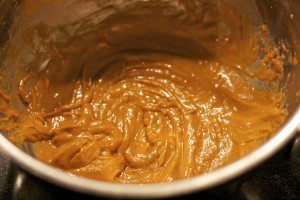
1. Whisk all the ingredients together vigorously until smooth. Set aside.
1 tbsp vegetable oil
1 clove garlic, minced
1 head bok choy, sliced in 1/4″ slices (makes about 4 cups)
1 large carrot, peeled and thinly sliced into 1/8″ thick and 1 1/2″ long matchsticks (about 1 1/2 cups)
1/2 red pepper, thinly sliced into 1/8″ thick and 1 1/2″ long matchsticks (about 1/2 cup)
1/2 English cucumber, sliced into 1/8″ thick and 2″ long matchsticks
2 scallions, thinly sliced
1/4 cup cilantro leaves
1. Heat a wok or large frying over medium high heat. Add oil and allow to heat, carefully tilt the pan to make sure the oil coats the bottom. Add garlic and cook for 1 minute until fragrant. Add carrot, cook for 3 minutes. Add bok choy and pepper and cook for 2 minutes, until wilted. Add scallions, stir and remove from heat.
2. Add cucumber and half the cilantro, pour on dressing and toss to coat. Serve while warm with the extra cilantro.
Chicken Tortilla Soup
Posted on 5 January 2011 | 8 responses
Happy New Year! I feel as though it has been an absolute age since I last posted. Okay… so that isn’t so much a feeling; it has been, I know. But you’ll be glad to hear that one of my New Years’ resolutions is to post more. So more recipes, more regularly. I also want to begin writing about my travels and the great food that I find and also doing reviews in my own town, NYC. As soon as I figure out how to get the extra page links at the top of the page, we’ll be in business!
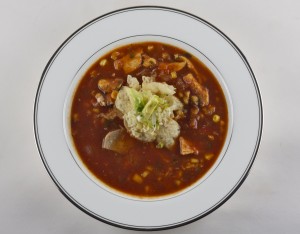
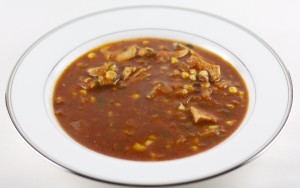
For now though I want to share this delicious Chicken Tortilla Soup. It is hearty, velvety, fresh tasting and perfectly spicy for cold weather or hot. It may just be me but right before the holidays all I could think about was Mexican food. Sometimes I think that your body knows exactly what it needs so I usually give in to all kinds of cravings. (Sometimes however I have to ignore them, as occasionally the craving is for a second or a third Krispy Kreme!) Due to my hippy-ish idea of feeding my body what it “needs”, my poor hubby had to eat countless bowls of guacamole and salsas of all kinds and fajitas were almost always on the menu. So I decided to make this soup to shake things up. I hadn’t made it before (or even tasted it) but I just instinctively knew that it was going to be delicious. And I was craving all things spicy and south of the border, it was to me. Thankfully the hubs thought so too!
This soup is soooo unbelievably easy to make. I mean there are only two steps and when do my recipes have two steps? Madness! If you poached or roast and cube the chicken breast ahead of time it is even easier. This soup is also, dare I say it, unbelievably healthy. Leaving you guilt free and with at least one of your NY resolutions intact! You can of course lessen the amount of Jack cheese and tortilla chips you add to the soup prior to serving or leave them on the table and let everyone serve themselves.
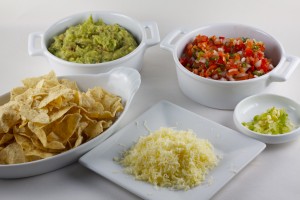
All the accompaniments and the ubiquitous Guacamole and salsa!
Notes: If you are cooking the chicken breasts the same evening as you make the soup, poach or roast them quickly.
To poach: Bring a medium saucepan of water to a medium simmer and slip the breasts in. Poach for 8 minutes or until cooked through. Leave until cool enough to handle and then cube into 1/2″ chunks.
To roast: Heat oven to 350ºF. Place breasts on a foil lined baking sheet and drizzle with olive oil and sprinkle with salt and pepper. Roast for 20 minutes or until cooked through. Leave until cool enough to handle and then cube into 1/2″ chunks.
Chicken Tortilla Soup, makes 4 main course sized bowls
2 chicken breasts, cooked, cooled and diced
1 onion, diced
1 jalapeno, finely diced
3 cloves garlic, minced
2 cups chicken stock
1 cup strained tomatoes (Pomi brand recommended or another BPA-free brand)
1 11oz can sweetcorn
1/4 cup chopped fresh cilantro
2 tsp chili powder
3/4 tsp dried oregano
1/2 tsp sweet paprika
1/2 ground New Mexico chile (optional)
1/4 tsp ground cayenne pepper
Finely sliced scallions, to serve
Crushed tortilla chips, to serve
Diced avocado, to serve
Grated Monterey Jack cheese, to serve
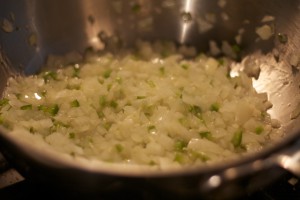
1. Sauté onions and jalapenos for 5 minutes, until softened. Add garlic and stir constantly to prevent burning for 2 minutes, until fragrant.
2. Add chicken stock and tomatoes and bring to a gentle simmer over medium heat for 10 minutes. Add chicken, sweetcorn, cilantro and spices and cook for a further 15 minutes. Taste and adjust seasoning with salt and pepper.
Serve immediately with scallions, tortillas, avocado and cheese. Enjoy!
Nobu’s Miso Marinated Black Cod
Posted on 9 December 2010 | 2 responses
Sometimes in amongst all the stews, soups and braises of this time of year you want something a little lighter, a little fresher tasting… Which is where this dish comes in. While this dish from the super fancy restaurant Nobu is as easy as pie it looks fancy and tastes like it was far harder to make than it really was. While black cod is not a label usually seen in the fishmongers or supermarket the fish goes by a few other names that are easier to find (when it’s called black cod they can charge more for it), look for sablefish or butterfish. All three names are the exact same fish.
The ingredients used in the recipe below are not the usually common pantry staples but I used them all with regularity. The mirin and sake often get added to stir fries (with some freshly grated ginger, soy sauce and sometimes a splash of sesame oil) and the miso is perfect for a quick soup or stock base (I make a quick miso soup by dissolving a tablespoon of miso in a cup of hot water and serving it with diced tofu and sliced scallions). Also all three ingredients keep almost forever so you can store them until you make this main course again because I know you will want to!
I served mine with a salad of mixed baby lettuces and avocado with Japanese-style Salad Dressing.
Fun fact: Apparently this is one of Robert DeNiro’s favorite dishes (he is a part owner in Nobu), so if any boys object to eating miso marinated fish just tell them convince them with the fact that the Godfather eats it!
Notes: the sweet miso marinade can also be made ahead and stored in a refrigerator in an airtight container.
The bones inside the fillet are easy to remove once the fish is cooked. Run your clean finger down the center of the fillet and ease out any bones that you can feel.
Miso Marinated Black Cod, serves 2 as a main course
3/8 cup saké (75ml)
3/8 cup mirin (75ml)
1 cup white miso paste (225g)
1/2 cup plus 2 tbsp sugar (113g)
2 8oz very fresh black cod fillets
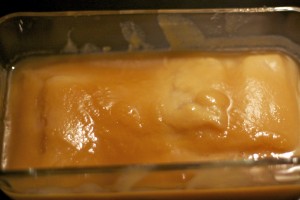
1. Pour saké and mirin into a small saucepan and bring the mixture to a boil over high heat. Boil for 20-30 seconds to boil off some of the alcohol. Turn the heat down to low and add the miso paste, stir carefully with a spoon to help the miso dissolve. Once the miso has dissolved, turn up the heat to high and add the sugar, stir constantly to help the sugar dissolve and to prevent burning. Remove from the heat and set aside to cool to room temperature (See Notes).
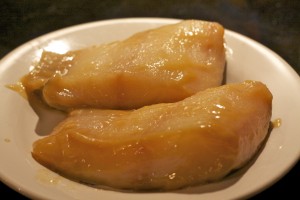
2. Once the marinade is at room temperature, pat the black cod fillets dry with paper towels. Place the fillets in a glass container and using your hands cover completely with the miso mixture. Store the fillets in a non-metal container and pour over the rest of the miso. Cover well and store in the fridge to marinate for 2-3 days.
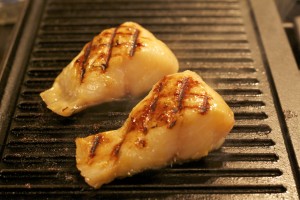
3. Heat oven to 400ºF. Line a baking sheet with foil. Heat a griddle or grill over medium high heat. Remove fillets from marinade by wiping not rinsing, so that there is still a very fine coating, and place the fish on the grill.
4. Grill for 2-3 minutes and carefully rotate the fish 90º and grill for another 2-3 minutes. Carefully flip with fillet over and repeat on the other side.
4. Place the fish on the prepared baking sheet and pop in the oven until the fish is cooked through, 10 to 15 minutes. Make sure to remove any bones down the center of the fillet and serve immediately.

